Guidelines for disassembly, Fabric, Frame – Anchor ANCHORSPAN A 60FT-80FT User Manual
Page 31
X-5
GUIDELINES FOR DISASSEMBLY
Fabric:
Walls -- Remove Ground Bars; Unlace the 2-pc wall; slide hooks out of eave bar channel, and pull
kedar up and out of liner channels of beam and outer channels of end uprights.
Gabled Ends -- Release tension by jamming ratchet handles to full vertical position and removing the
web at the end uprights and at the beam baseplates. Release caribiners at top and bottom of lace
line (use safety line if climbing on top of structure). Unlace the 2-pc end and pull each half downward
and out through the channel flare in beam.
Middle Panels -- Release tension by jamming ratchet handles to full vertical position and removing
the web. Extract tails of tension arch up and through the flare in the outer beam channel. Grip kedar
tails to pull panel out of channel flares. Pull in same direction wind is blowing so that wind lifts panel.
Frame:
Remove End Framing -- Remove eave bars. Remove end upright stakes (or other anchoring
devices). Rotate each end upright by 90 degrees so that it drops out of the slots in the bottom of
beam. Lower carefully and remove.
Remove Baseplate Hardware -- Before lowering beams, remove baseplate adapter bars, fabric ten-
sioning winches , and all other baseplate hardware to avoid crushing them or damaging the beam as
the beam is lowered to the ground.
Lowering of Beams --. Remove middle eave bars; then follow instructions below: To release
SpanLatch™ purlins, push pointed end of purlin hook into release hole (with yellow trigger) in bottom
of SpanLatch™ at an uphill angle until latch releases. Lift purlin off spacer. To avoid possible dam-
age, keep purlin under control. Do not let it swing under its own momentum against the purlin stop.
Use the gin pole (in same position as during assembly) to lower beams. Then, disassemble beam
sections: (Leave bolts/hardware together as complete assemblies for storage).
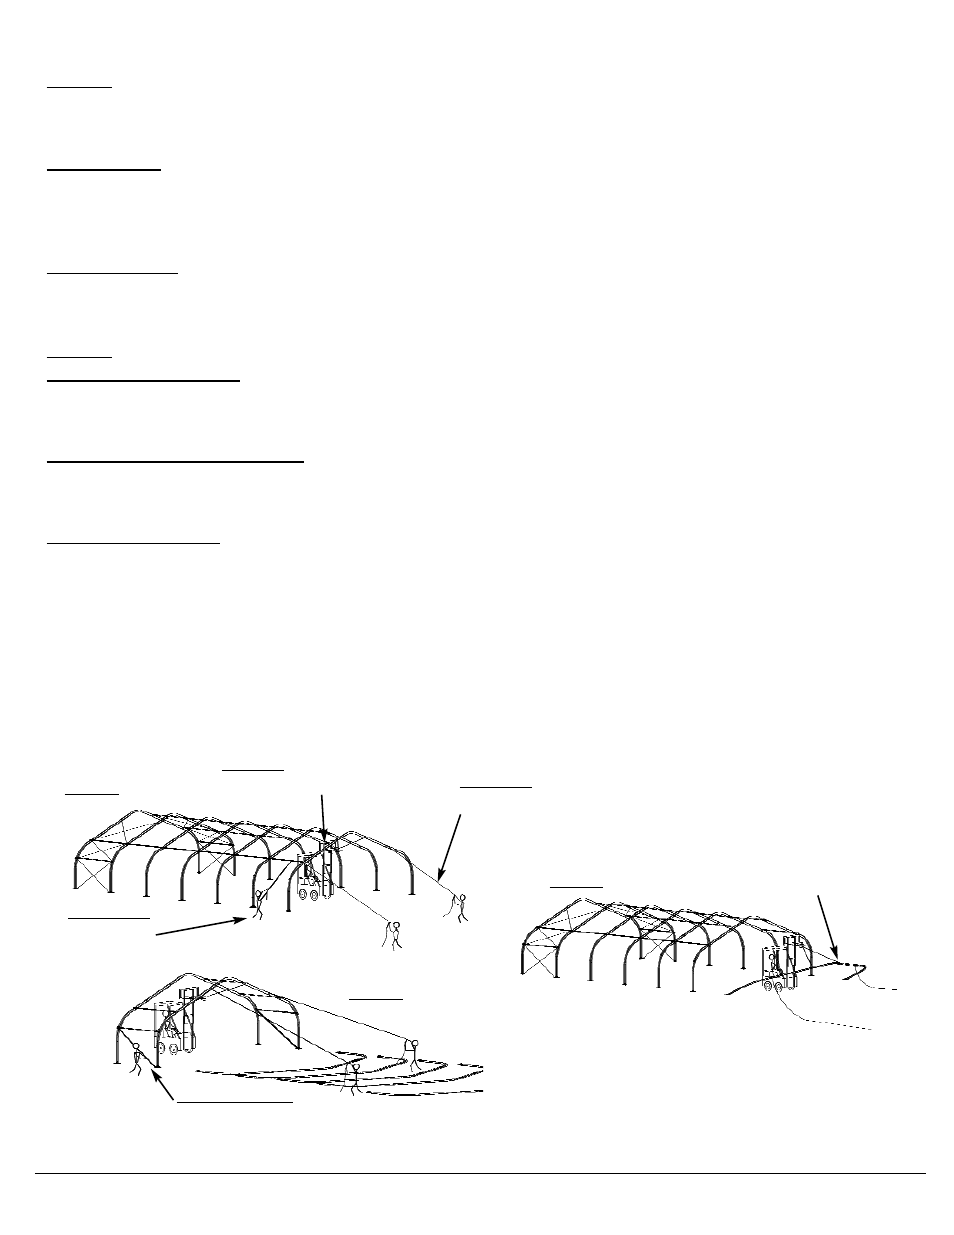
Do Not Stand or Walk in the Falling Path of the Beam
(Keep unlatched purlins under control. To avoid damage,
Do not let them swing under their own momentum.)
HOLD ROPES
Secure the beam near vertical, using appropriate
power equipment to control the beams descent.
CONTROLLED DESCENT
Control the final descent of beam
to ground to avoid damage.
PURLIN RELEASE
1 worker releases final
SpanLatch purlin.
SAFETY ROPES
2 workers pull until last purlin is released and beam
leans toward desired falling path.
DIAGONAL BEAM BRACE
Before releasing the next to last beam, re-install diagonal
beam braces. Do not remove braces until the last beam is
controlled by the power equipment for descent to ground.
STEP 1
STEP 2
STEP 3