Anchor STAKE OUT User Manual
Stake out, Assembly and operation instructions, Assembly instructions operating instructions
ASO 1208
Assembly and Operation Instructions
EC 3845
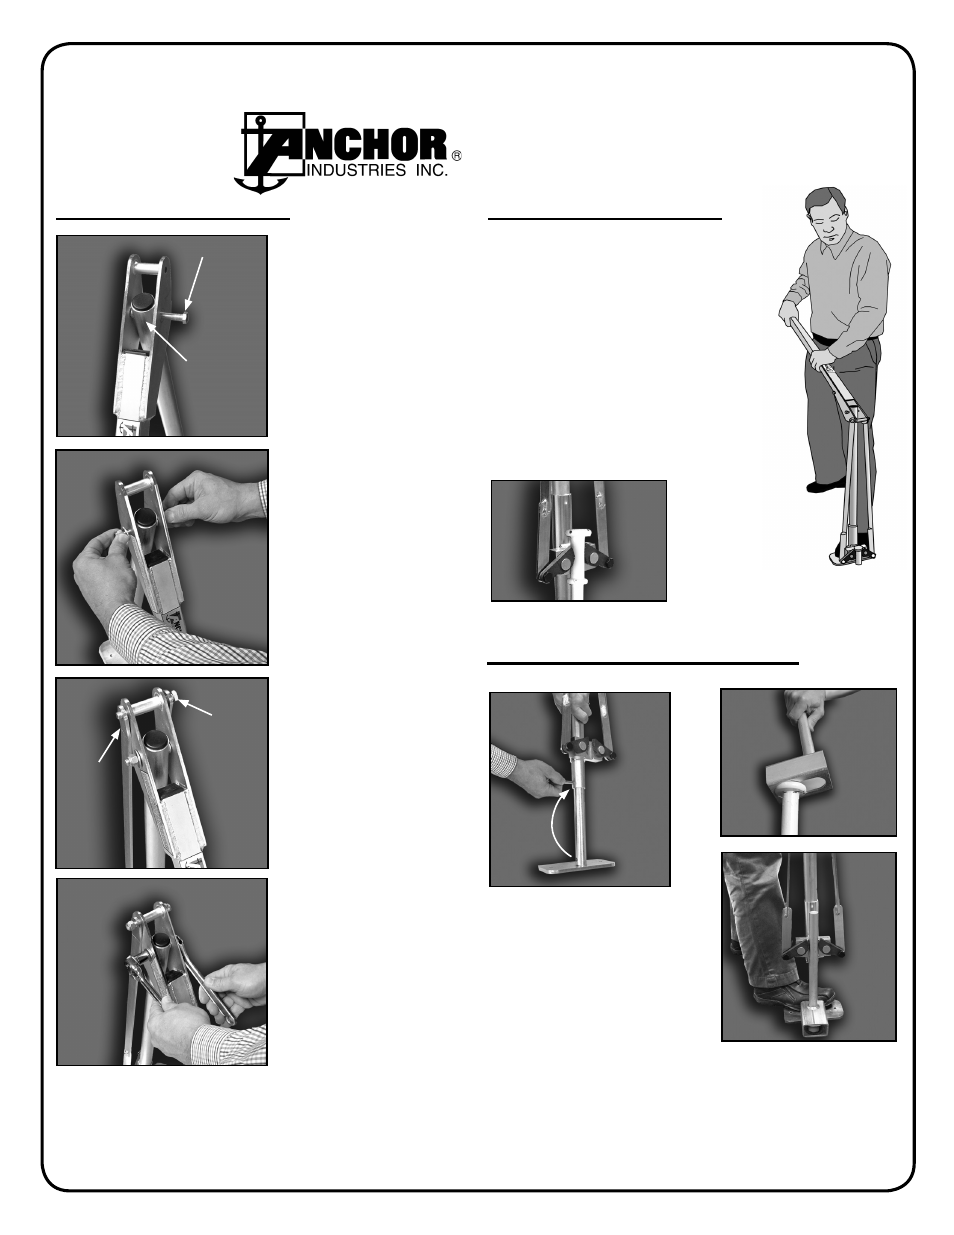
Step 1:
Place contents
of box on floor or table. Place
handle over riser tube with de-
cal facing up and insert short
3/8” - 24 bolt.
Step 2:
Start 3/8” - 24
self-locking nut onto bolt.
Step 3:
Swing link arms
up to handle. Insert the long
3/8” bolt through link arms and
handle.
Step 4:
Use two 9/16”
wrenches to tighten riser bolts
and nuts and link arms onto
handle.
Note: Nut will stop before
contacting the handle. Then,
back off the nut on the link
arm bolt one full turn from the
washer. Handle should raise
and lower freely.
CAUTION:
Never put your fingers or hands between the jaws,
or between the jaws and the stake.
Assembly Instructions
Operating Instructions
Step 1:
Lift handle to up position so that
jaws are fully open.
Step 2:
Place unit so that jaws are on either
side of stake. See Figure 1 below.
Step 3:
Push down on handle, clamping on
stake and lifting it out of the ground.
Step 4:
Repeat motion as necessary until
stake is free
Tip:
In soft conditions or mud, place a short
piece (1 to 2 feet in length) of 2 x 4 lumber under
the base of the unit. This will spread the force
over a larger area, allowing stake removal even
in muddy conditions.
Stake Out
Anchor Industries, Inc. ● 1100 Burch Drive ● PO Box 3477 ● Evansville, IN 47733, USA
Phone: 812-867-2421 ● Fax: 812-867-0547 ● Toll Free: 800-544-4445
Email: [email protected] ● www.anchorinc.com
Step 1
Step 2
Step 3
Short bolt
Long
bolt
Link
arms
Step 4
Riser tube
Stake head adapter (optional)
(for single head or
shoulder head stakes tamped down close to base plate.) Part #36574
Step 1
Step 1:
Remove pin at bottom of
riser tube. Raise the tube until holes
align and replace pin.
Step 2:
Fit adapter over head of
stake and slide into small end of slot.
Step 3:
Place unit so that jaws
are on either side of stake adapter bar
and continue as noted in Operating
Instructions.
Figure 1
Step 2
Step 3