First beam standing with diagonal brace installed, Pivoting remaining beams to vertical – Anchor ANCHORSPAN A 60FT-80FT User Manual
Page 17
13
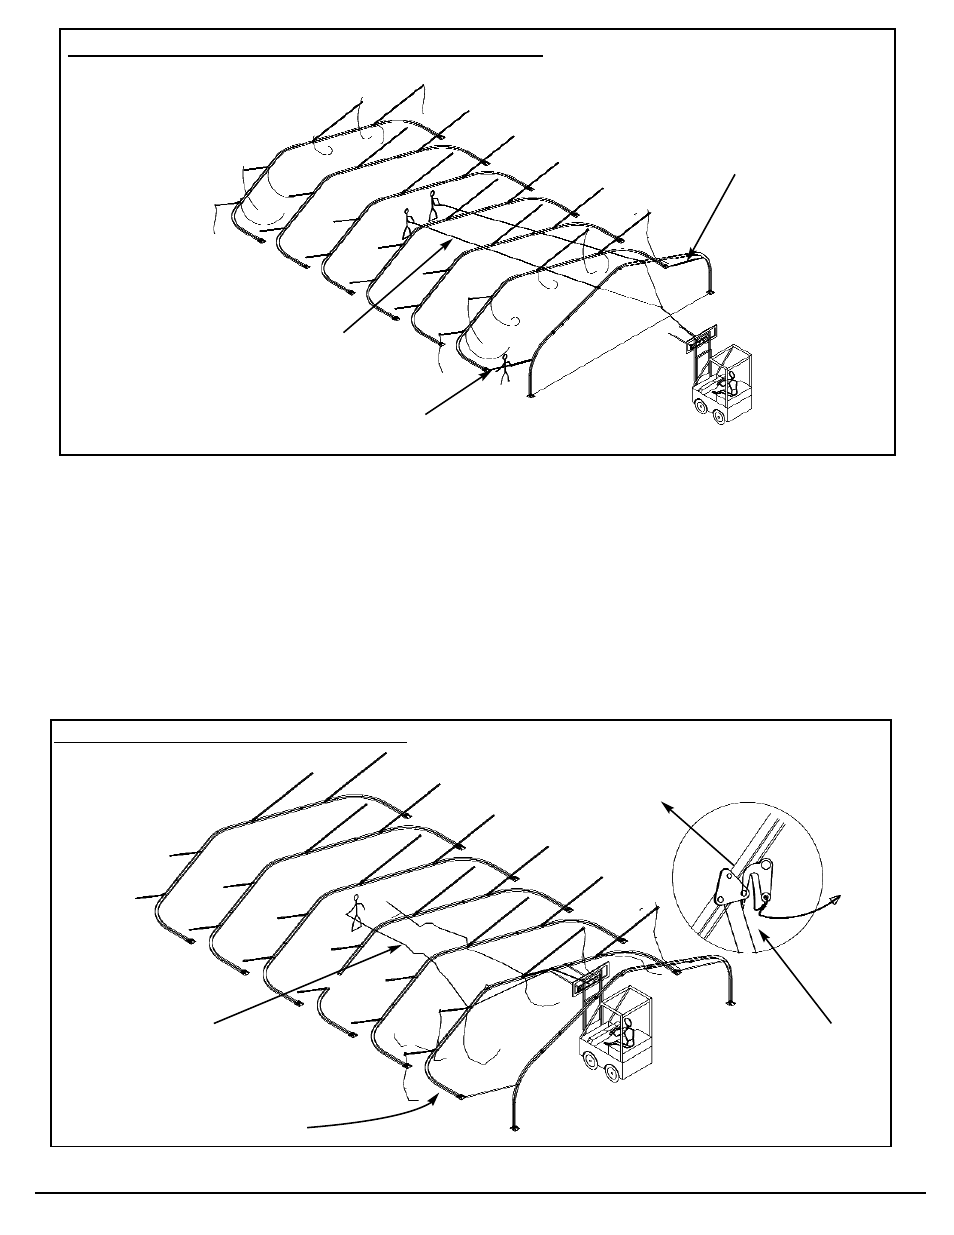
Erecting the 2nd Beam. Erect the 2nd beam the same as above, except that the beam harness
hooks to the top hole in the fixed end of the apex purlin. And, instead of diagonal beam braces, the
2nd beam is stabilized by connecting its SpanLatch™ purlins to the first beam (See top of Pg 14).
Using the purlin hook, push the SpanLatch™ end of each purlin to the top of the beam a few feet
above each joint. Then hook backwards, pulling the latching end down the beam slope to engage
the latch. Before erecting remaining beams, proceed to the bottom of page 14 and install the dou-
ble-latch eave purlins in the first bay, align the first (2) beams perpendicular to the anchoring surface,
and connect the lower ends of all cross-cabling in the first bay. When the first bay is stabilized
with cabling (bottom, page 14), remove the diagonal braces and erect all remaining beams, repeat-
ing the cabling pattern in the last and final bay and other bays as required (see the Footprint
Drawing.)
Safety Lines
Diagonal Braces Installed
Diagonal Brace
First beam standing with diagonal brace installed
Safety Lines
2nd Beam pivots similar to 1st, but
is secured by SpanLatch Purlins,
rather than diagonal braces.
Beam Harness Hooks to
beam at Top Hole of Apex
Purlin (fixed end).
Under beam
to safety rope
To Fork Lif
t
(Bottom Eye)
Pivoting remaining beams to vertical