Anchor ANCHORSPAN A 60FT-80FT User Manual
Page 18
14
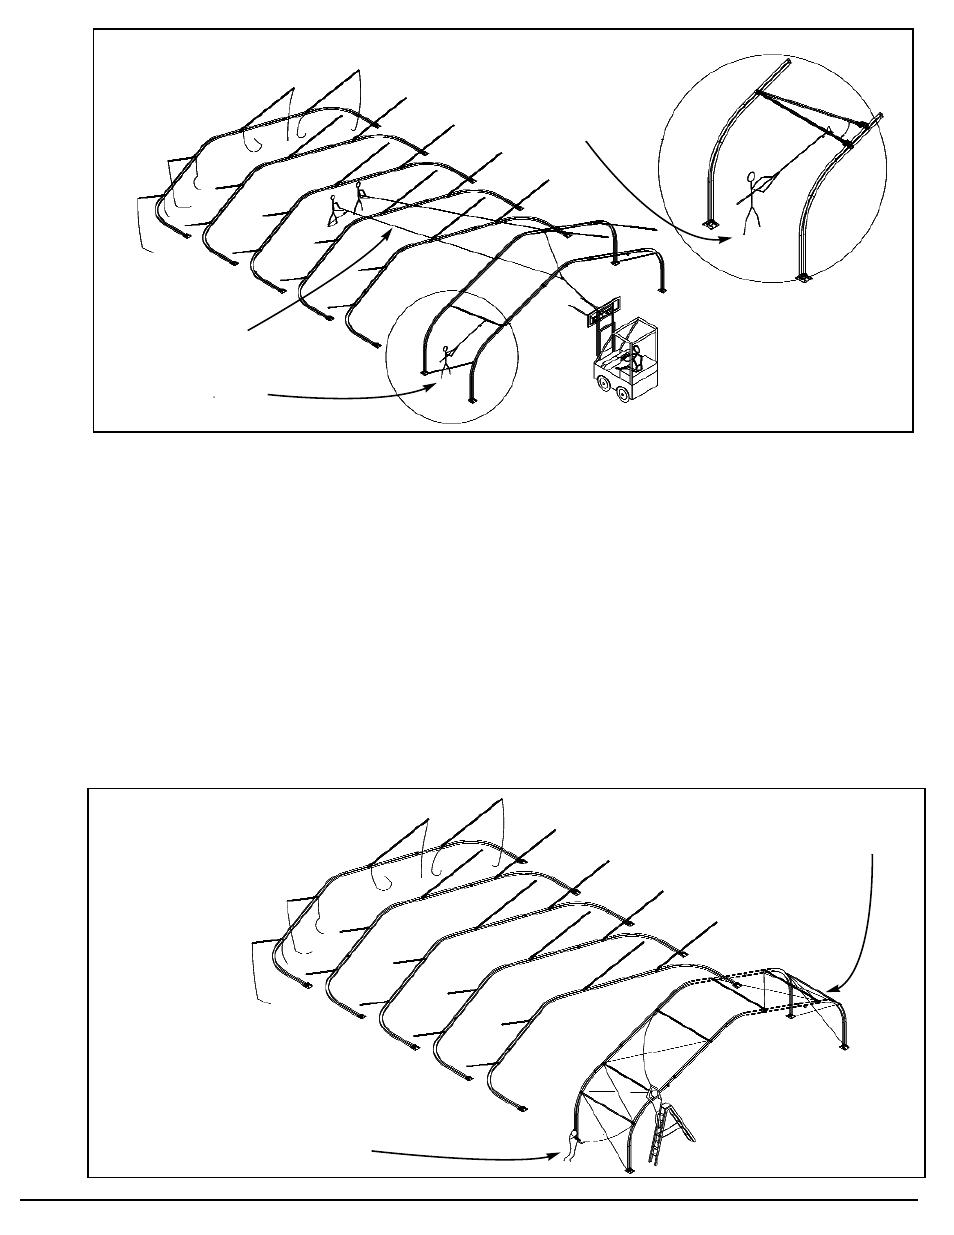
After the overhead Spanlatch purlins have been engaged between the first two beams, install eave
purlins and attach the turnbuckle ends of all X-cabling to form the “X’s” shown below (and at the
top of page 15) in the end bay of the building. (Note: eave purlins are double-latch purlins
with spanlatches on both ends.) To install them, simply raise the entire purlin above the purlin
spacer at the eave bolt, with the jaws of the spanlatch facing downward. Then, pull the purlin
downward until both spanlatches engage. (An exception to this procedure occurs in struc-
tures with only three beams total. In three-beamed structures, eave purlins will be stan-
dard spanlatch purlins, with one fixed end and one latching end.)
After the first bay is vertically aligned and X-cabled, continue raising beams by the same tech-
nique, using the purlin tool to secure the spanlatch purlins of each new beam to the beams that
are already standing until all beams are erect (see page 15). The cabling pattern will be repeated
in the last bay of the structure plus every 6th bay of the structure. No more than (5) empty bays
are allowable without X-cabling. Consult the footprint drawing if there is any doubt about the
cabling.
Safety Lines Prevent Beam
from falling toward forklift.
2nd beam pivoted same as 1st, but
secured by SpanLatch Purlins,
rather that diagonal brace.
Attach lower ends (turnbuckles) to upper holes in
SpanLatch purlin ends. Connect ALL cross-cables
loosely. Then, tighten in sequence from the ground
up, while vertically aligning the beam.
Double-Latch purlins at eaves (Except in
structures of only 3 beams, which have
Single SpanLatch purlins at eaves.)
Push SpanLatch above joint, then hook and
pull purlin downward onto Purlin Spacer to
engage and latch. Use short purlin tool on
low purlins, long purlin tool on high purlins
Engage SpanLatch Purlins between 1st & 2nd beam
Stabilize structure with cross-cabling