Flush mounting, Outdoor installation rules, Name tag material and printing – 2N Helios IP Vario User Manual
Page 20
20
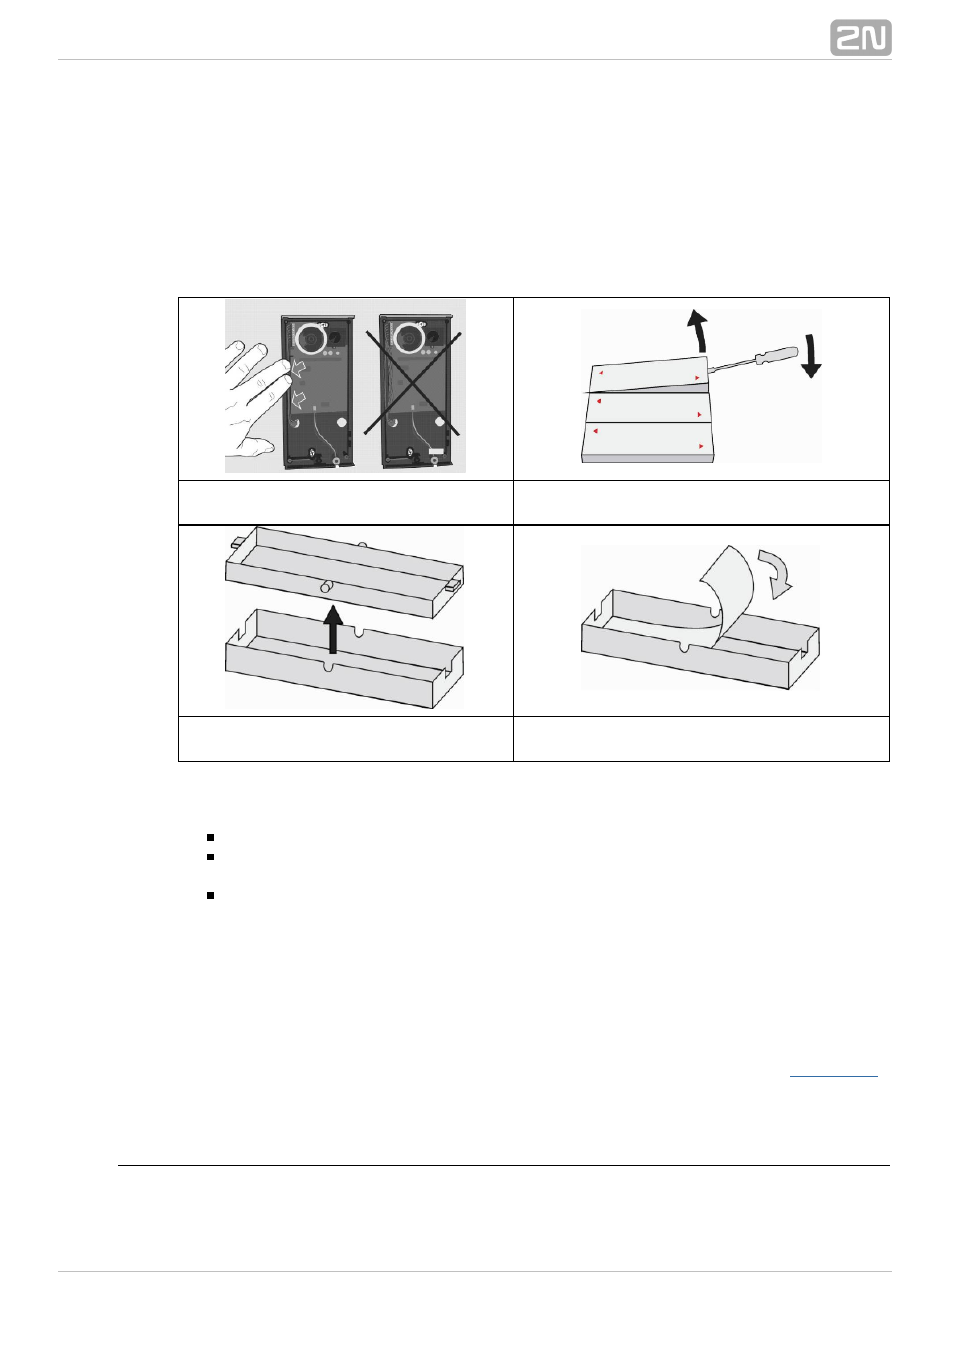
17. Put the inserts back in the name plates.
18. Replace the name plates, clicking them into position. The name plates hold the
matt foil inserted underneath.
19. Check whether a silicon seal is inserted in the top groove of the plastic cover. A
spare seal package is included.
20. Close the metal cover and fix it with screws.
Figure 2.7 Cabling
Figure 2.8 Name Plate Removing
Figure 2.9 Insert Removing
Figure 2.10 Label Inserting
Outdoor installation rules
Always connect button backlighting – it is used for heating.
The joint between the roof module and the wall must be filled with a waterproof
cement to prevent water in-leak (see Figure 2.5).
Water must not leak in along or around the cables.
Name tag material and printing
Each
package includes a sheet of transparent foil for laser
2N
®
Helios IP Vario
printing. Cut the printed foil into pieces and insert the labels in the name plates. Do not
use paper to avoid water in-leak and paper damage.
Red arrows are printed on the name plate. Make sure that the text and the arrow do
not overlap. We recommend you to use a template (MS Word) available at
f
or printing.
Flush Mounting
Follow the installation instructions included in the flush mounting box delivery.