Platform control station, Platform control station -33 – JLG 4394RT Service Manual User Manual
Page 102
SECTION 3 - CHASSIS, PLATFORM & SCISSOR ARMS
3-66
– JLG Lift –
3121249
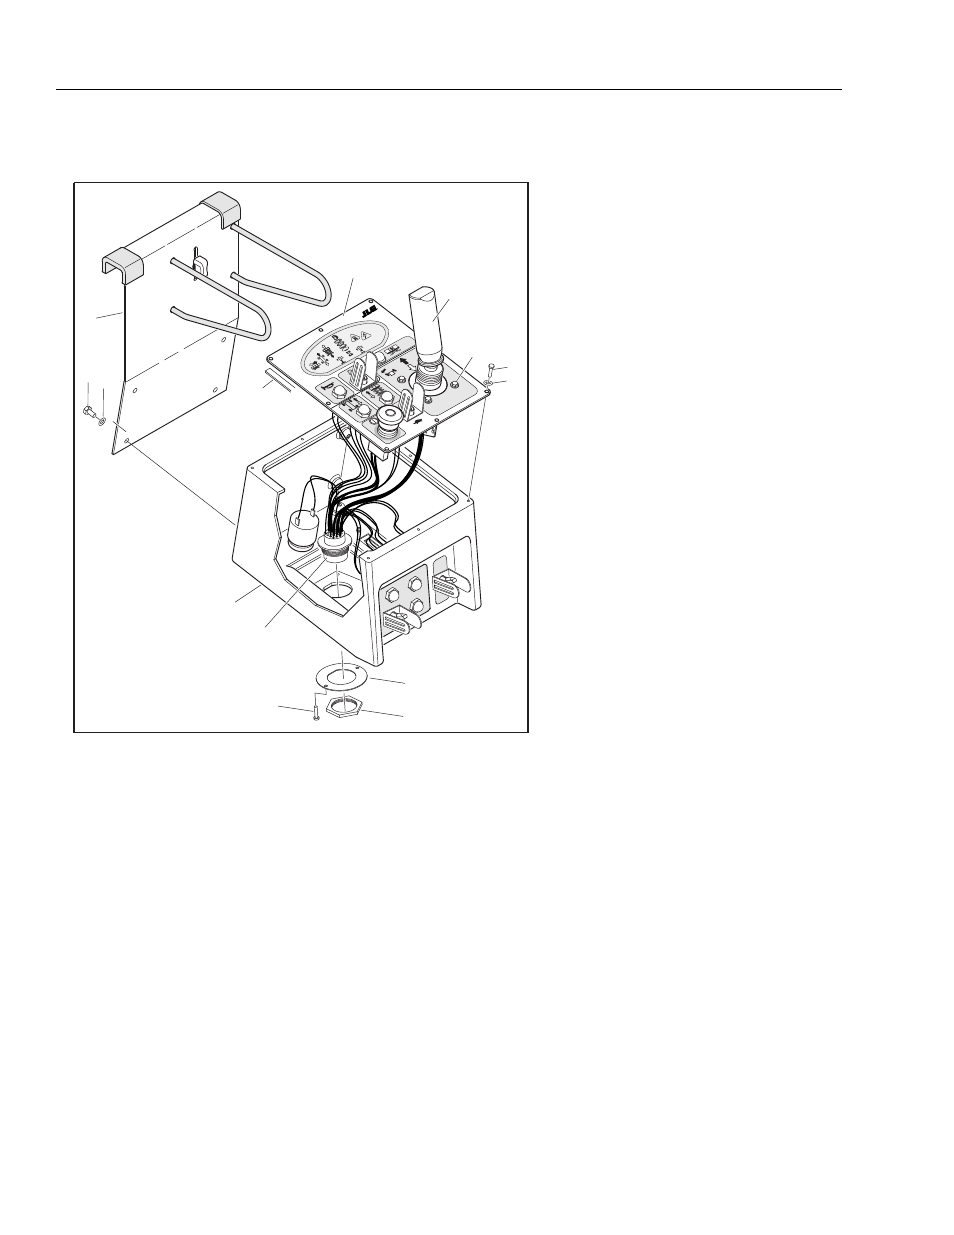
Platform Control Station
DISASSEMBLY:
1. Disconnect the cable from the harness on the under-
side of the platform control station.
2. Remove the control station from the mounting
bracket (1) by removing the four bolts (2) and star-
washers (3).
3. Remove the seven screws (6) and washers (7) to
remove the console lid (5) from the console box (4).
4. Once lid is removed, switches, buttons and bulbs
can be removed for replacement.
5. Remove the the four screws (7) and washers (9) to
remove the joystick controller (14).
6. The harness (13) can be removed from the box by
removing the terminal nut (11), two screws (10) and
d-ring bracket.
ASSEMBLY
1. Follow Disassembly Procedures in reverse.
2. Ensure electrical wires are properly and securely
attached to switches, buttons and bulbs.
3. Apply a new layer of insulation tape (8) between lid
and box if needed.
NOTE: Ensure wires are not pinched when placing lid onto
box.
4. Reattach cable to harness on underside of platform
control station.
5. Operate functions with platfrom control console to
ensure proper operation.
1
2 3
4
5
6
7
8
7, 9
10
11
12
13
14
!
1. Mounting Bracket
2. Bolt, 1/4"-20NC x 1/2"
3. Starwasher
4. Console Box
5. Console Lid
6. Self Tapping Screw, #8-18 x 3/4"
7. Washer
8. Insulation Tape
9. Plastite Screw, #10-32NC x 1/2"
10. Self Tapping Screw, #8-18 x 3/4"
11. Terminal Nut
12. D-Ring Bracket
13. Harness
14. Joystick Controller
Figure 3-39. Platform Control Station