5 maintenance – Eppendorf Research plus User Manual
Page 18
5 Maintenance
18
Eppendorf Research® plus — Operating manual
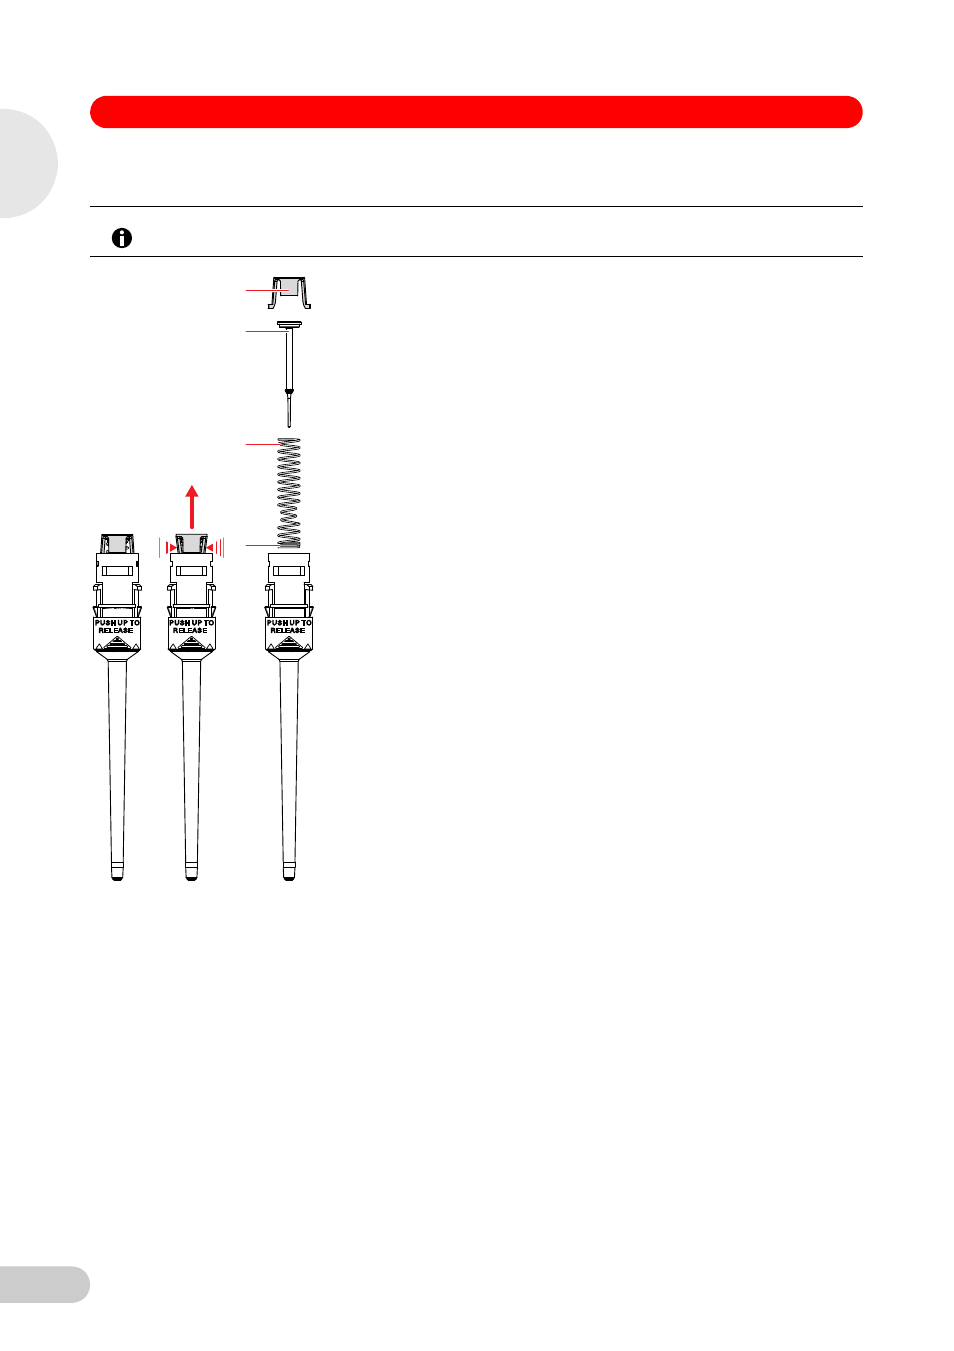
Opening and assembling the lower part (≤1 000 μL)
Hint!
To avoid confusion of parts, only disassemble and assemble one pipette at a time.
Opening the lower part:
1. On the piston mount (1) push the locking mechanisms
together slightly.
2. Remove the piston mount.
3. Remove the piston (2) and the piston spring (3). The
piston is under spring tension. Pistons and piston springs
will look different for the individual volume versions.
Assembling the lower part:
1. Carefully guide the piston and the piston spring into the
cylinder. Make sure that the piston is guided correctly in
the piston spring and in the cylinder. There must not be
any perceptible resistance. Stop pushing as soon as
any resistance is felt This may indicate that the piston is
not positioned correctly in the cylinder. There is a risk of
bending the piston if too much force is applied. Carefully
pull out the piston and repeat the process correctly. In the
case of piston springs with double windings (4), these
windings must point downwards.
2. Keep the piston and the piston spring pressed.
3. Keep the locking mechanisms on the piston mount
pressed with the other hand.
4. Mount the piston mount in such a way that the two locking
mechanisms engage in their retainers.
5. Gently press a pipette tip against the inserted piston. The
piston must move down in the cylinder without any
noticeable resistance.
Installing the lower part and ejector sleeve:
1. Insert the lower part into the upper part until it engages
audibly.
2. Set the maximum volume and operate the control button
several times. It must run smoothly and resistance-free.
3. Keep the ejector pressed. The ejector rod protrudes from
the upper part.
4. Fit the ejector sleeve onto the ejector rod. It is fitted
correctly if it engages slightly.
5. Carry out a gravimetric test of the systematic and random
error (see Technical data on p. 35).
This test ensures that no parts were confused during
assembly and that the pipette has been assembled correctly.
1
2
3
4
5
M
a
in
te
nance