Advance adapters, inc, Atlas 2 speed rebuild kits – Advance Adapters AB1001 User Manual
Page 9
ADVANCE ADAPTERS, INC.
4320 Aerotech Center Way, Paso Robles, CA 93446
ASSEMBLY INSTRUCTION SHEET
Page 9 of 12 Rev. Date:
06-18-08
P/N AB1000 & AB1001
ATLAS 2 SPEED REBUILD KITS
Once the shaft assembly is fully installed, line the 5 retainer bolt holes up with the case and install the 5 fasteners. Make
sure you put a dab of RTV blue silicone on the threads and tighten. When you draw up the five front retainer bolts,
the race in the rear of the case will be pushed out slightly.
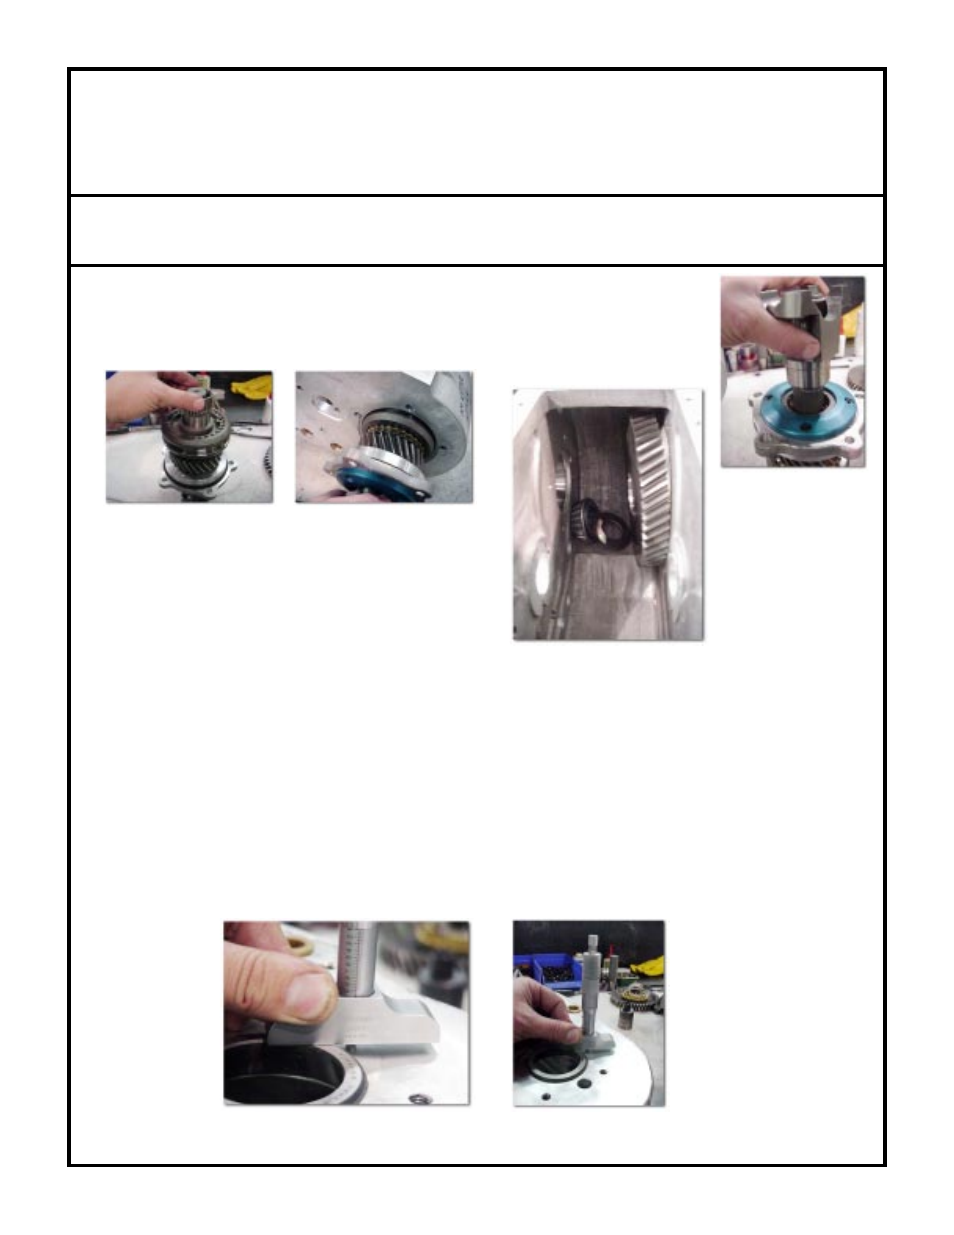
We have included assorted shims because this is how the tapered bearings are set to the correct tolerance. The
different shim thicknesses have been provided to accept different bearing thicknesses. The fewer the shim used, the
"looser" the bearings are pre-loaded. Ideally, with the rear cap installed you want approximately 10 inch./lbs. of drag
when turning the front output assembly. We recommend measuring the stickout with a depth micrometer, then use
the bearing cap/shim stack-up that is closest to that measurement. Once the proper tolerance is found, use Loctite
518 on the mating surfaces and tighten the 4 Allen bolts.
Take the tappered roller bearing race and tap the rear race flush with the case. Take the new
front assembly and turn it over (as shown below) and install the caged needle bearing for the
low gear on the shaft. Insert the new assembly into the Atlas case. As the front assembly
in being installed, slip the low gear onto the rear portion of the shaft and onto the needle bearing.
With the front assembly further into the case, install the
original spacer and the original tapered bearing. This assem-
bly will then pilot into the bearing race located in the back of
the transfer case.