AEM 30-6053 Series 2 Plug & Play EMS User Manual
Page 9
Page 9 of 21
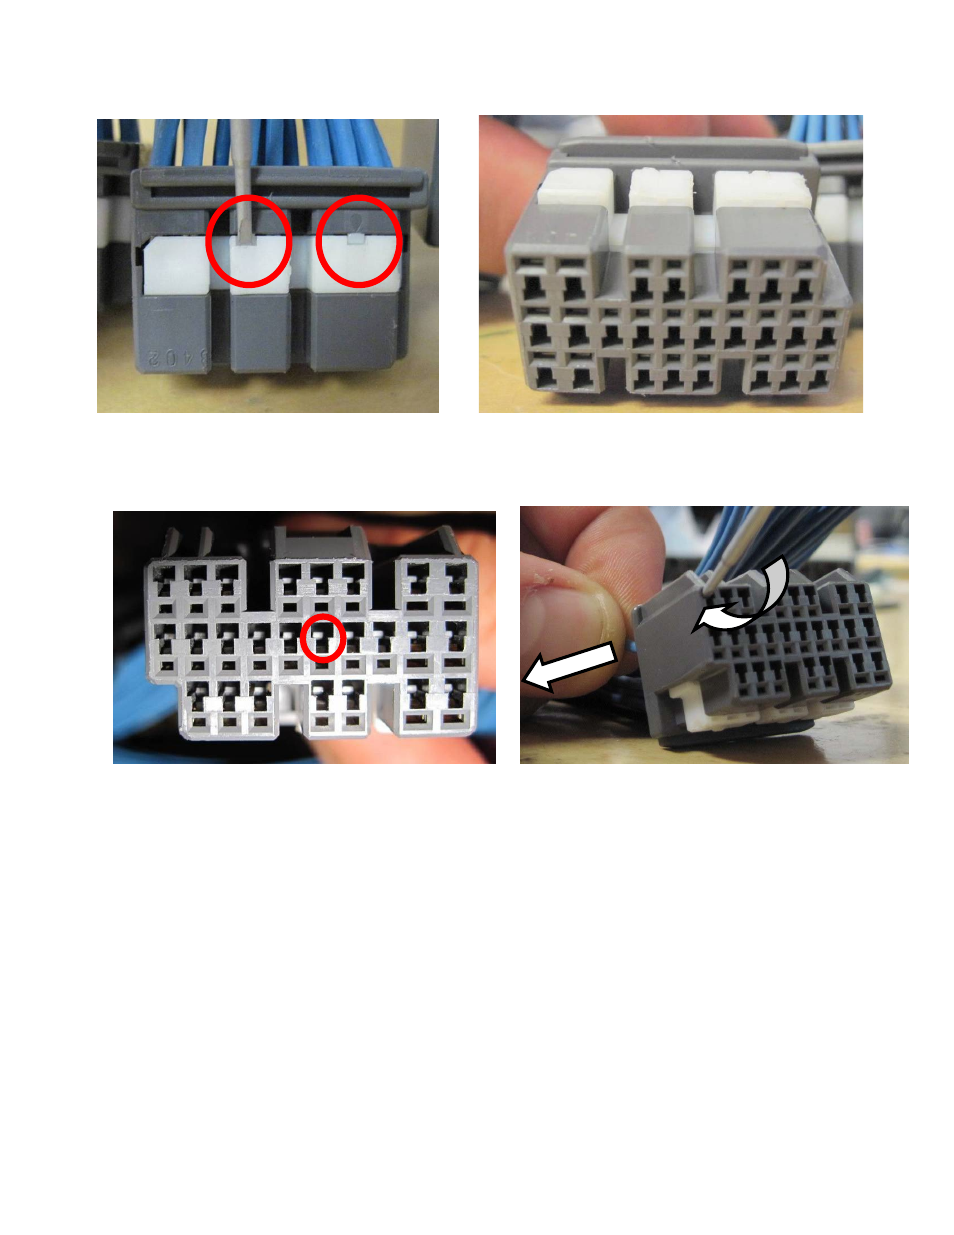
2) Repin ECU pins (only necessary if adding or relocating ECU pins)
a) Locate a small screwdriver (a precision 1.5mm wide flathead screwdriver is
recommended) and carefully pry white plastic retainer using both slots in the retainer
so it disengages vertically about 1mm as shown in the following pictures:
Screwdriver lifts here
Plastic retaining mechanism after lifting
b) Next remove the metal pin from the plastic connector by lightly prying on the plastic
tabs that secure the metal pin in the plastic connector while pulling on the wire at the
same time as shown below.
Pry this tab up to release the pin
While prying tab up, gently pull pin back
3) Install the AEM Engine Management System
a) Plug the provided wiring harness into the AEM EMS and position it so the wires are
not pulled tight or stressed in any manner.
b) Secure the EMS with the provided Velcro fasteners behind driver’s side seat.
c) Reconnect the negative battery terminal.
d) Plug the communications cable into the EMS and into your PC.
e) Turn the ignition on, but do not attempt to start the engine.
f) At the time these instructions were written, new EMS units do not require USB drivers
to be installed on the PC. The EMS will automatically be detected as a human
interface device (HID).
g) With the AEMTuner software open, select ECU>>Upload Calibration to upload the
startup calibration file (.cal) that most closely matches the vehicle’s configuration to
be tuned. Check the Notes section of the calibration for more info about the vehicle it
was configured for. These files can be found in the following folder:
C:\Program Files\AEM\AEMTuner\Calibrations\Honda - Acura\