Connecting to a digital audio device, Connections 02 – Pioneer DBR-TF100GB User Manual
Page 11
Connections
02
11
6
Switch the TV to all the other tuned
channels, including the channel tuned for the
VCR, and check the picture quality.
If the picture quality is good, go to the
Starting up the first time on page 12. If there
is a picture quality problem even though the
aerial is connected, follow the instructions
below after completing
Starting up the first
time on page 12.
1Disconnect the aerial from the back of
the DTR.
2Check to make sure the TV is tuned to
the channel selected for watching digital
programmes.
3Press the MENU button on the remote.
The HOME MENU screen is displayed.
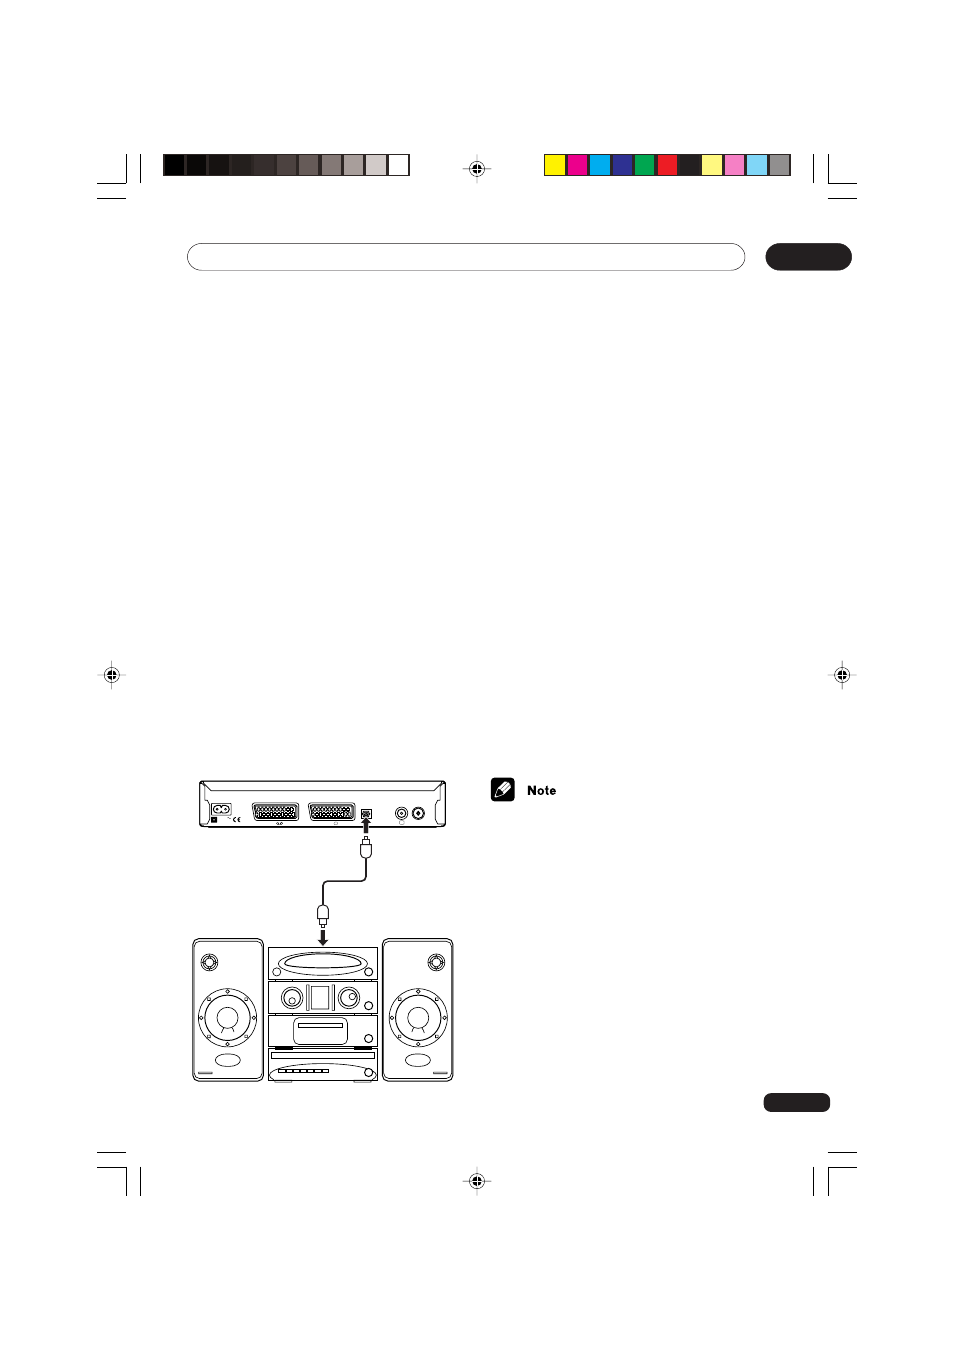
Connecting to a digital audio device
Connect an optical digital audio cable (sold seperately) between the optical digital audio output
socket on the DTR and an optical digital input on a sampling rate converter-equipped stereo
system, AV amp, etc.
230V
VCR
TV
OPTICAL
AERIAL
50Hz
TV
Digital Terrestrial Receiver
Sampling rate
converter-equipped
stereo system,
AV amp, etc.
4Select Setup from the HOME MENU
screen, TV Setup, and then RF Output
Channel using
5, ∞ and SELECT
buttons on the remote.
The default setting for this option, 38,
should be changed if there is interfer-
ence. Select a channel that is far from
38. Press the MENU button (Exit) to exit
the menu and store the setting.
5Repeat from Step 4 to check if the
picture quality improves.
• If a Dolby Digital encoded audio stream
is output and you have a Dolby Digital
decoder equipped external digital audio
device, change your digital audio output
settings in User Preferences, Digital
Audio Out. (See pages 27 and 28.)
• If the external digital audio device does
not support the sampling rate at which
the digital audio is being broadcast, no
audio will be heard.
“Dolby” and the double-D symbol are
trademarks of Dolby Laboratories.
DBR-TF100GB_09_15.p65
7/22/03, 12:14 PM
11