Registering custom paper settings – Konica Minolta bizhub 25e User Manual
Page 47
2-14 Various printing methods
Registering custom paper settings
You can register / edit custom paper sizes.
1
Open the printer settings screen on the computer
.
2
Confirm that the “Paper” tab is selected.
3
Click [Custom Paper Settings].
4
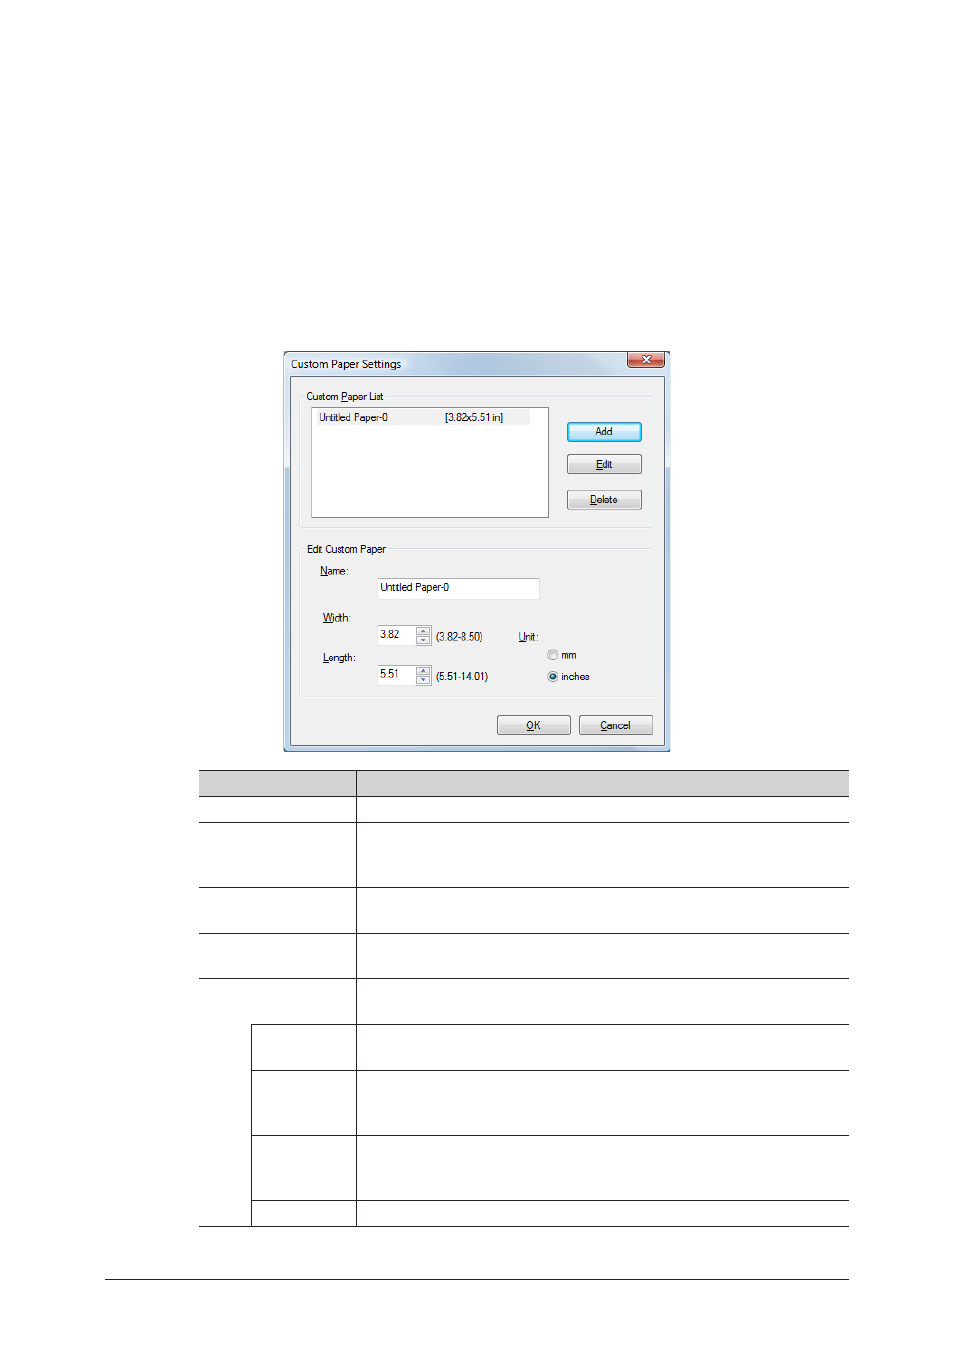
Click [Add] and then specify the paper settings.
To change a registered setting, select the custom paper size to change and click [Edit].
Item
Description
Custom Paper List
A list of the registered custom paper sizes is displayed.
Add
Click this to register a new custom paper size.
Up to 50 sizes can be registered. When 50 sizes are registered, this
button is grayed out.
Edit
Select a registered custom paper size, and then click this button to
edit.
Delete
Select a registered custom paper size, and then click this button to
delete.
Edit Custom Paper
You can specify the settings for the custom paper size.
This area becomes active when you click [Add] or [Edit].
Name
Enter a name for the custom paper size.
Up to 20 characters can be entered.
Width
Set the width of the custom paper size.
The width value cannot be set to a value larger than that of the
length, even if it is within the setting range.
Length
Set the length of the custom paper size.
The length value cannot be set to a value smaller than that of the
width, even if it is within the setting range.
Unit
Select the unit to use for the width and length.
5
Click [OK].