Konica Minolta bizhub 36 User Manual
Page 46
bizhub 42/36
5-12
5.3
Installation using Add Printer Wizard
5
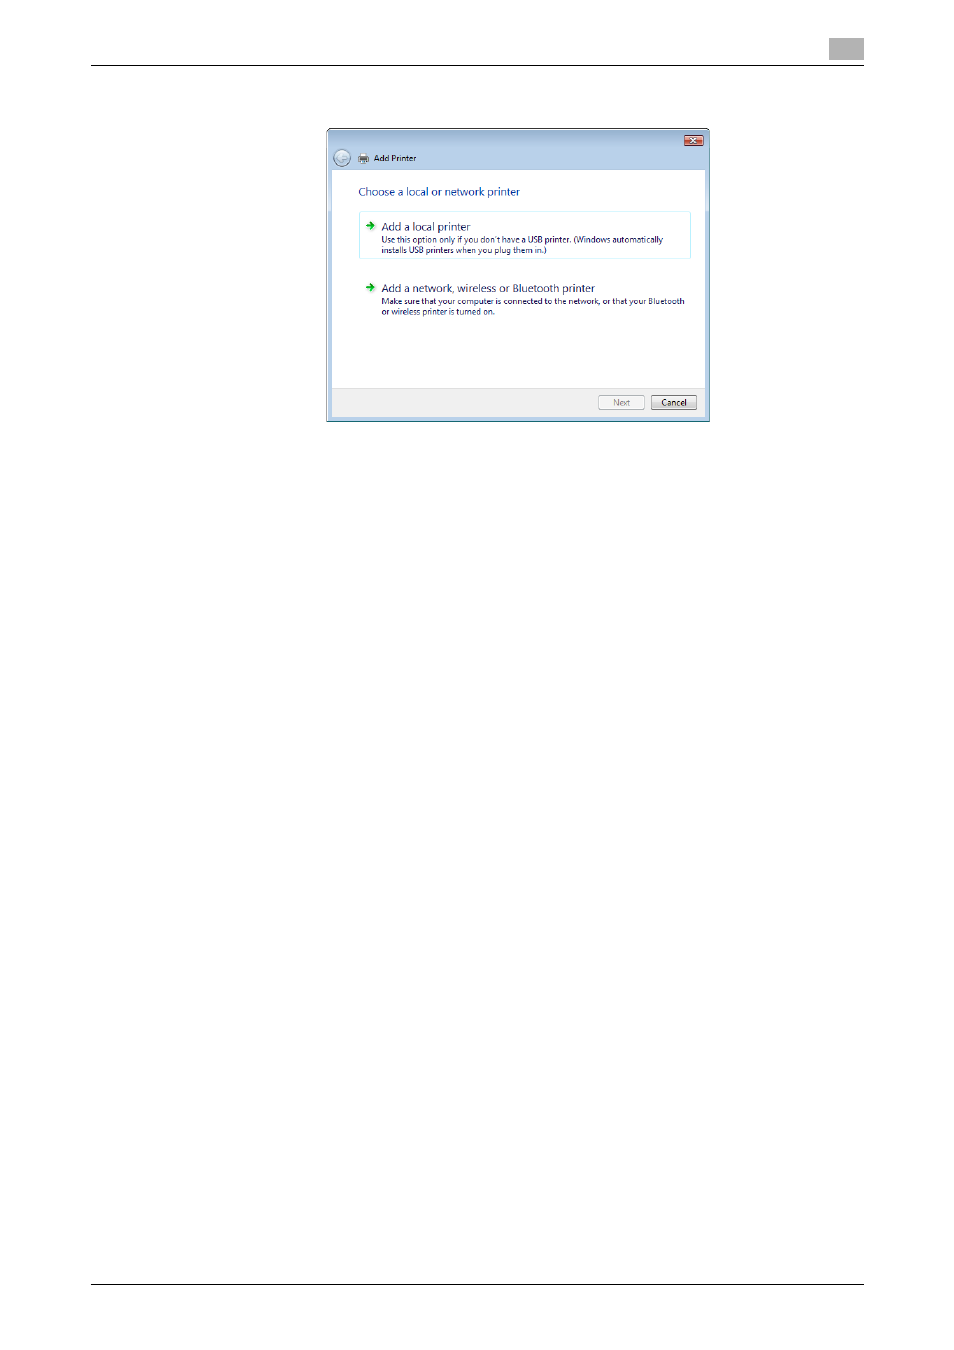
5
Click [Add a local printer].
The [Choose a printer port] dialog box appears.
6
Click [Create a new port:], and then select [Standard TCP/IP Port] as the type of port.
7
Click [Next].
8
Specify the IP address and port.
% To use the LPR/Port9100 protocol, select [TCP/IP Device], and then enter the IP address.
9
Click [Next].
% If the [Additional Port Information Required] or [Information for Additional Port Required] dialog box
appears, go to Step 10.
% If the [Install the printer driver] dialog box appears, go to Step 13.
10
Select [Custom], and then click [Settings...].
11
Change the settings according to the port, and then click [OK].
% For LPR connection, select [LPR], and then enter [Print] in the [Queue Name:] box.
% You must discriminate between upper and lower case letters when entering it.
% For Port9100, select [Raw], and then enter a RAW port number (initial setting: [9100]) in the [Port
Number:] box.
12
Click [Next].
The [Install the printer driver] dialog box appears.
13
Click [Have Disk...].
14
Click [Browse...].
15
Select a desired fax driver folder on the CD-ROM, and then click [Open].
% Select a folder according to the fax driver, operating system, and language to be used.
16
Click [OK].
The [Printers] list appears.