2 setting up the cs49530-usb boards, 2 setting up the cs49530-usb boards -2, Figure 3-1. front panel driver setup wizard -2 – Cirrus Logic CRD49530-USB User Manual
Page 21
Installation, Setup, and Running First Application
CRD49530-USB User’s Manual
DS705RD3
Copyright 2008 Cirrus Logic
3-2
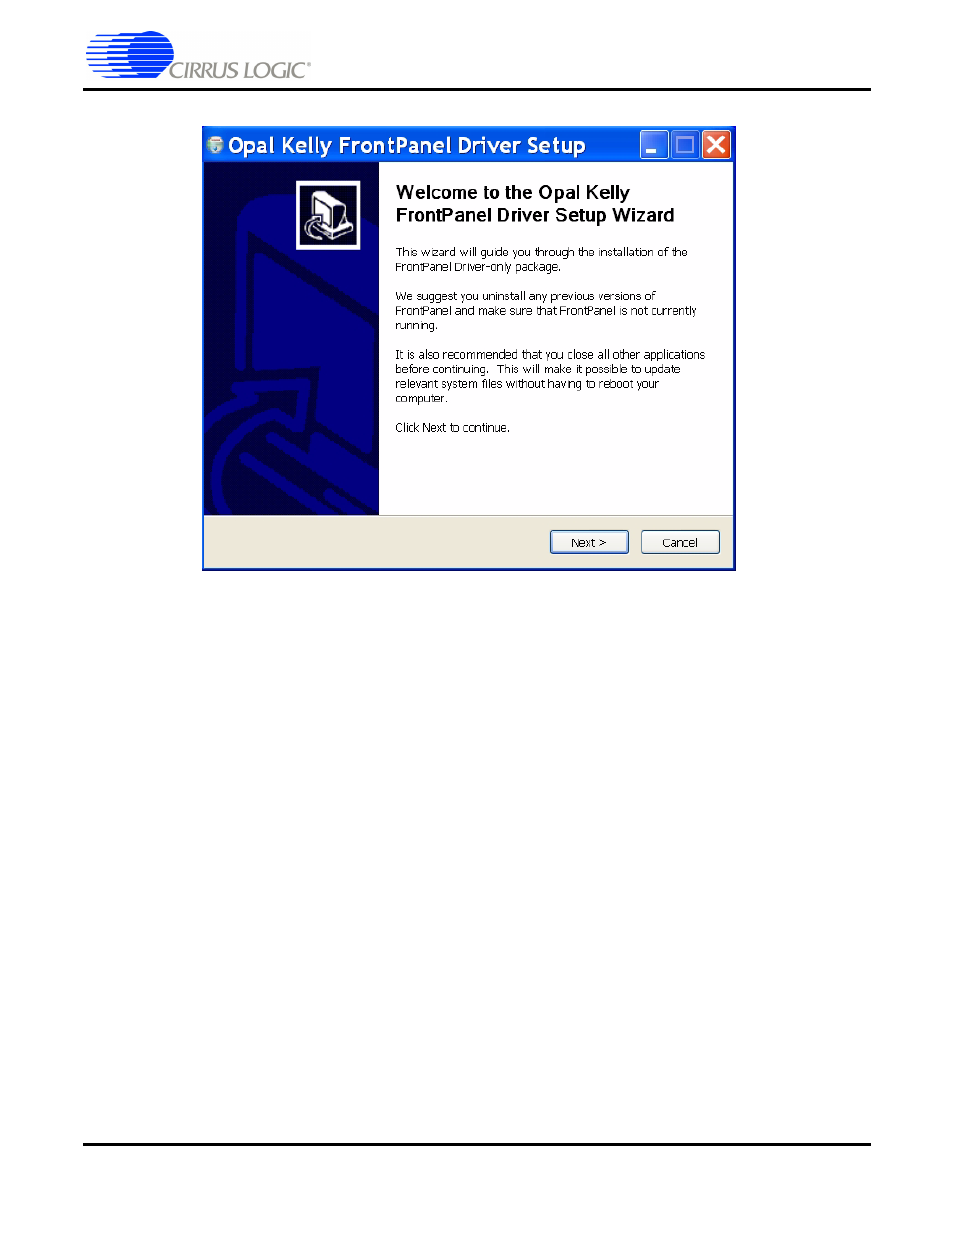
Figure 3-1. Front Panel Driver Setup Wizard
8. The Opal Kelly Licensing Agreement window will appear next. Click “I Agree” to agree to the terms
and continue.
9. The next window asks the user to choose components for installation. By default, only one component
is available and is pre-selected – Unified USB Driver. Click Next to continue.
10. The wizard will then ask the user to choose the install location. Select the default location of
“C:\Program Files\Opal Kelly\FrontPanel” and click Install. This should take only a few seconds.
11. Click Finish once the wizard has completed installation of the drivers.
12. The Cirrus DSP evaluation software will then prompt the user to click Finish to exit the setup wizard.
3.1.2 Setting up the CS49530-USB Boards
1.
Place the CRD49530 and the CRD USB Master on a static-free surface.
2. If the boards are not mated, connect them together as shown in
. Notice that the USB
connector on the CRD USB Master and the power connector on the CRD49530 are on the same side.
3. Connect the power supply jack to the CRD49530 board at J25 and the adapter to a wall power socket
or power strip.
4. Check that the D3 (green), D2 (red), and D4 (orange) power indicator LEDs illuminate on the
CRD4953x.
5. Make Audio Input connections to the to CRD49530 baord
•
Connect one end of the digital audio S/PDIF optical cable to SPDIF_RX0 on the CRD49530 board.