Festo Параллельный захват HGP User Manual
Page 21
HGP−...−A−B(−G..)
Festo HGP−...−A−B(−G..) 0405b English
21
S
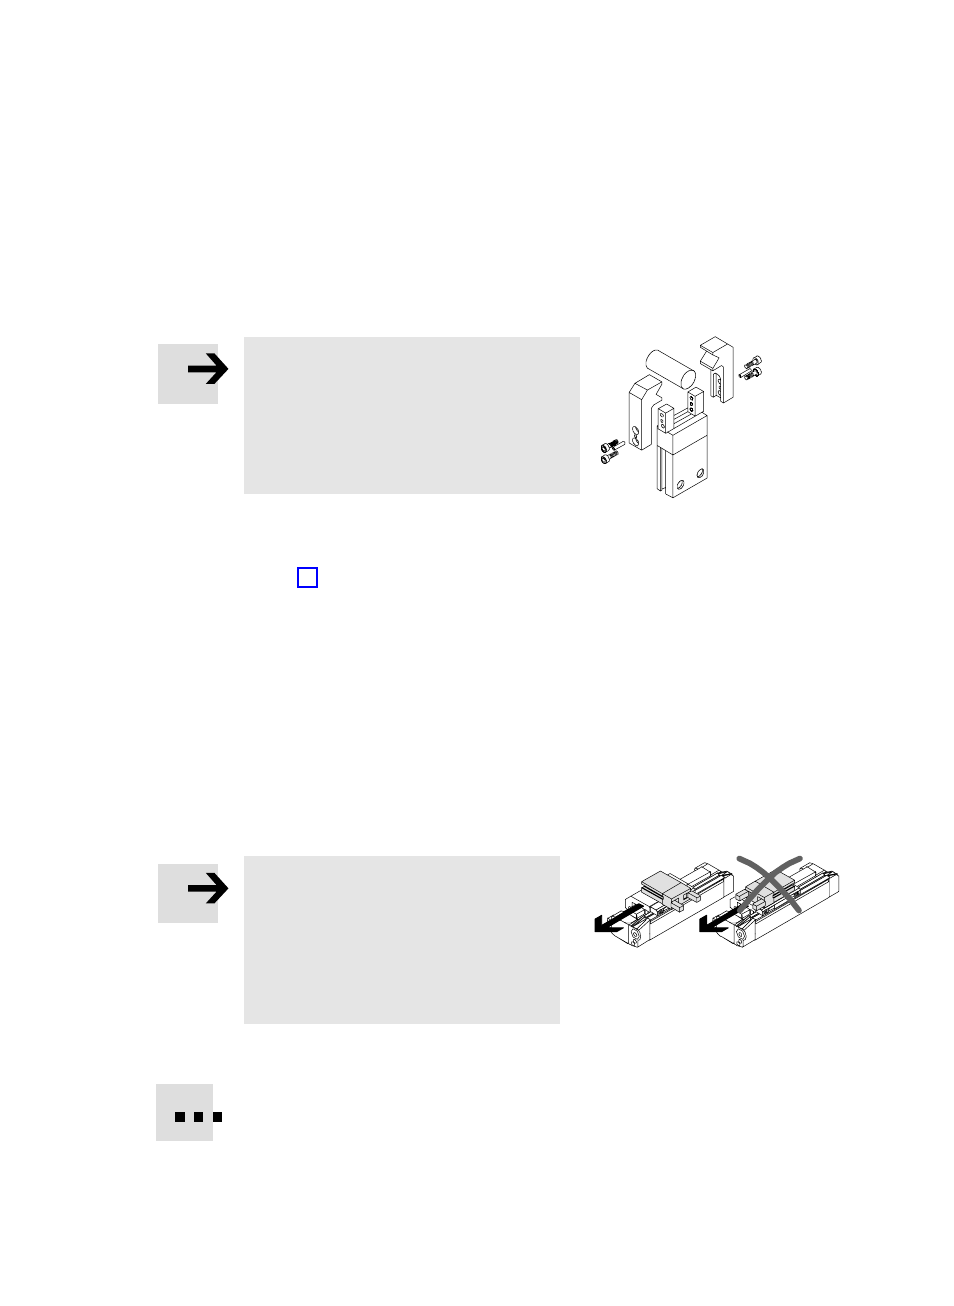
Press a dowel pin (see table) into each gripper finger.
S
Position thegripper fingers with the dowel pin on the gripper jaws.
Please note
S Observe the maximum permitted
tightening torques when mounting the
gripper fingers.
If the tightening torque is exceeded, the
gripper mechanism may be damaged.
S
Screw two fastening screws into the
threaded holesof the gripper jaws
(see Fig. 10).
If you are using proximity switches,
S
observe the following points:
ć Limited fastening possibilities for the gripper (e.g.: due to protruding
proximity switch).
ć Mounting sequence for the proximity switches.
ć Direction of cable exit of the proximity switches.
ć Interference influences due to ferritic parts fitted (only HGP−10−A).
Fastening the HGP−...
Please note
In cases of high acceleration in the
longitudinal direction of the gripper
(e.g.: when fitted onto moving parts like
the DGP−...):
S take into account the fact that the
gripping force can diminish.
S
Make sure that there is sufficient space for the connecting elements.
S
Check to see if adapter plates of type HAPG−... are necessary.
S
Place the HGP−... as near as possible to the compressed air supply (short tubing).
This leads to shorter pressurization times.
Fig. 10
Fig. 11