System settings, Analog switch setup – Spektrum SPM18100 DX18 User Manual
Page 22
22
SPEKTRUM DX18 • TRANSMITTER INSTRUCTION MANUAL
EN
EN
System Settings
The System Settings menu consists of four screens:
System Settings, Extra Settings, Serial Number and Calibrate. Select NEXT or PREV to move between screens.
System Settings
User Name
The User Name fi eld
displays your name in the
lower right corner of the
main screen.
To Program a User Name:
1. Scroll to User Name
and press the scroll wheel. The User Name screen appears.
2. Scroll to the desired character position and press the scroll
wheel. Scroll left or right to change the character and press
the scroll wheel to save the selection. The User Name can
contain a maximum of 20 characters, including spaces.
3. Press the Back button to save the User Name and return to the
System Settings screen.
Contrast
To adjust the screen contrast:
1. Scroll to Contrast and press the scroll wheel.
2. Scroll left or right to adjust the contrast value. Lower numbers
lighten the contrast, higher numbers darken it.
3. Press the scroll wheel once to save the selection.
Backlight
The Backlight fi eld adjusts the backlight appearance time and
brightness. You have the option to turn the backlight off for models
you fl y during the day and turn the backlight on for night fl ying
models.
The backlight time options are:
Off: Appears for a short time when you power on the transmitter.
On: The backlight is always on.
Set Time: The backlight is on for 3, 10, 20, 30, 45 or 60
seconds before automatically turning off. Press the scroll
wheel once to turn the backlight on.
The backlight percentage adjusts the backlight intensity and it
is adjustable in 10% increments from 10% (darker) to 100%
(brighter).
Mode
You can change the control stick mode from
Mode 2 to Mode 4 or Mode 1 to Mode 3.
Mode changes that require movement of complete gimbal
assemblies must be performed by a Horizon Hobby service center.
To change the gimbal stick mode:
1. Scroll to Mode and press the scroll wheel.
2. Scroll left or right to change the gimbal stick mode. Press the
scroll wheel to save the selection.
3. Select NEXT in the lower left corner until the Calibration screen
appears.
4. Move all transmitter controls to the center position and
complete the calibration process before exiting the System
Settings menu. See “Calibrating Your Transmitter” for more
information.
Battery Alarm
Battery Alarm enables you to change the transmitter battery type
and the alarm voltage limit. The alarm activates when the battery
reaches the low voltage limit.
To change the battery alarm:
1. Scroll to the battery type and press the scroll wheel once to
change the type to LiPo/Li-Ion or NiMH.
2. Scroll to the battery voltage and press the scroll wheel. Turn
the scroll wheel left or right to change the voltage level. Press
the scroll wheel again to save the selection.
CAUTION: Never select NiMH when a LiPo/Li-Ion
battery is installed in the transmitter. Doing so may over-
discharge the LiPo battery and damage the battery, transmitter
or both.
CAUTION: Never adjust the low voltage limit for the LiPo/
Li-Ion battery pack below 6.4V. Doing so could over-
discharge the battery pack and damage both battery pack and
transmitter.
Selecting a Language
In the Systems Settings screen, rotate the roller to highlight
Language, then press the roller to select the Language function.
Rotate the roller to select the desired Language. When the desired
Language is selected, press the roller to accept that Language.
Names you input will not be affected by language change. After
changing the language for the text, you may also want to change
the language for the spoken alerts. See the “Spoken” and “SD
Card” sections for more information.
Inactive Alarm
An alarm activates if the transmitter sees a period of inactivity for
a certain amount of time. The alarm is helpful in reminding you
to power off the transmitter and avoiding a situation where the
transmitter battery completely discharges.
The Inactive Alarm options are:
• Inh (No alarm sounds)
• 5 min
• 10 min (Default)
• 30 min
• 60 min
To change the Inactive alarm time:
1. Scroll to the current alarm time and press the scroll wheel.
2. Scroll left or right to change the alarm time. Press the scroll
wheel to save the selection.
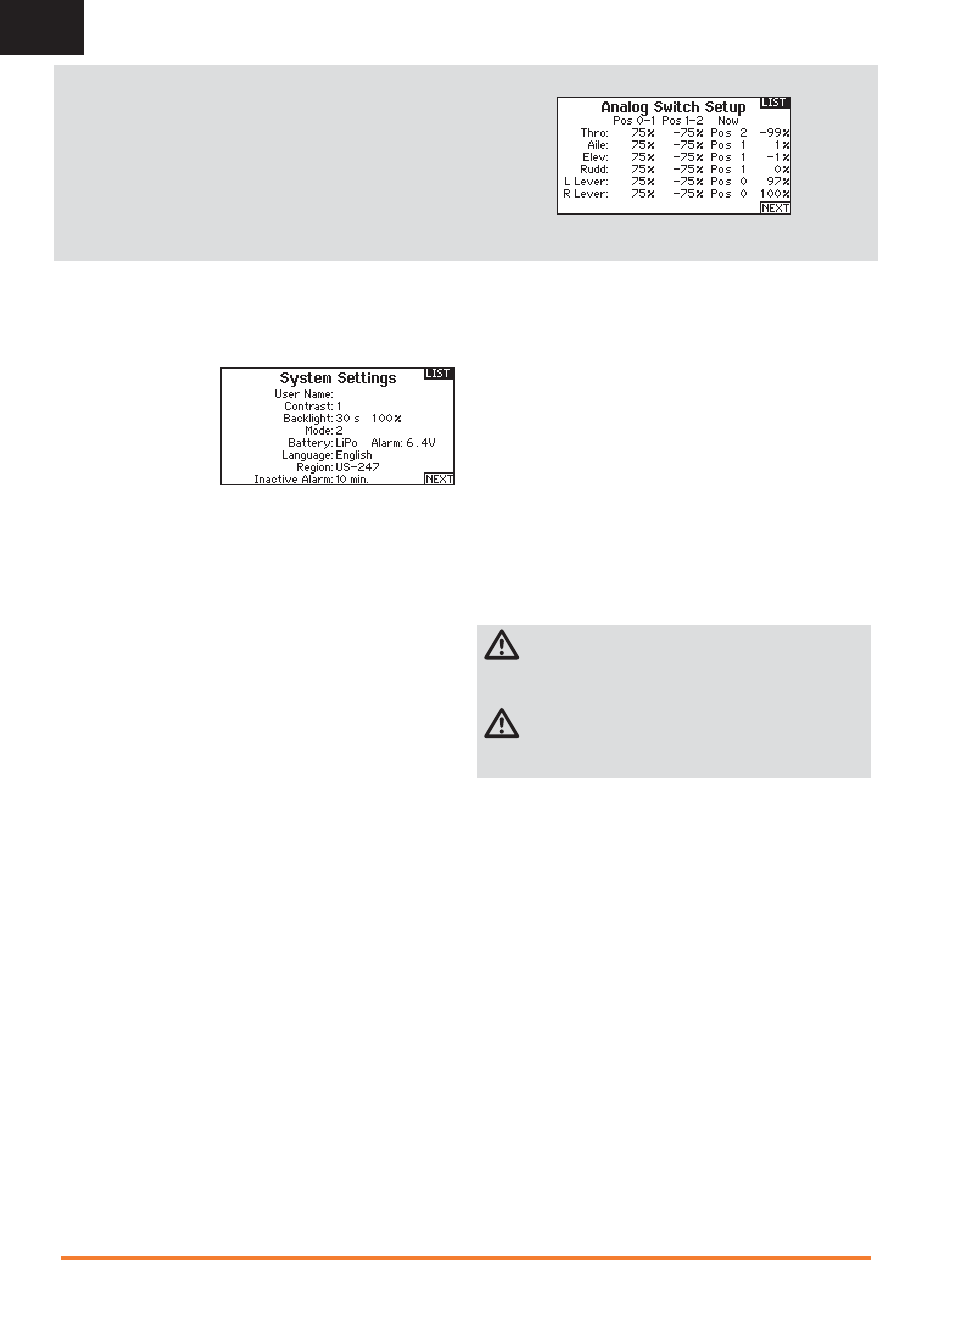
Analog Switch Setup
Allows all sticks and pots to be used as a kick point to turn on
functions like mixes. To add a kick point:
1. Move the control stick, lever or knob to the desired kick point
position.
2. Scroll to the desired kick point and press the scroll wheel once
to save the selection.
To delete a kick point, scroll to the desired kick point and press the
Clear button.