Swiftech H20 120 PREMIUM2 User Manual
Page 24
Copyright Swiftech 2007 – All rights reserved – Last revision date: 1-15-07 - Information subject to change without notice – URL:
http://www.swiftech.com
Rouchon Industries, Inc., dba Swiftech – 3400 Industry ave., suite 104, Lakewood, CA 90712 – Tel. 562-595-8009 – Fax 562-595-8769 - E Mail: [email protected]
PAGE 24 of 28
Permanent Installation
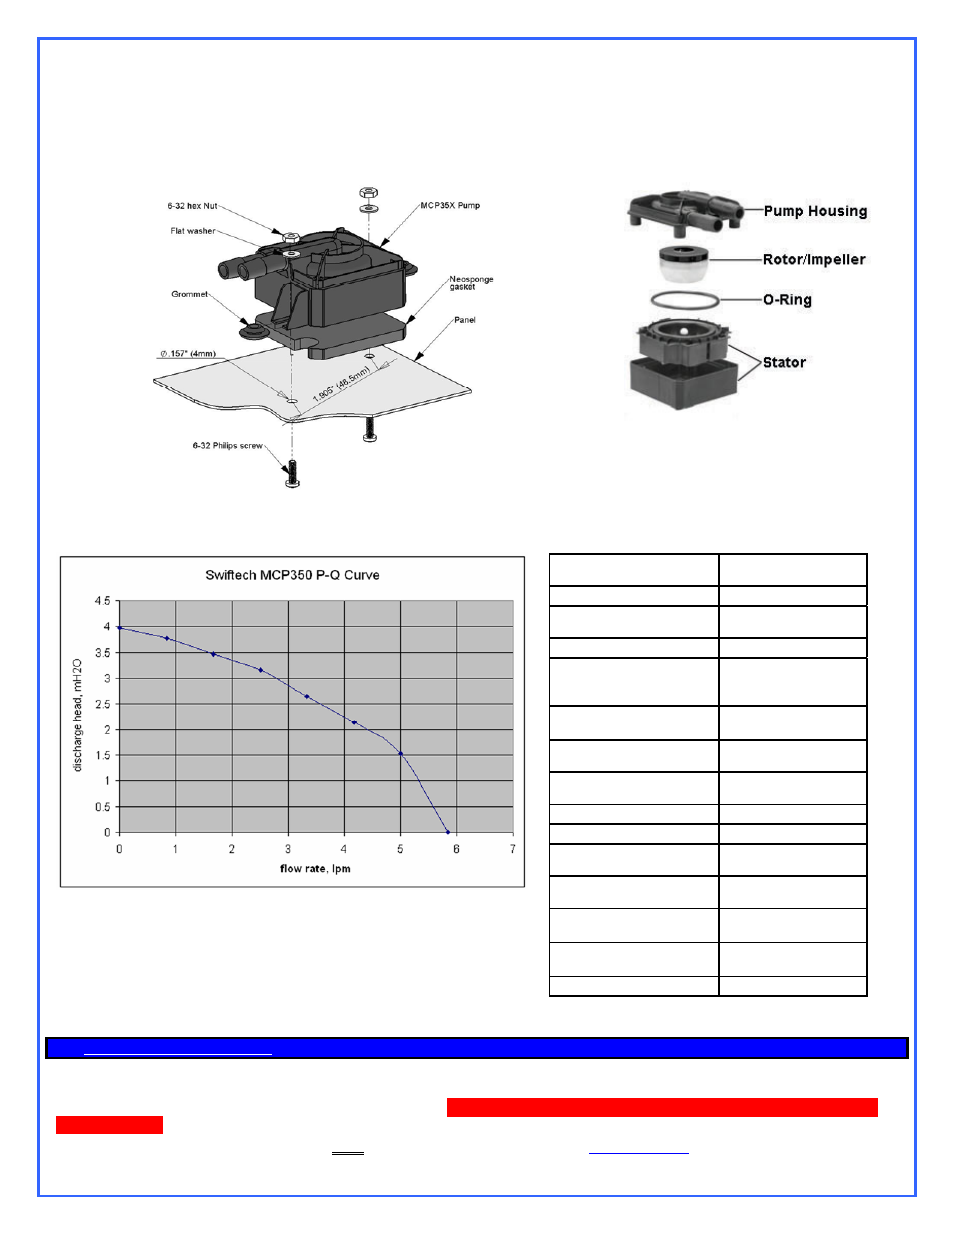
Drill two 0.312” (8mm) holes into panel, 2.52” (64mm) apart. Snap grommet
into each hole. Tighten the provided screws until the pump neoprene pad is
slightly and evenly compressed by approximately 1/8” (2~3mm) or less.
Exploded view
Performance & Specifications
Nominal voltage
12 V DC
Operating voltage range
9 to 13.2 VDC
Nominal power (@ 12 V)
8.3 W
Nominal current (@ 12 V)
.69 amps
Motor type
Electronically
commutated, brushless
DC, spherical motor
Nominal hWith the ead (@ 12
V)
13.05 ft (4 m)
Nominal discharge (@ 12 V) ~ 92.4 GPH (350 LPH)
Connection size
3/8" barbs (10mm)
Maximum pressure
22 PSI (1.5 BAR)
Temperature range
Up to 140°F (60°C)
Electrical connector
Molex 4 pin
Weight
7.3 oz (207 gr.)
Our noise measurement (non
lab environment)
24 ~ 26 dBA in a quiet
room @ 2'
MTBF (Mean Time Between
Failures)
50,000 Hours
RPM sensor
3-pin connector
5 R
E
-
INSTALLING THE MOTHERBOARD
With your radiator, pump and reservoir installed, it is now time to re-install the motherboard into your case. Please follow
the motherboard manufacturer instructions to this effect. DO NOT CONNECT THE POWER TO THE MOTHERBOARD
AT THIS TIME! Power to the motherboard should ONLY be connected once the system has been fully tested for leaks.