Replacing the mainboard – Acer 5241 User Manual
Page 107
Chapter 3
97
Replacing the Mainboard
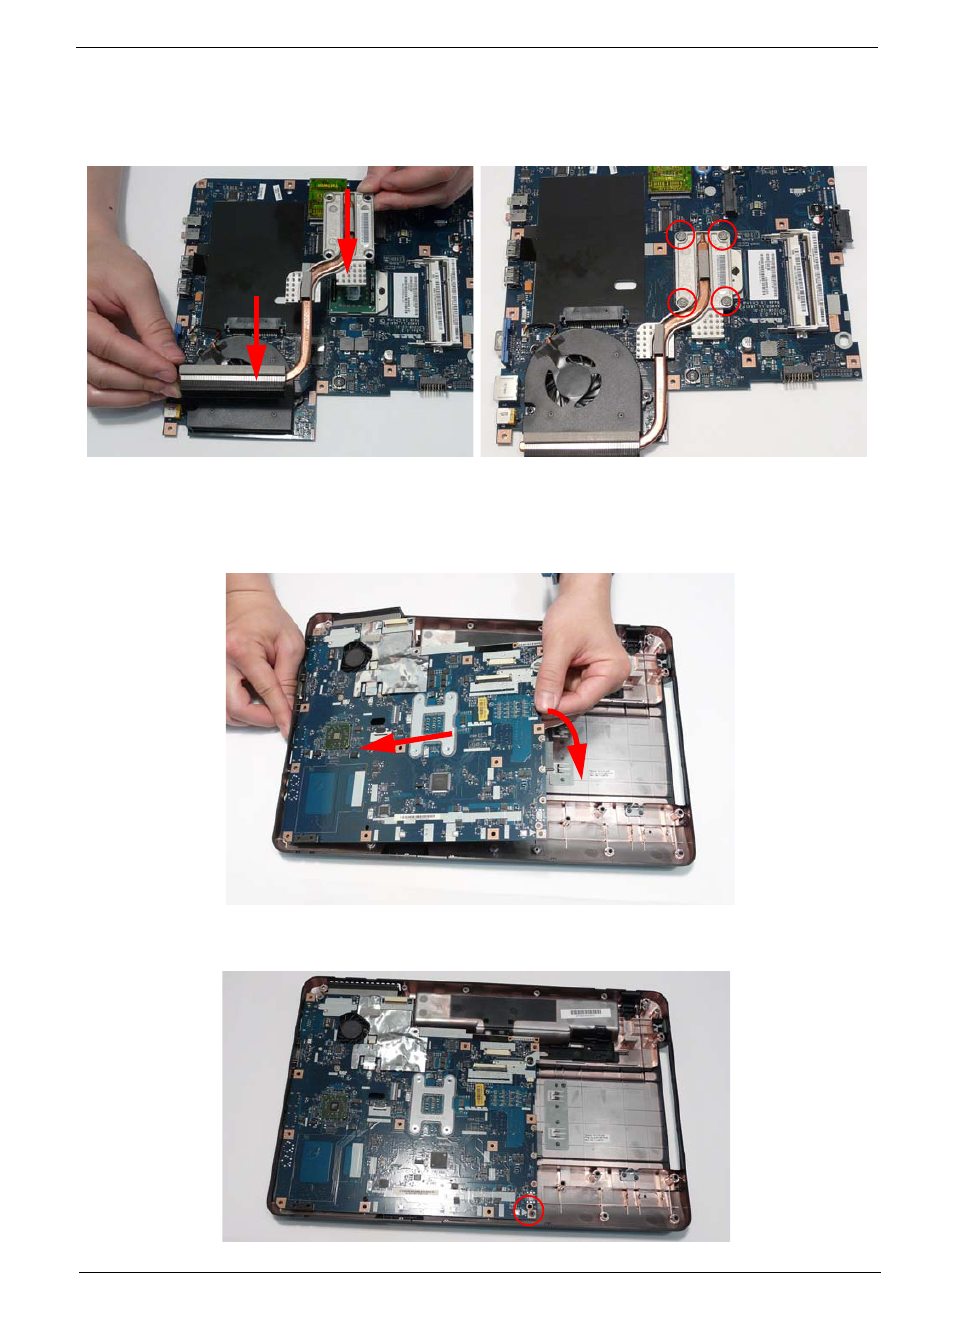
3. Align the screw holes on the Thermal Module and
Mainboard then replace the module. Keep the
module as level as possible to spread the thermal
grease evenly.
4. Replace the four securing screws (in numerical
order from screw 1 to screw 4) to secure the
Thermal Module in place.
1. Ensure that the Mainboard is face up (the CPU is not visible). Place the Mainboard in the chassis, left edge
first (1), then rotate it downward into position (2).
NOTE: Ensure the I/O ports are positioned correctly through the casing.
2. Replace the single securing screw in the mainboard.
1
2
3
4
(1)
(2)
See also other documents in the category Acer Notebooks:
- Aspire 5741ZG (2345 pages)
- Aspire 5741ZG (313 pages)
- TravelMate 5330 (14 pages)
- Extensa 7230 (86 pages)
- AOD257 (1810 pages)
- AO753 (374 pages)
- AO533 (4 pages)
- AOD255 (299 pages)
- AO522 (1810 pages)
- Aspire EC-471G (10 pages)
- Aspire V5-531G (2484 pages)
- Aspire M3-581TG (3478 pages)
- Aspire M3-581TG (11 pages)
- Aspire M3-581PTG (10 pages)
- Aspire 8950G (378 pages)
- Aspire EC-471G (11 pages)
- Aspire V5-571PG (3604 pages)
- Aspire E1-571 (308 pages)
- Aspire E1-521 (11 pages)
- Aspire S5-391 (11 pages)
- Aspire S5-391 (111 pages)
- Aspire M5-581TG (10 pages)
- Aspire M5-581TG (11 pages)
- Aspire V3-471G (362 pages)
- Aspire V3-471G (11 pages)
- Aspire M5-481TG (11 pages)
- Aspire 9420 (109 pages)
- Aspire 9520 (123 pages)
- 3280 (106 pages)
- 4600 (128 pages)
- Aspire 1300 (96 pages)
- 4330 (198 pages)
- TravelMate 3250 (98 pages)
- 1450 (99 pages)
- 2420 (108 pages)
- 310 (130 pages)
- 310 (2 pages)
- 3690 (123 pages)
- 5010 (113 pages)
- 3250 (124 pages)
- 5560 (112 pages)
- 5230 (176 pages)
- 420 series (78 pages)
- 3000 (109 pages)
- 3200 Series (90 pages)