DAVIS Vantage Pro2 Temperature/Humidty Sensor Replacement Kit User Manual
Page 6
6
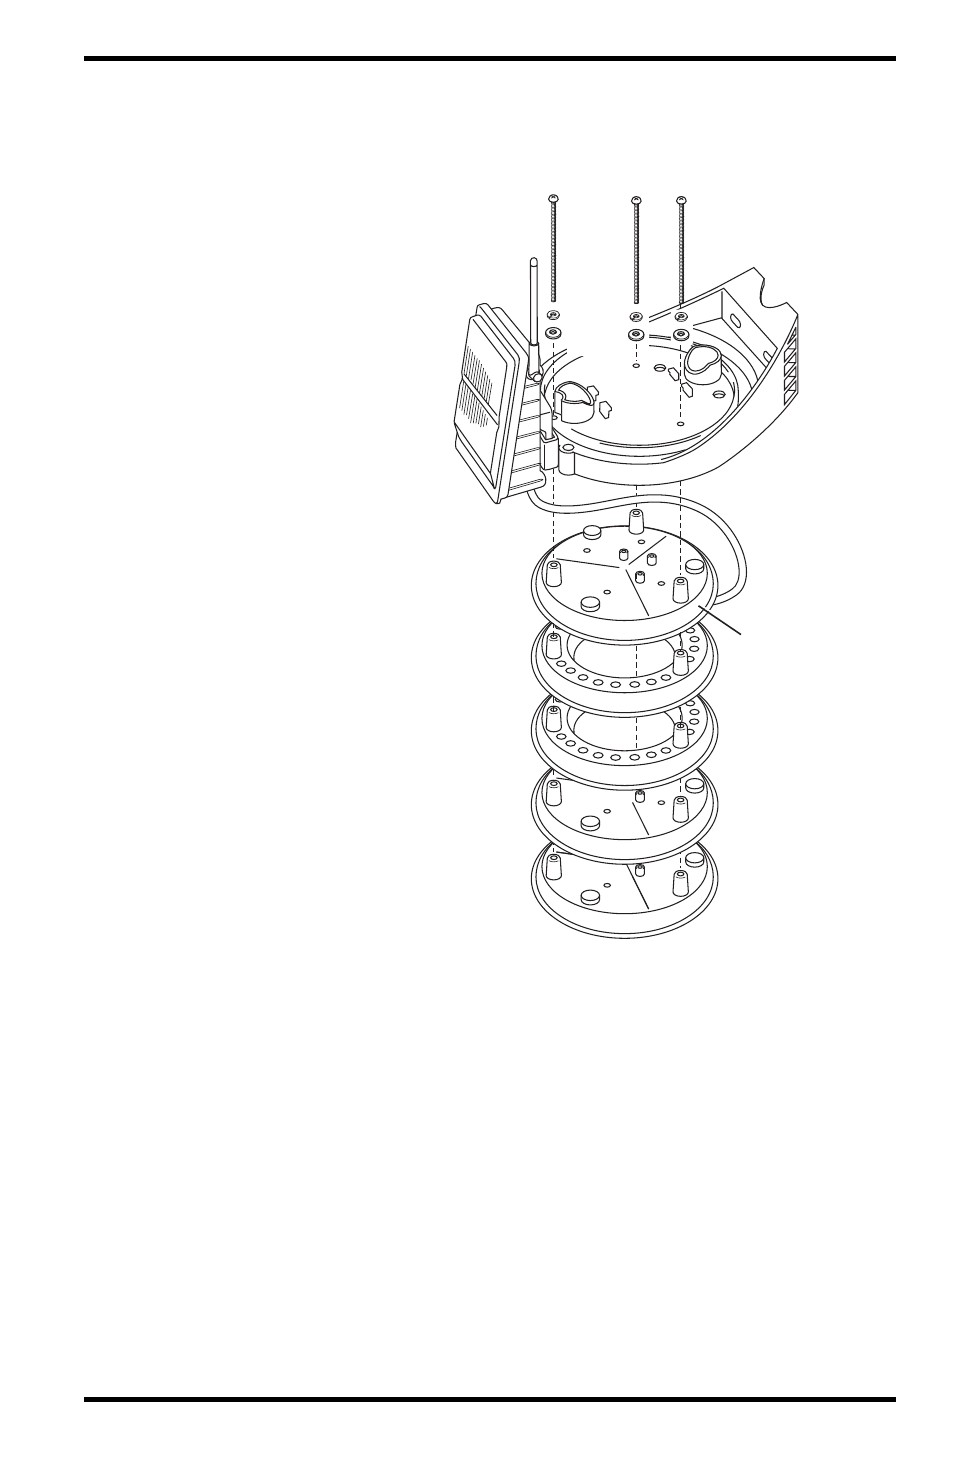
4. Use the screws that were taken from the last insulating disk or use the
screws provided with the Temperature/Humidity Sensor Replacement Kit
to mount the Temperature/Humidity sensor in place.
5. Reassemble the radiation
shield plating.
6. Check the orientation of
the Temperature/
Humidity sensor cable.
When the plating is
reassembled, the cable
should be oriented on the
right side of the plating
so that it can be easily
placed between the top
radiation shield and the
rain collector base.
7. Replace the three 4''
screws, lock washers and
flat washers into their
respective holes in the
rain collector base and
screw the radiation shield
plates back into place.
Re-install the ISS
1. Install the rain collector
cone and lock it in place.
2. Slide the new
Temperature/Humidity
sensor cable back
through the cable access
port of the SIM box.
3. Connect the Temperature/Humidity sensor cable into the correct port.
4. Close the SIM cover temporarily without connecting the solar panel
cables.
5. Test communication between the ISS and the console. To test
communication, take the console out of Setup Mode (see “Take the
Console Out of Setup Mode” on page 7 for more information) and make
sure the console is receiving data from the ISS or Temperature/Humidity
Station. See the ISS manual or Temperature/Humidity Station Manual for
more information on testing communication.
4" Screw
(3)
Plates
Rain Collector Base
Temp/Humidity
Sensor Plate
Lock
Washer
Flat
Washer