Install the retrofit kit components, Opening the sim housing cover – DAVIS Vantage Pro ISS Retrofit Kit User Manual
Page 5
Install the Retrofit Kit Components
Page 5
Install the Retrofit Kit Components
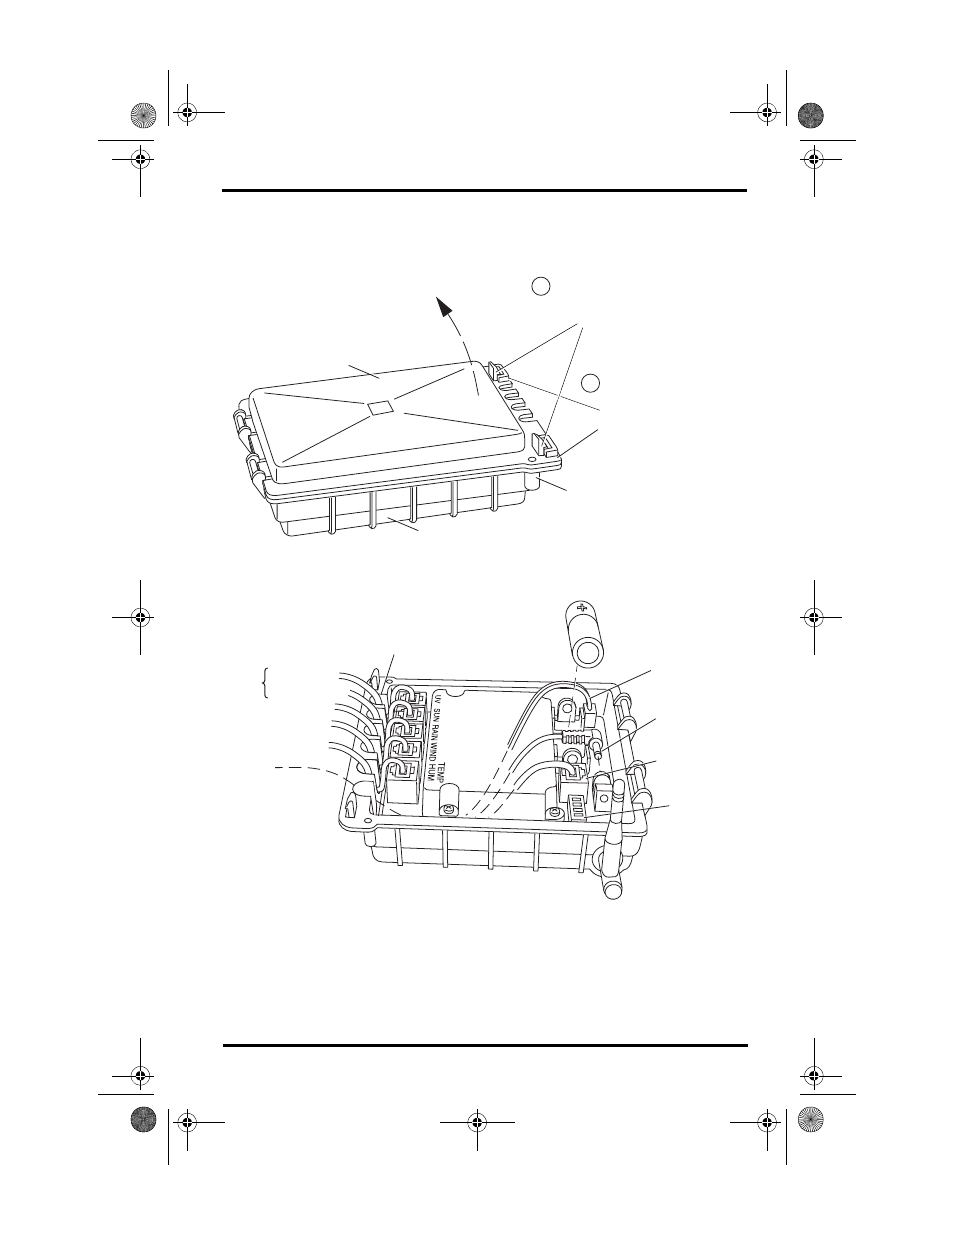
1.
Open the SIM housing cover. Note the “S-loop” in which the TEMP-HUM
cable is formed.
2.
Disconnect the TEMP-HUM cable and close the SIM housing cover.
3.
Place the new SIM housing, radiation sensor plate and Temp/Hum sensor
assembly on the work surface with the SIM housing on the bottom.
4.
Place the two open plates on the Assembly, feeding the TEMP-HUM cable
through the opening in the plates. Be sure that the three screw holes line
up.
Use your thumbs to push
back on the two (2) plastic
latches.
Screw Fastening Holes.
Use self-threading screws:
#6 x 0.5" (3.5mm x 12 mm)
(optional)
With the latches pushed
back, use your fingers to
lift up on the corner edges
of the cover.
SIM Housing
SIM Housing Cover
1
2
Opening the SIM Housing Cover
Cable Routing Channels
(press cables fully into channel
to form "S-loop")
DIP Switches
(wireless models
only)
Console Cable
(cabled models
only)
Solar Panel Power
(wireless models only)
AC Power
(optional)
3-Volt Lithium Battery
(wireless models only)
UV Sensor
Optional
Solar Radiation
Rain Collector
Anemometer
Temp/Humidity
New SIM Connections
ISS2 RetroKit D011.fm Page 5 Wednesday, February 19, 2003 6:02 PM