Dissassemble the iss radiation shield, Old sim connections and screw locations – DAVIS Vantage Pro ISS Retrofit Kit User Manual
Page 3
Dissassemble the ISS Radiation Shield
Page 3
Dissassemble the ISS Radiation Shield
Note:We recommend using a workbench or equivalent flat surface for the following pro-
cedures.
1.
With the rain collector cone in place, turn the ISS over so it rests on the top
of the cone.
2.
Disconnect the rain collector cable and (if present) the solar panel cable, and
the SUN (solar radiation) and UV sensor cables.
3.
The SIM transmitter board, dust cover, and small rear cover plate (not
shown) are attached to the top radiation shield plate by 4 screws. Unscrew
these screws and remove the front dust cover along with the SIM and the
rear cover plate.
4.
Make a note of the transmitter ID switch settings. You will use these set-
tings in the new replacement SIM.
5.
Remove the battery from the circuit board and set all ID code positions ON.
With all the transmitter ID switches set to ON, the power stored in the old
SIM’s super capacitor should dissipate within one hour.
Note:
Setting the #1, 2 and 3 ID switches to ON will set your transmitter ID to “8”. Setting the
#4 ID switch will turn on the ISS test mode. Set the #1, 2 and 3 switches differently if you
are using Station 8 in your weather station. Refer to Appendix A.”Wireless Transmitter
Settings” in your ISS Installation Manual for more information.
6.
Save the battery as a back-up and set aside the SIM board for return to
Davis.
Switch Position
1
2
3
4
Switch Setting
OFF
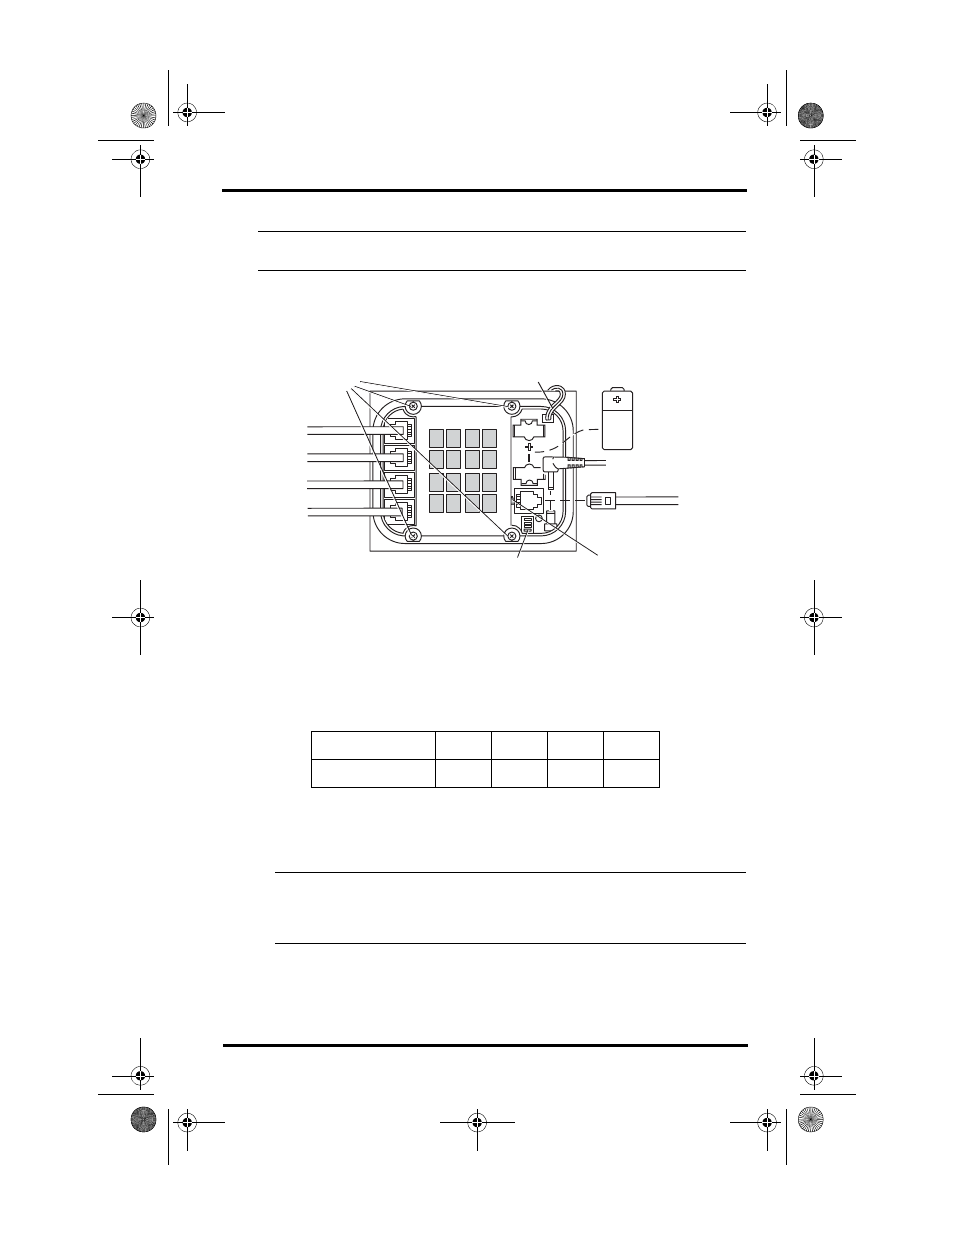
3-Volt
Lithium
Battery
(wireless
only)
AC Power
(optional)
Console Cable
(cabled only)
DavisTalk Transmitter ID Switches
Anemometer
UV Sensor
Solar Sensor
Rain Collector
UV SUN RAIN WIND
CONSOLE
Solar Panel Cable (wireless only)
Mounting Screws (4)
Green Test LED
Old SIM Connections and Screw Locations
ISS2 RetroKit D011.fm Page 3 Wednesday, February 19, 2003 6:02 PM