Setting console station id on the console – DAVIS Wireless Temp/Hum Station, 2003 & newer User Manual
Page 5
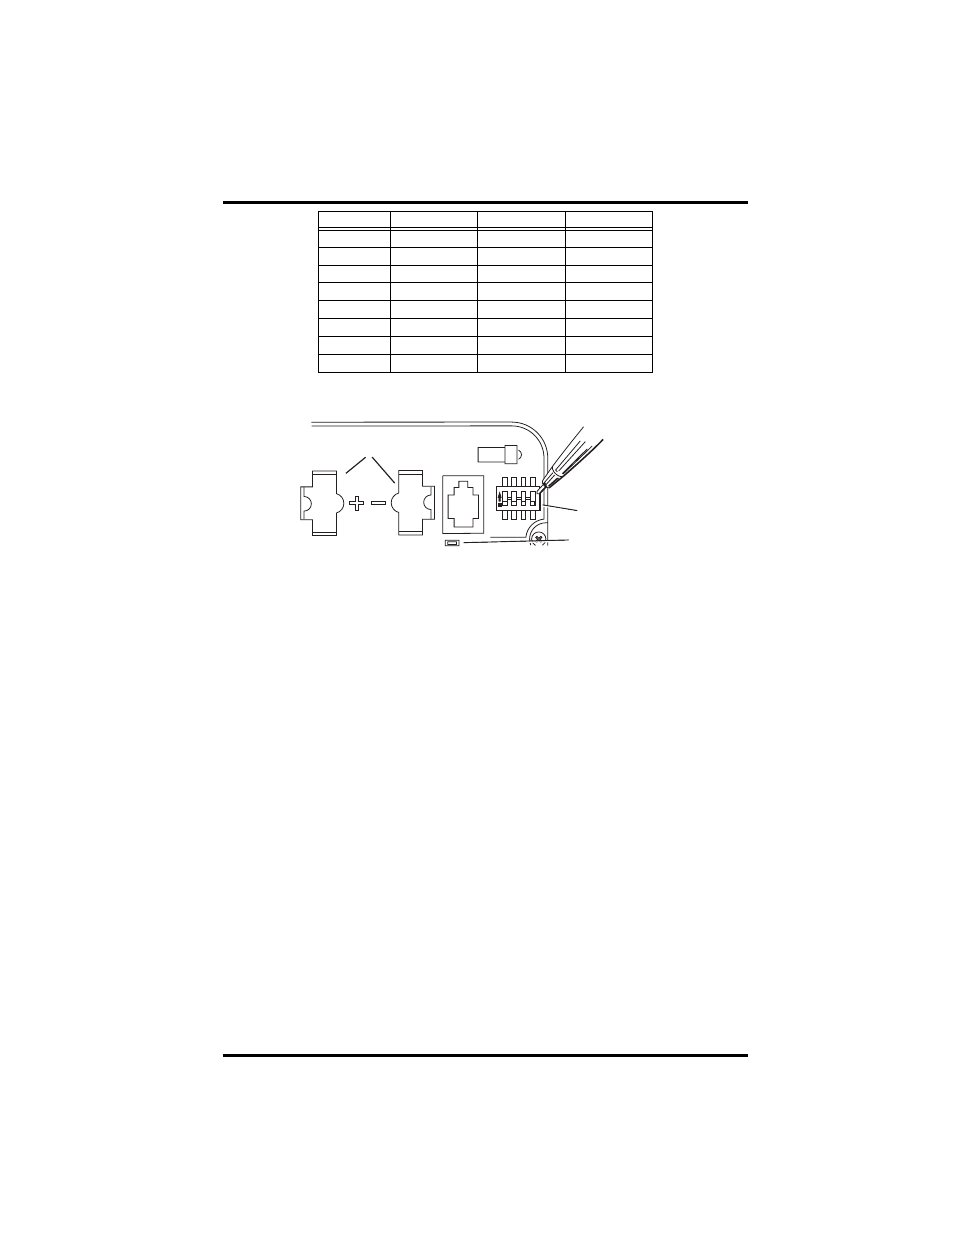
Setting the Transmitter ID
5
Use this table to ensure that each wireless transmitting station in your system is
broadcasting on its own transmitter ID.
DIP Switches in Top-right Corner of SIM (Illustration has been enlarged for clarity)
Setting Console Station ID on the Console
1. Put your console into Setup Mode — press and hold the DONE key and
press the DOWN arrow key.
The console will show you Screen 1: Transmitters. You should see the words:
“RECEIVING FROM...” and “STATION NO.” followed by the transmitter
IDs that your console detects. One of these should be the ID number you just
set on the Temp/Hum Station transmitter. If you don’t see it, make sure the
console is within 10' of the transmitter, and verify that you set the DIP
switches correctly. If you still don’t see it, go to “TEST mode”.
2. Press the DONE key to move on to Screen 2: Selecting Transmitters.
Setup Mode – Screen 2 is where you will set the console to recognize signals
on that ID as coming from a Temp/Hum Station.
3. Press the LEFT or RIGHT arrow key, or the STATION key, to scroll through
transmitter IDs.
When you see the ID you chose for the Temp/Hum Station, use the UP or
DOWN arrow keys to activate reception of that ID code. Make sure the
screen shows “ON”.
4. Press the GRAPH key to change the type of station assigned to that transmit-
ter ID.
Press the GRAPH key until “TEMP HUM” appears.
5. If you don’t see a 4X next to the station type, press and hold the TEMP key
then press the HI/LOW key once. A 4X should appear next to “TEMP
HUM” on the console LCD.
6. To exit Setup Mode, press and hold the DONE key.
ID C
ODE
S
WITCH
1
S
WITCH
2
S
WITCH
3
#1
(default)
off
off
off
#2
off
off
ON
#3
off
ON
off
#4
off
ON
ON
#5
ON
off
off
#6
ON
off
ON
#7
ON
ON
off
#8
ON
ON
ON
1
2
3
4
ON
Battery Holder
Transmitter ID
Switches
Test Indicator LED