New v-vol group dialog box – HP StorageWorks XP Remote Web Console Software User Manual
Page 76
21. Click Apply. The confirmation message indicating if it is OK to apply the setting to the storage
system is displayed.
22. Click OK. The confirmation message closes and the new V-VOL information is applied to the
subsystem.
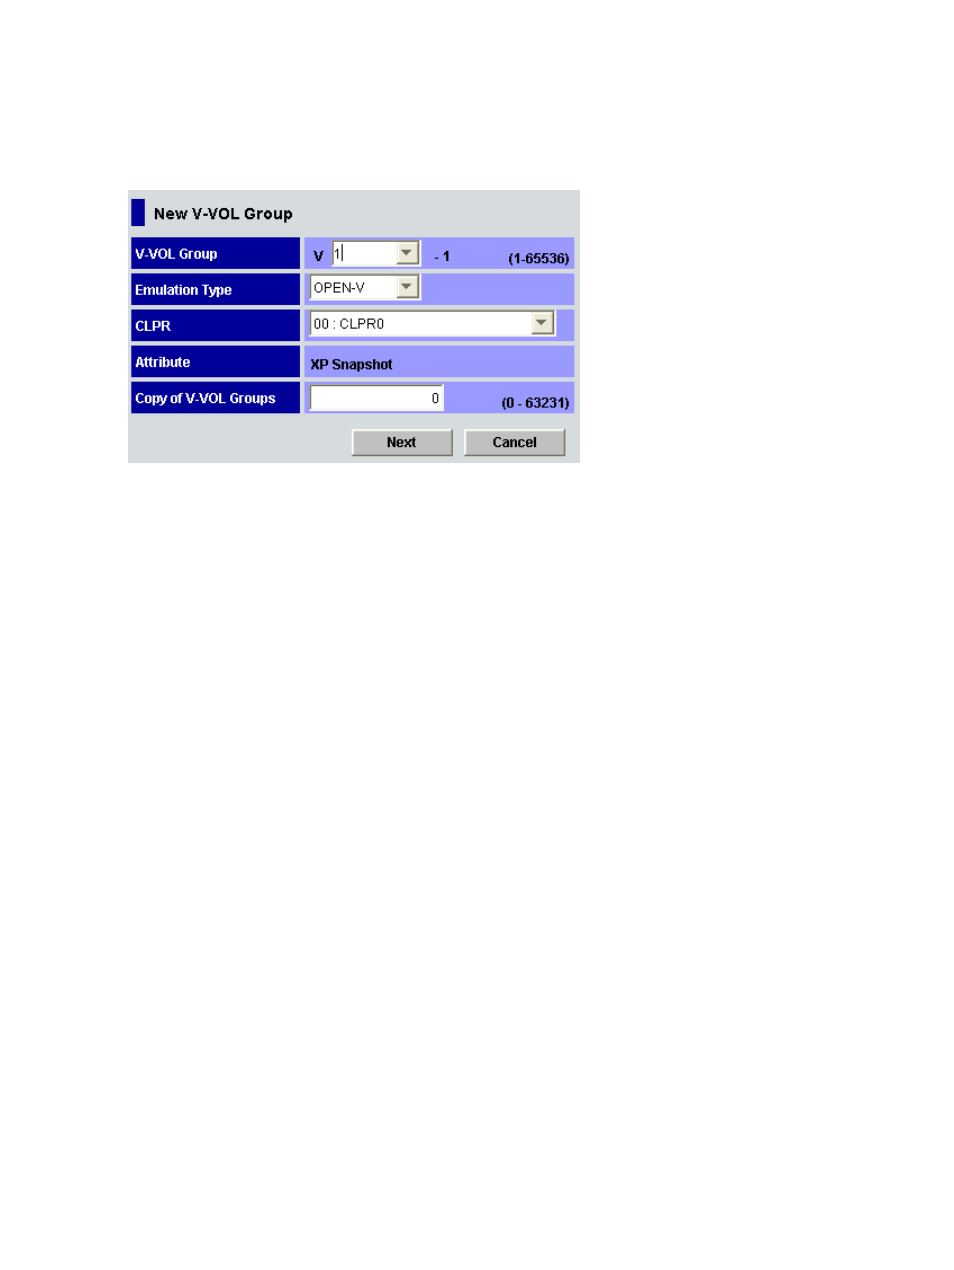
Figure 17 New V-VOL Group Dialog Box
The New V-VOL Group dialog box displays the following items.
•
V-VOL Group drop-down list
You can select or enter the V-VOL group ID in the drop-down list. A whole number from 1 to
65536 can be selected or entered in the drop-down list.
Do not enter a V-VOL group ID that is already used by another V-VOL group. If you enter a
V-VOL group ID that is already used by another V-VOL group and click Next, an error message
will be displayed. In that case, select or enter a different number for the new V-VOL group ID.
•
Emulation Type drop-down list
You can select the emulation type of the V-VOL group.
•
CLPR drop-down list
You can select the CLPR of the V-VOL group.
•
Attribute
The name of the program product that is going to use the V-VOL group is displayed. This is
the name of the program product whose icon you right-clicked in order to display the New
V-VOL Group dialog box.
•
Copy of V-VOL Groups text box
The number of the V-VOL groups to be copied can be entered. You can enter a whole number
from 0 to 63231. Note that no V-VOL group will be copied if you enter 0.
•
Next button
Fixes the settings in the New V-VOL Group dialog box and displays the Create V-VOL wizard
dialog box (1).
•
Cancel button
Cancels the settings in the New V-VOL Group dialog box and closes the dialog box.
76
Performing XP Snapshot Operations