HP OmniBook 800 Notebook PC User Manual
Page 15
15
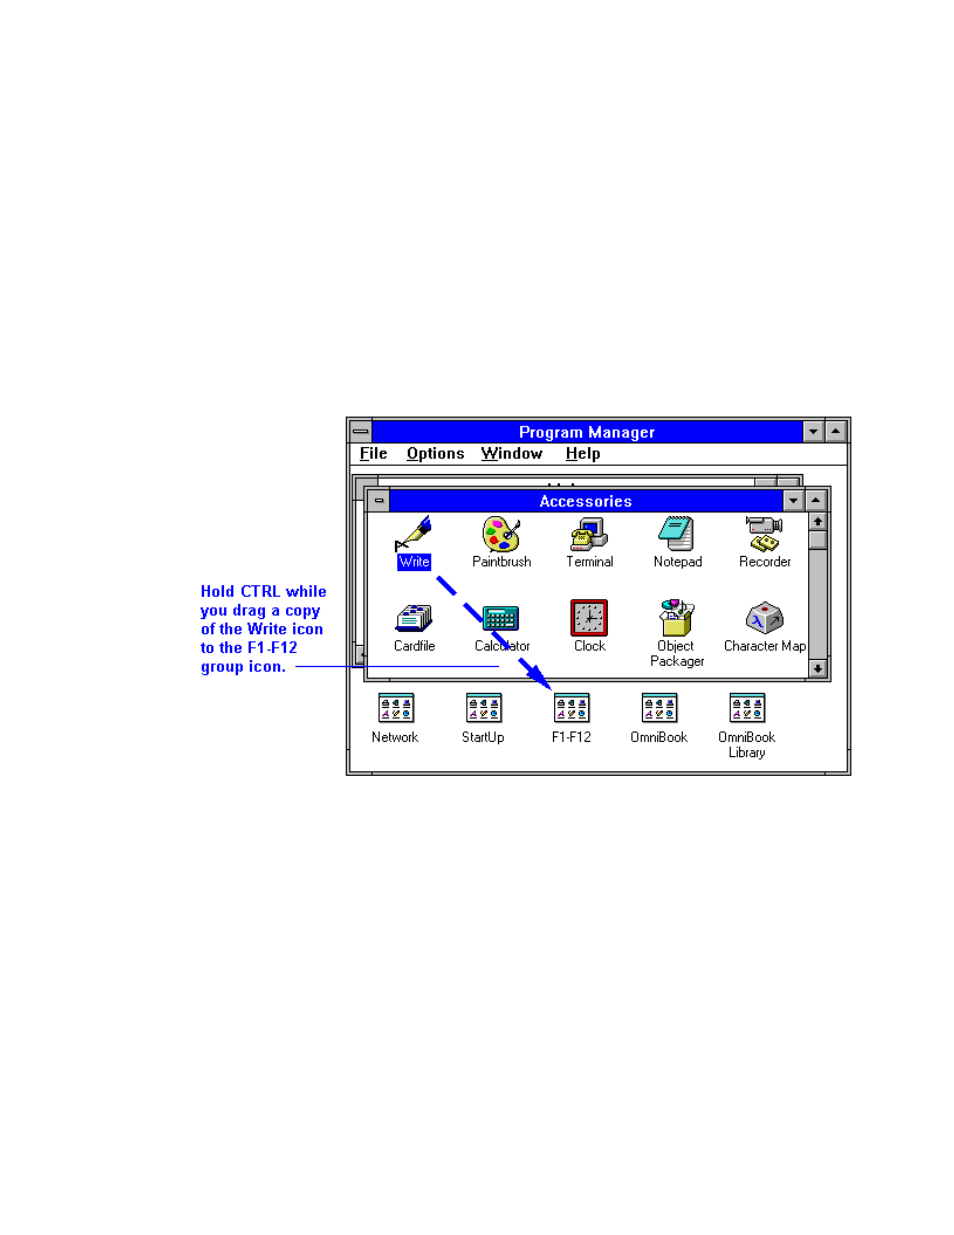
2. Hold down the CTRL key, then move the mouse pointer to the application icon,
press and hold the left mouse button while you drag a copy of the icon onto the
F1–F12 group icon, then release the mouse button and CTRL key. (See the
illustration below.)
This puts a copy of the icon at the end of the F1–F12 group and assigns the
application to the next available function key. The icons in this group
automatically define the FN keys in left-to-right order—you can see the icons if
you double-click the F1–F12 group icon.
3. Press ALT+F4 at the same time to exit Program Manager (and Windows).
4. At the MS-DOS prompt, type win to restart Windows and activate your new FN
key.
Example: Setting Up a FN Key
1. In Program Manager, hold CTRL while you use the mouse to drag a copy of the
Write icon from the Accessories group onto the F1–F12 group icon.
2. Exit Program Manager, then type win.
3. To start Write, press FN and F6 at the same time (assuming only F1 through F5
were already assigned).
To quit any Windows application, you can press the ALT and F4 keys together.
To make a new FN-key icon strip
1. Make sure you’ve installed a printer in Windows.
2. In Program Manager,
open the OmniBook group and double-click the Icon Print
icon.
3. Choose Print. This prints a label that corresponds to the icons in the F1–F12
group.