Smart array controller cable options, Installing the mini-sas p222 cable in a 1u node – HP ProLiant SL210t Gen8 Server User Manual
Page 45
Hardware options installation 45
8.
Connect the 2U adapter cable to the GPU power cable.
9.
Install the node into the chassis ("
Installing a node into the chassis
" on page
10.
Connect all peripheral cables to the node.
11.
Power up the node ("
" on page
Smart Array controller cable options
NOTE:
For more information on cabling configurations, see Cabling (on page
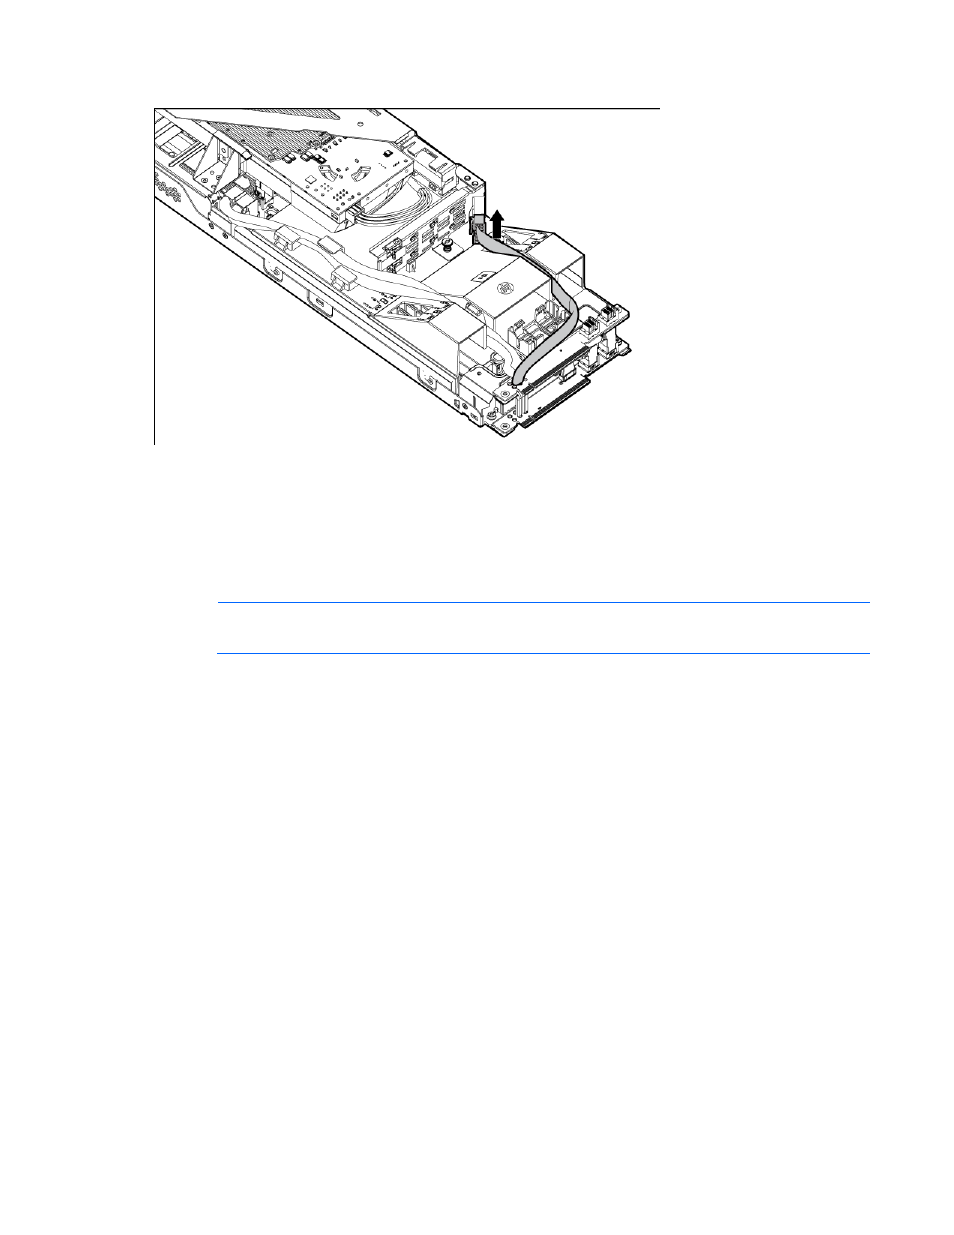
Installing the Mini-SAS P222 cable in a 1U node
1.
2.
Disconnect all peripheral cables.
3.
Remove the node from the chassis (on page
4.
Remove the 1U cable guard (on page
5.
Remove the 1U air baffle (on page
6.
Remove the PCI riser cage (on page
7.
Disconnect and remove the Mini-SAS cable ("
" on page
8.
If not installed, install the P222 Smart Array controller into the PCI riser cage ("
" on page
9.
Connect the Mini-SAS cable x4 connector to the P222 Smart Array controller.
- xt1500 (58 pages)
- LaserJet 4700 (68 pages)
- ProLiant BL460c Gen8 Server Blade (67 pages)
- ProLiant DL360 Server (16 pages)
- ProLiant BL460c Gen8 Server Blade (65 pages)
- ProLiant DL388p Gen8 Server (128 pages)
- ProLiant BL465c Server Blade (87 pages)
- ProLiant DL388p Gen8 Server (47 pages)
- ProLiant BL40p Server series (73 pages)
- ProLiant DL140 G2 Server (81 pages)
- ProLiant ML115 Server (63 pages)
- Servidor HP ProLiant ML370 G4 (20 pages)
- Servidor HP ProLiant ML370 G4 (30 pages)
- Servidor HP ProLiant DL160 G5p (84 pages)
- Servidor HP ProLiant DL980 G7 (143 pages)
- Servidor HP ProLiant DL380 G5 (137 pages)
- Integrity rx2620 Servers (42 pages)
- Integrity rx2620 Servers (48 pages)
- Integrity rx2620 Servers (53 pages)
- Integrity rx2620 Servers (24 pages)
- Integrity rx2620 Servers (33 pages)
- Integrity rx2620 Servers (100 pages)
- Integrity rx2620 Servers (37 pages)
- Integrity Superdome sx1000 Server (53 pages)
- Integrity rx2620 Servers (37 pages)
- Integrity rx2620 Servers (58 pages)
- Integrity rx2620 Servers (77 pages)
- Integrity rx2620 Servers (107 pages)
- Integrity rx2620 Servers (55 pages)
- 9000 rp3440 Servers (36 pages)
- Servidor HP ProLiant DL360p Gen8 (129 pages)
- Servidor HP ProLiant DL120 G6 (133 pages)
- ProLiant DL580 Gen8 Server (91 pages)
- ProLiant MicroServer Gen8 (95 pages)
- ProLiant MicroServer (94 pages)
- ProLiant BL685c G5 Server Blade (99 pages)
- ProLiant Firmware Maintenance CD (87 pages)
- ProLiant BL10e Server Blade (232 pages)
- ProLiant BL40p Server series (30 pages)
- Serveur lame HP ProLiant BL680c G5 (90 pages)
- Serveur lame HP ProLiant BL465c Gen8 (578 pages)
- ProLiant DL320e Gen8 Server (96 pages)
- ProLiant ML110 G7 Server (113 pages)
- 9000 rp8420 Servers (38 pages)
- Integrity Superdome sx1000 Server (19 pages)