Expansion board options, Installing an expansion board – HP ProLiant SL210t Gen8 Server User Manual
Page 42
Hardware options installation 42
c.
Disconnect and remove the Mini-SAS cable ("
" on page
5.
In a 2U node configuration:
a.
Remove the PCI riser cage (on page
b.
Remove the 2U adapter board bracket (on page
c.
Disconnect and remove the Mini-SAS cable ("
" on page
d.
Remove the 2U air baffle (on page
6.
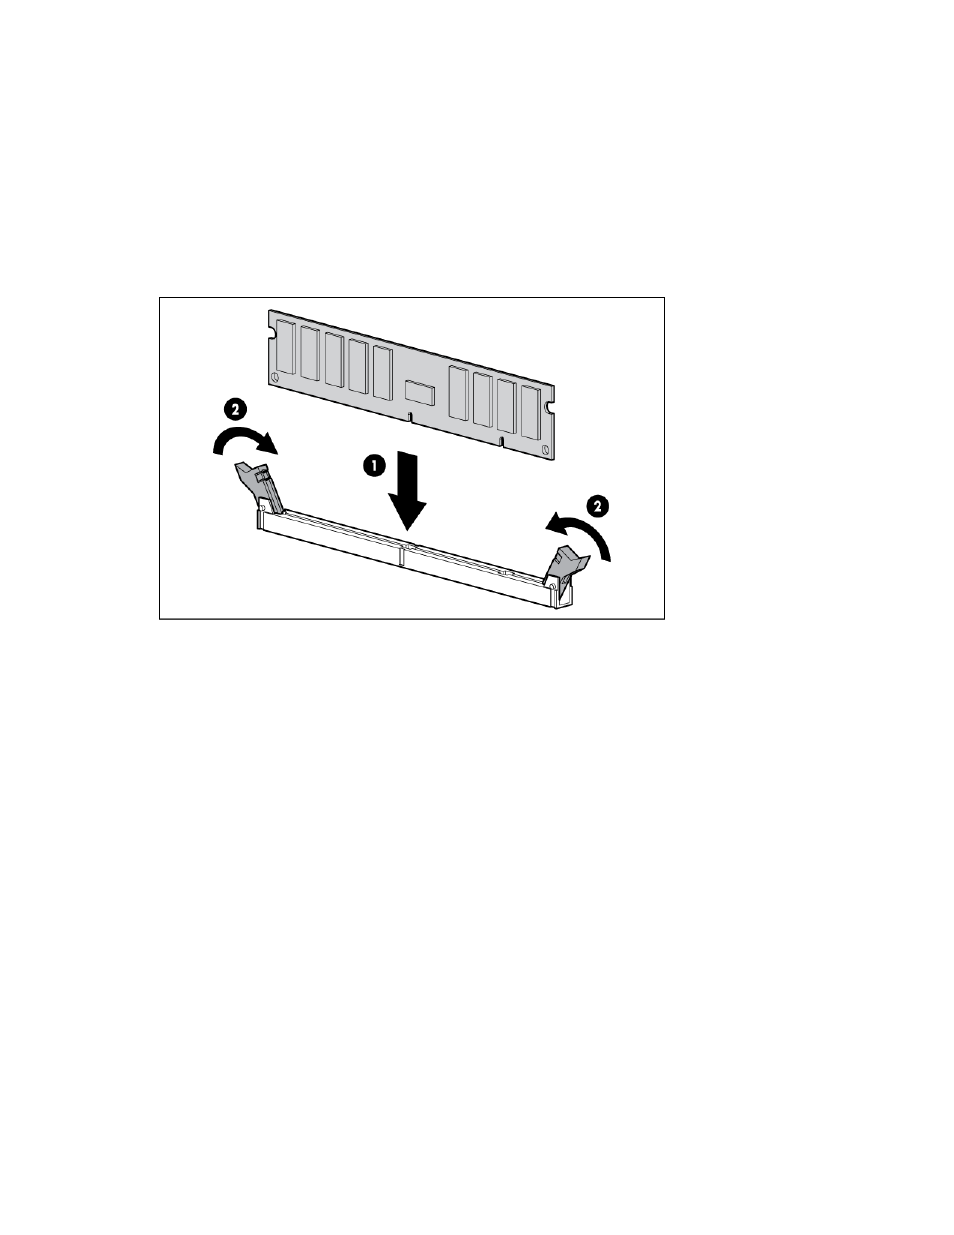
Open the DIMM slot latches.
7.
Install the DIMM.
8.
In a 1U node configuration:
a.
Connect the Mini-SAS cable (on page
b.
Install the 1U air baffle (on page
c.
Install the 1U cable guard (on page
9.
In a 2U node configuration:
a.
Install the 2U air baffle (on page
b.
Connect the Mini-SAS cable (on page
c.
Install the 2U adapter board bracket (on page
d.
Install the PCI riser cage (on page
10.
Install the node into the chassis ("
Installing a node into the chassis
" on page
11.
Connect all peripheral cables to the node.
12.
Power up the node ("
" on page
To configure the memory mode, use RBSU ("
" on page
Expansion board options
Installing an expansion board