HP Storage Mirroring V5 Software User Manual
Page 30
7 - 6
Volumes, folders, and files that are marked with a checkmark are included. If there is no
checkmark, the item is excluded. Expand and collapse the directory tree and click on an item to
add or remove a checkmark. Once you have configured the data to recover, click Next to
continue.
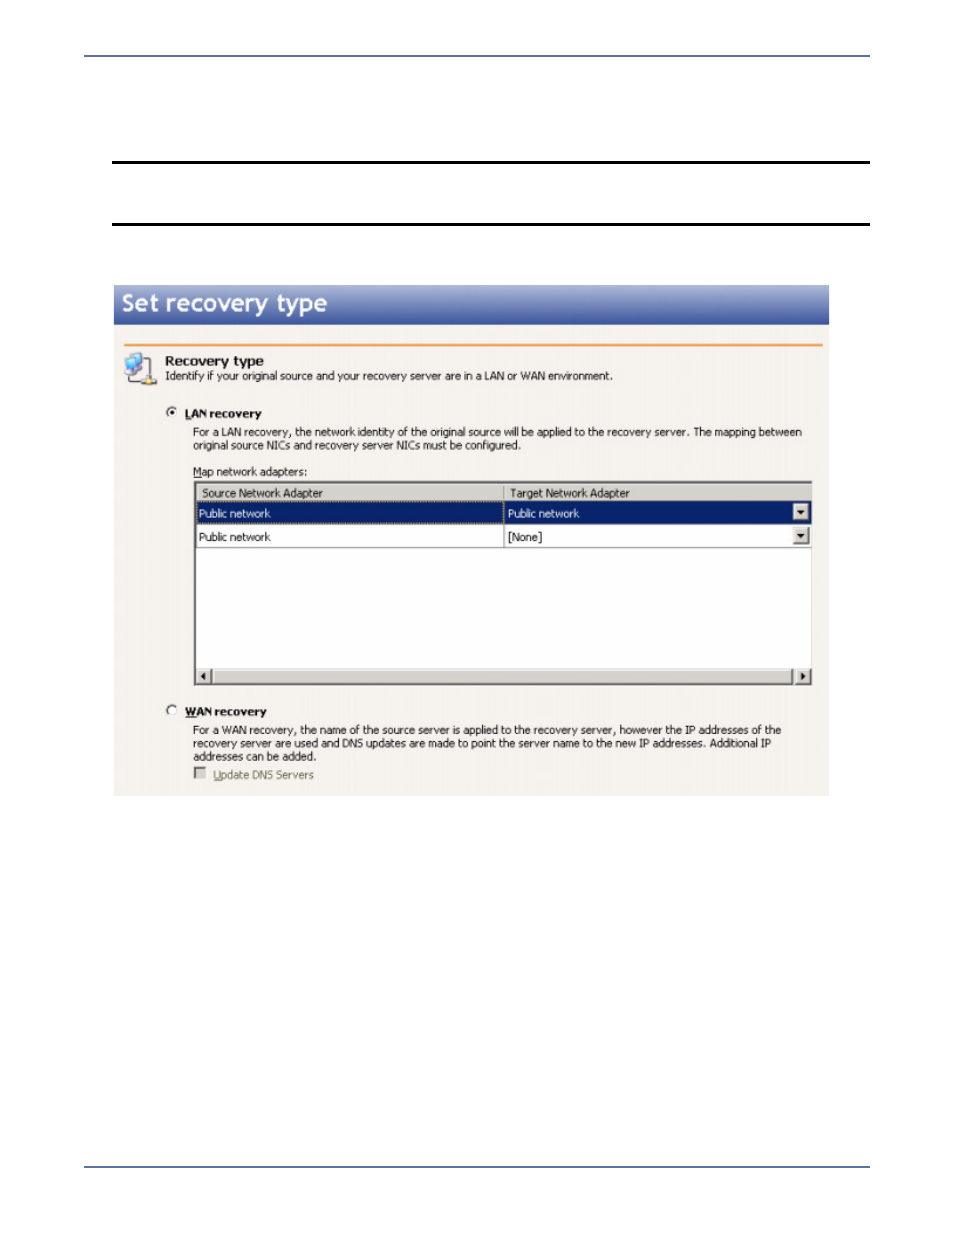
9.
Specify if your recovery server is in a LAN or WAN environment with respect to your original
source.
LAN recovery—If your recovery server is on a LAN with your original source, the original
source name and the IP address(es) will be applied to the recovery server. Specify which
network adapters on the recovery server that you want to take over for the network adapters
on the original source.
WAN recovery—If your recovery server is located across a WAN from your original source,
the original source name will be applied to the recovery server, but the IP address(es) of the
original source will not be used. Instead, the IP address(es) of the recovery server will be
used. If desired, you can select to Update DNS servers, which will allow you to specify how
to resolve server names and IP addresses. If you do not select Update DNS Servers, you
must manually modify DNS after the recovery is complete.
10.
Click Next to continue.
11.
If you selected to update your DNS servers for a WAN recovery type, specify your DNS update
options.
DNS Domains—Click Add and specify the name of your DNS Domain. Repeat this for each
DNS domain. If you want to remove a domain, highlight the name and click Remove.
User name—Highlight a DNS domain and specify a user account that has privileges to update
DNS.
Password—Specify the password associated with the user account you entered.
NOTE:
The Select all and Deselect all buttons allow you to quickly select or deselect all
user data on your server. These buttons do not change the selection of system state
data, which is defined by Server Image Copy and cannot be modified manually.