HP OmniBook 3100 Notebook PC User Manual
Page 30
30
To insert or eject a floppy disk
When the OmniBook is reading or writing data to the floppy drive,
the floppy disk indicator appears on the status panel.
Caution
Do not insert or remove a floppy disk while the OmniBook is actively reading
or writing data. Wait until the floppy drive is done. Otherwise, you could lose
data or the OmniBook could stop responding.
•
Hold the disk with its face up, then slide it into the floppy drive slot (on the right
side of the OmniBook) until it clicks into place.
•
To remove the floppy disk, press the eject button next to the slot.
To insert or remove a CD
When the OmniBook is reading data from the CD-ROM drive, the
CD-ROM/hard disk drives indicator appears on the status panel.
Caution
Do not insert or remove a CD while the OmniBook is actively reading data.
Wait until the CD-ROM drive is done. Otherwise, the OmniBook could stop
responding.
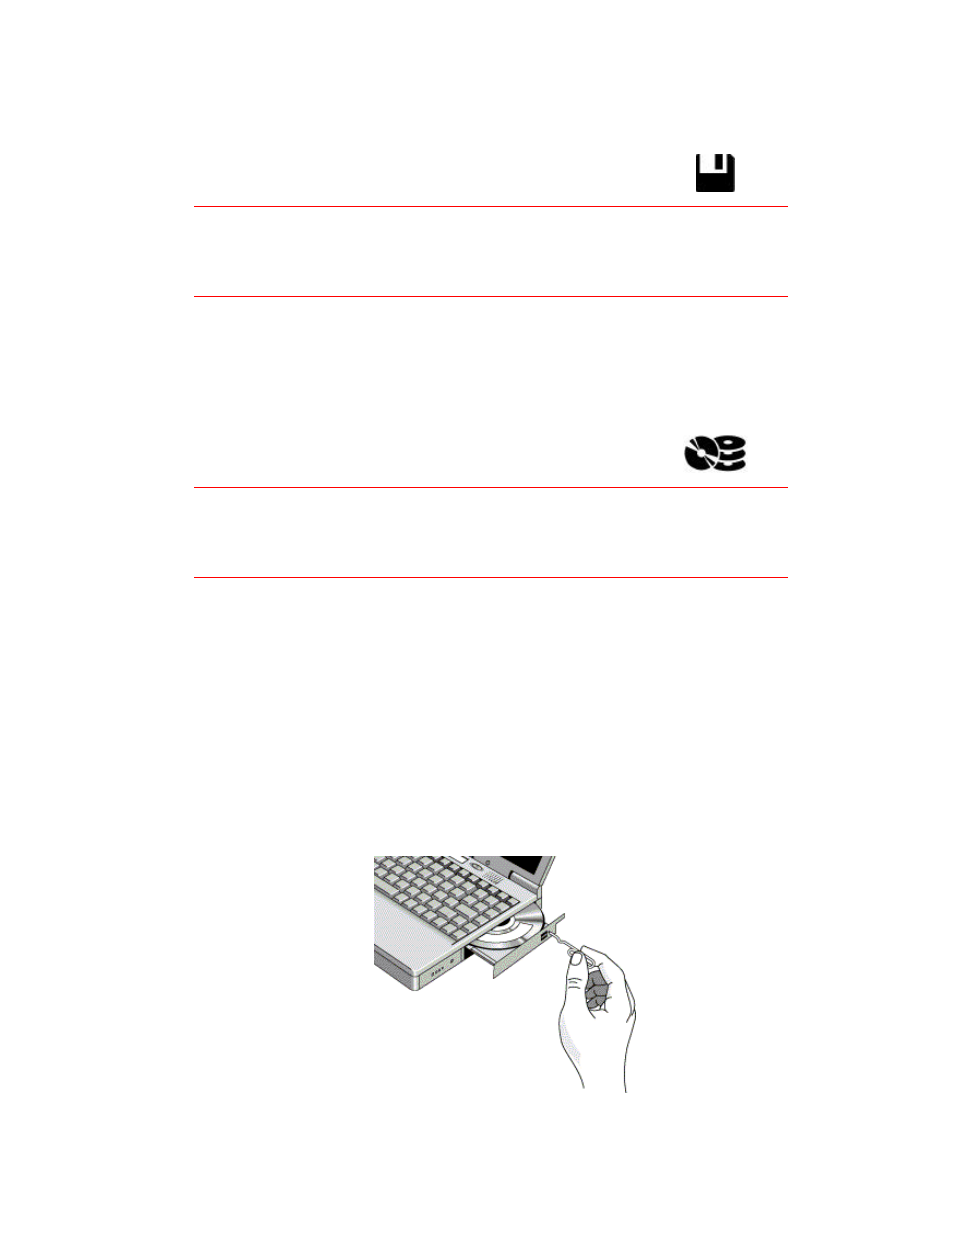
1. Press the button on the face of the CD-ROM drive.
2. If you are using this drive for the first time, be sure to remove the cardboard
packing insert.
3. Place the CD into the drive (label facing up) and gently press down to seat the
CD on the spindle.
–or–
Remove the CD.
4. Slide the CD-ROM tray back into the module to close it.
If the CD-ROM drive has no power, you can still open the drawer of the CD-ROM
drive by inserting a straightened paper clip into the recessed hole as shown above.