Creating a managed project from scratch – HP Integrity NonStop H-Series User Manual
Page 15
This section also provides an example of how to create multiple managed projects to build a single
application.
NOTE:
For the most detailed descriptions of project wizards, read the sections about creating
projects from scratch. Other sections regarding project creation provide much less detail and,
instead, focus on short descriptions of how to create projects.
Creating a managed project from scratch
Before creating a managed project, you need to decide what the primary language for the project
will be. The primary language determines the linker used to create the final build object. You'll
also need to decide whether the final build object will be an executable or some type of library.
Project creation is quite similar for all managed projects regardless of language. This section
provides an example of creating a C executable project to help get you started.
To create a C project, perform the following steps from the NonStop Development perspective:
1.
Select New > C Project from the context menu of the NonStop Project Explorer view.
Alternatively, you can select File > New > C Project or select C Project from the New NonStop
Project icon pull-down menu in the main tool bar.
2.
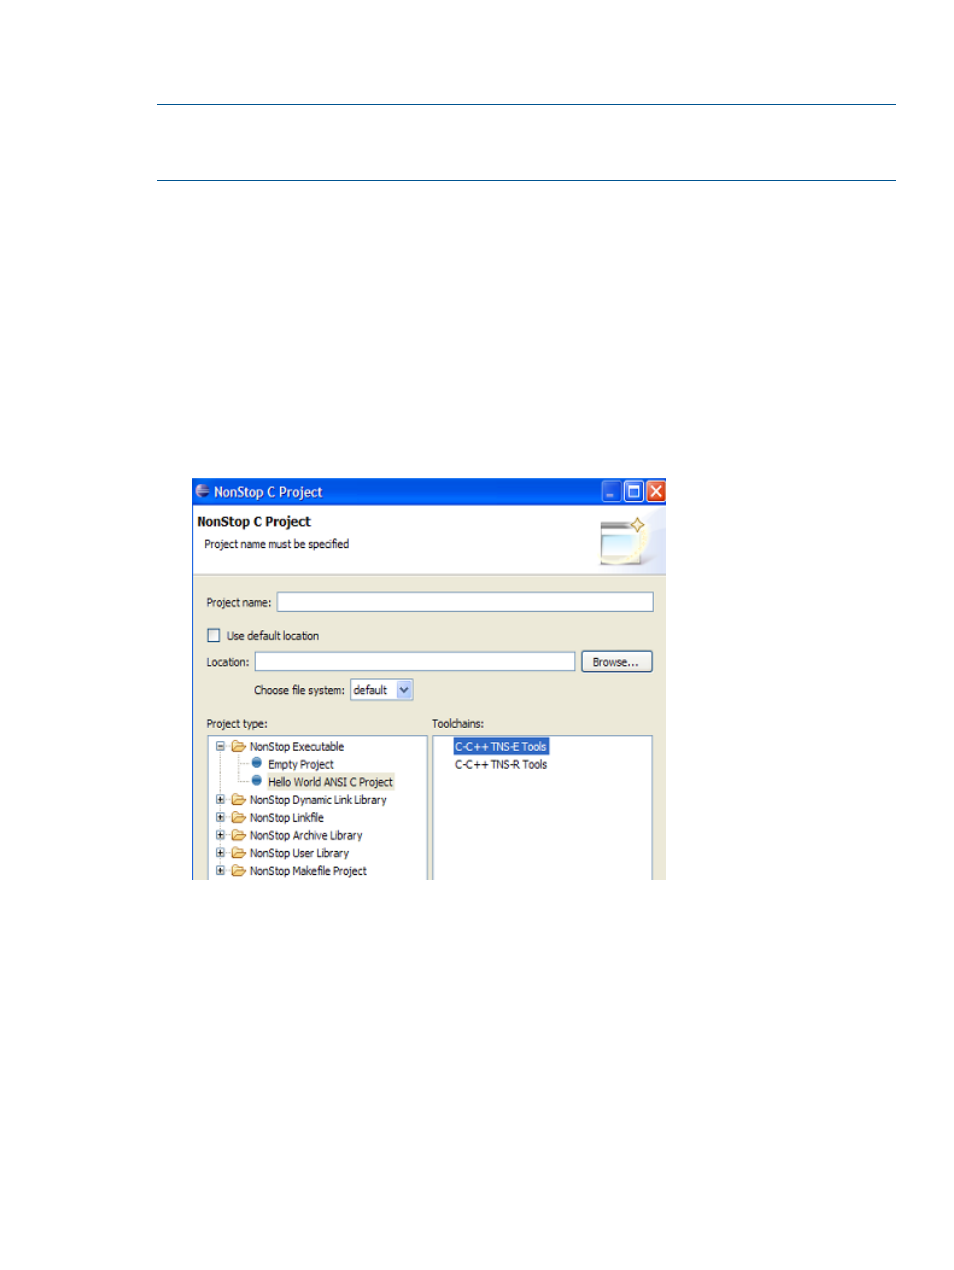
In the resulting NonStop C Project wizard:
a.
Enter a name for your project in the Project name: field.
b.
Optionally: deselect the Use default location checkbox and enter a location where you
want your project stored. If you don't do this, NSDEE will, by default, create your project
as a top-level directory in your workspace directory.
c.
Select Hello World ANSI C Project in the NonStop Executable folder. This will result in
NSDEE creating an initial source file for you that simply declares main() and prints a
text string.
d.
Under Toolchains:, select C-C++ TNS-E Tools. Tool chains define the cross compilers,
linkers, and other tools associated with building for a particular NonStop architecture.
By default, NSDEE creates two build configurations for each tool chain you select: one
for debug builds and one for release builds.
3.
Select Next >. The resulting Basic Settings page is shown because you selected Hello World
ANSI C Project. (It would not be shown if you had selected Empty Project instead.)
Creating projects
15