Adding an snmp trap destination – HP Virtual Connect 8Gb 24-port Fibre Channel Module for c-Class BladeSystem User Manual
Page 39
Virtual Connect domains 39
Task
Action
Delete SNMP access
Click Delete in the Action column, or right-click on the SNMP Access row,
and then select Delete.
Add an SNMP trap destination
("
" on page
Click Add below the destination table, or right-click on the header row of
the destination table, and then select Add Destination.
Edit an SNMP trap destination
Click Edit in the Action column, or right-click on the trap destination row,
and then select Edit Destination.
Delete an SNMP trap destination Click Delete in the Action column, or right-click on the trap destination
row, and then select Delete Destination.
Save changes
Click Apply.
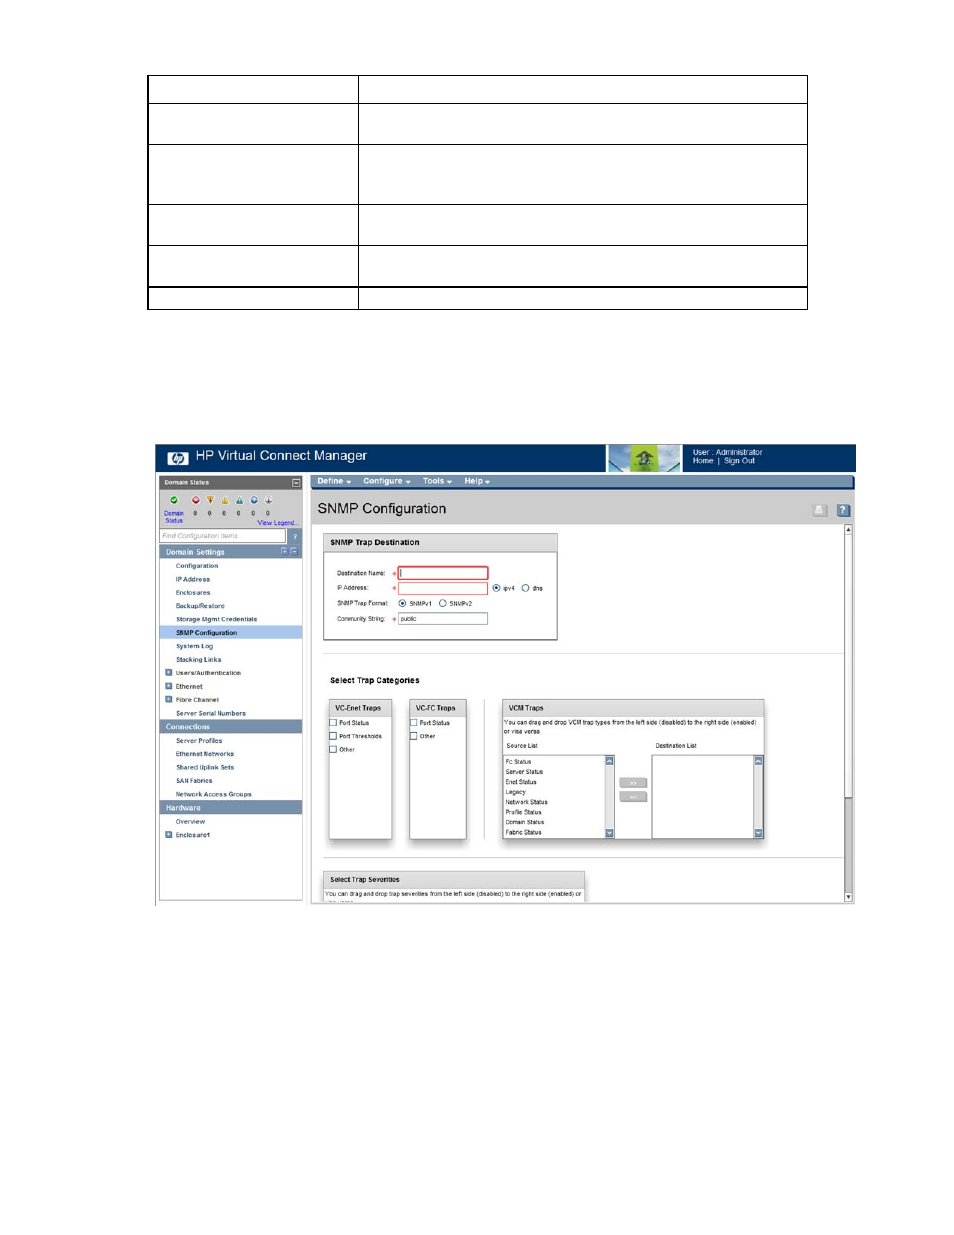
Adding an SNMP trap destination
To add an SNMP trap destination, right-click the header row of the SNMP Trap Destination table, or click
Add Destination at the bottom of the SNMP Trap Destination table.
You can configure up to five VC-Enet and five VC-FC SNMP trap destinations. To add an SNMP trap
destination:
1.
Enter a unique name for the new trap being added. No spaces are allowed.
2.
Enter the IPv4 address or DNS name for the trap destination. DNS is not supported for VC-FC modules.
3.
Select the Trap Format: SNMPv1 or SNMPv2. SNMPv2 is not supported for VC-FC modules.
4.
Enter the SNMP trap community string for the specified trap. The default is "public."
For VC-Enet modules, the maximum trap community string length is 39.
For VC-FC modules, the maximum trap community string length is 24.
- Virtual Connect Flex-10 10Gb Ethernet Module for c-Class BladeSystem Virtual Connect 8Gb 20-port Fibre Channel Module for c-Class BladeSystem Virtual Connect 4Gb Fibre Channel Module for c-Class BladeSystem Virtual Connect Flex-10.10D Module for c-Class BladeSystem Virtual Connect FlexFabric 10Gb24-port Module for c-Class BladeSystem 4GB Virtual Connect Fibre Channel Module for c-Class BladeSystem