Configuring network settings using a web browser, Configuring network settings using the clp – HP ProLiant DL145 G3 Server User Manual
Page 49
Using LO100 49
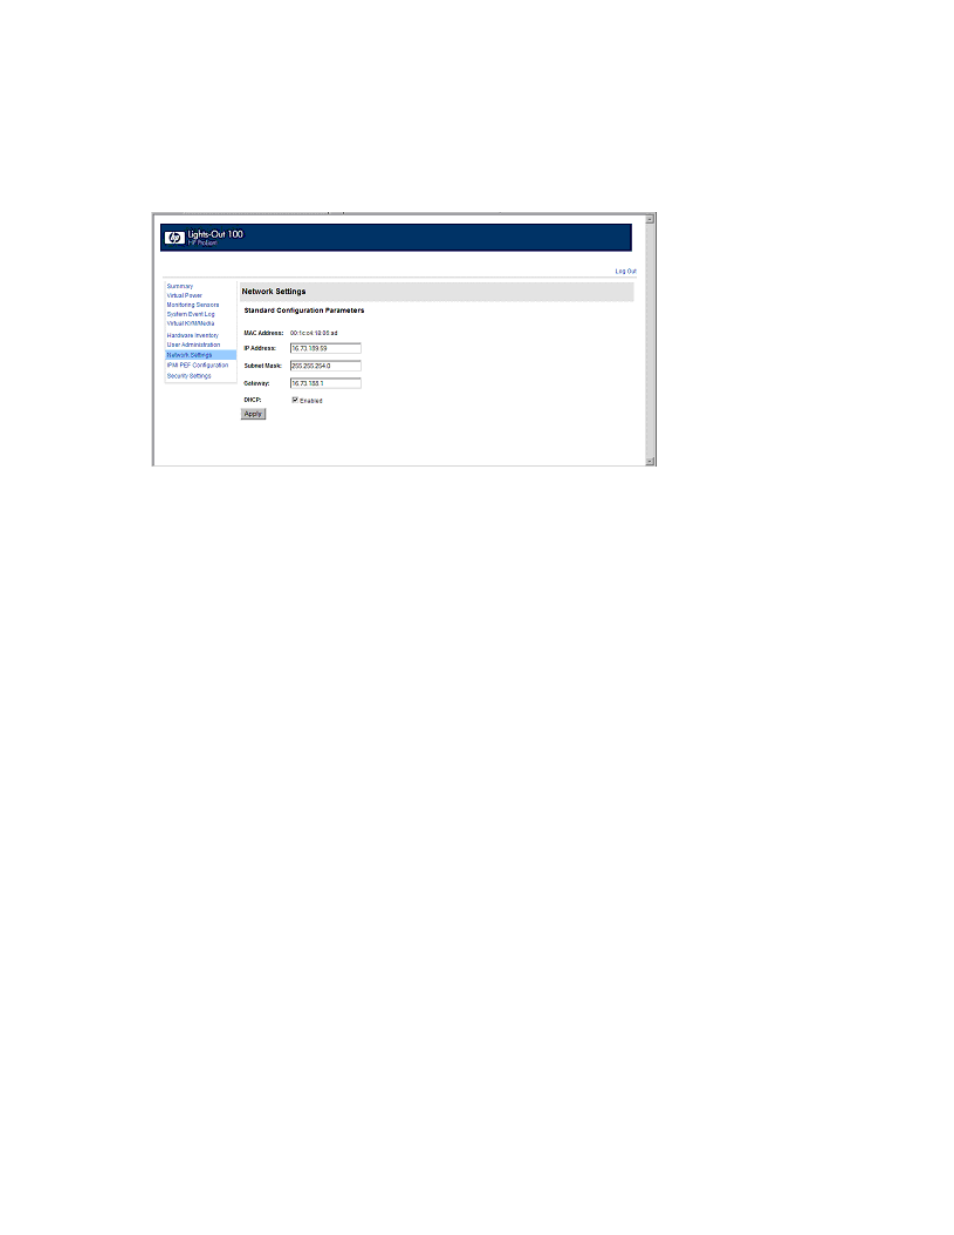
Configuring network settings using a web browser
The Network Settings screen displays IP address, subnet mask, and other TCP/IP-related settings. From the
Network Settings screen, you can enable or disable DHCP and configure a static IP address for servers
not using DHCP. You can view and modify the network settings when logged in as either OEM or
administrator (admin).
To modify the network settings, on the browser main menu navigation bar, click Network Settings, enter
the new settings, and then click Apply.
Configuring network settings using the CLP
1.
Log in to LO100 CLP as described in the "Logging in to LO100 (on page
2.
At the command prompt, enter cd map1/nic1.
3.
Configure the network settings by entering the following: set
o
networkaddress specifies the IP address for the NIC. This setting is dynamic.
o
oemhp_nonvol_networkaddress specifies the IP address stored in non-volatile memory.
o
oemhp_mask specifies the subnet mask for NIC. This setting is dynamic.
o
oemhp_nonvol_mask specifies the subnet mask stored in non-volatile memory.
o
oemhp_gateway specifies the gateway IP address for the NIC. This setting is dynamic.
o
oemhp_nonvol_gateway specifies the gateway IP address stored in non-volatile memory.
o
oemhp_dhcp_enable specifies whether DHCP is enabled for the NIC. Boolean values are
accepted
o
oemhp_nonvol_dhcp_enable specifies whether DHCP is enabled for the NIC and address
stored in non-volatile memory.
Configuring network settings using the BIOS Setup Utility
To enable a static IP address:
1.
Press the F10 key during POST to enter the BIOS Setup Utility.
2.
Press the right arrow (→) key to navigate to the Advanced menu.
3.
Press the down arrow (↓) key to scroll to IPMI. Press the Enter key.