Asus TS300-E3 User Manual
Page 133
A S U S T S 3 0 0 - E 3
A S U S T S 3 0 0 - E 3
A S U S T S 3 0 0 - E 3
A S U S T S 3 0 0 - E 3
A S U S T S 3 0 0 - E 3
6 - 7
6 - 7
6 - 7
6 - 7
6 - 7
4.
Select all the drives required for the RAID set, then press
The configurable array appears on screen.
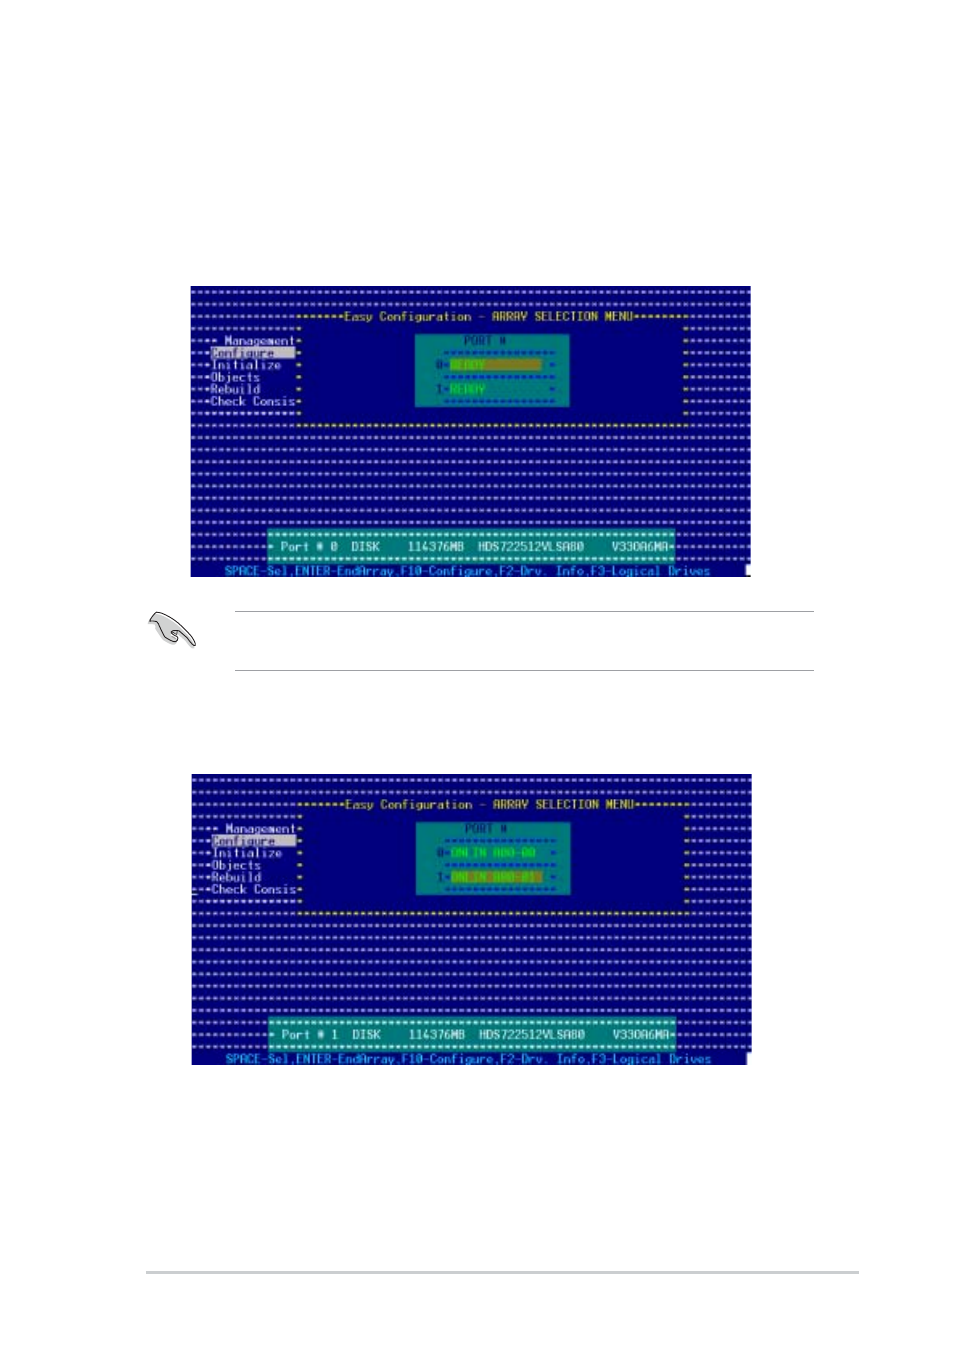
3.
The A R R A Y S E L E C T I O N M E N U
A R R A Y S E L E C T I O N M E N U
A R R A Y S E L E C T I O N M E N U
A R R A Y S E L E C T I O N M E N U
A R R A Y S E L E C T I O N M E N U displays the available drives
connected to the SATA ports. Select the drives you want to include in
the RAID set, then press
indicator changes from R E A D Y
R E A D Y
R E A D Y
R E A D Y
R E A D Y to ONLIN A[X]-[Y]
ONLIN A[X]-[Y]
ONLIN A[X]-[Y]
ONLIN A[X]-[Y]
ONLIN A[X]-[Y], where X is the
array number, and Y is the drive number.
The information of the selected hard disk drive displays at the bottom of
the screen.