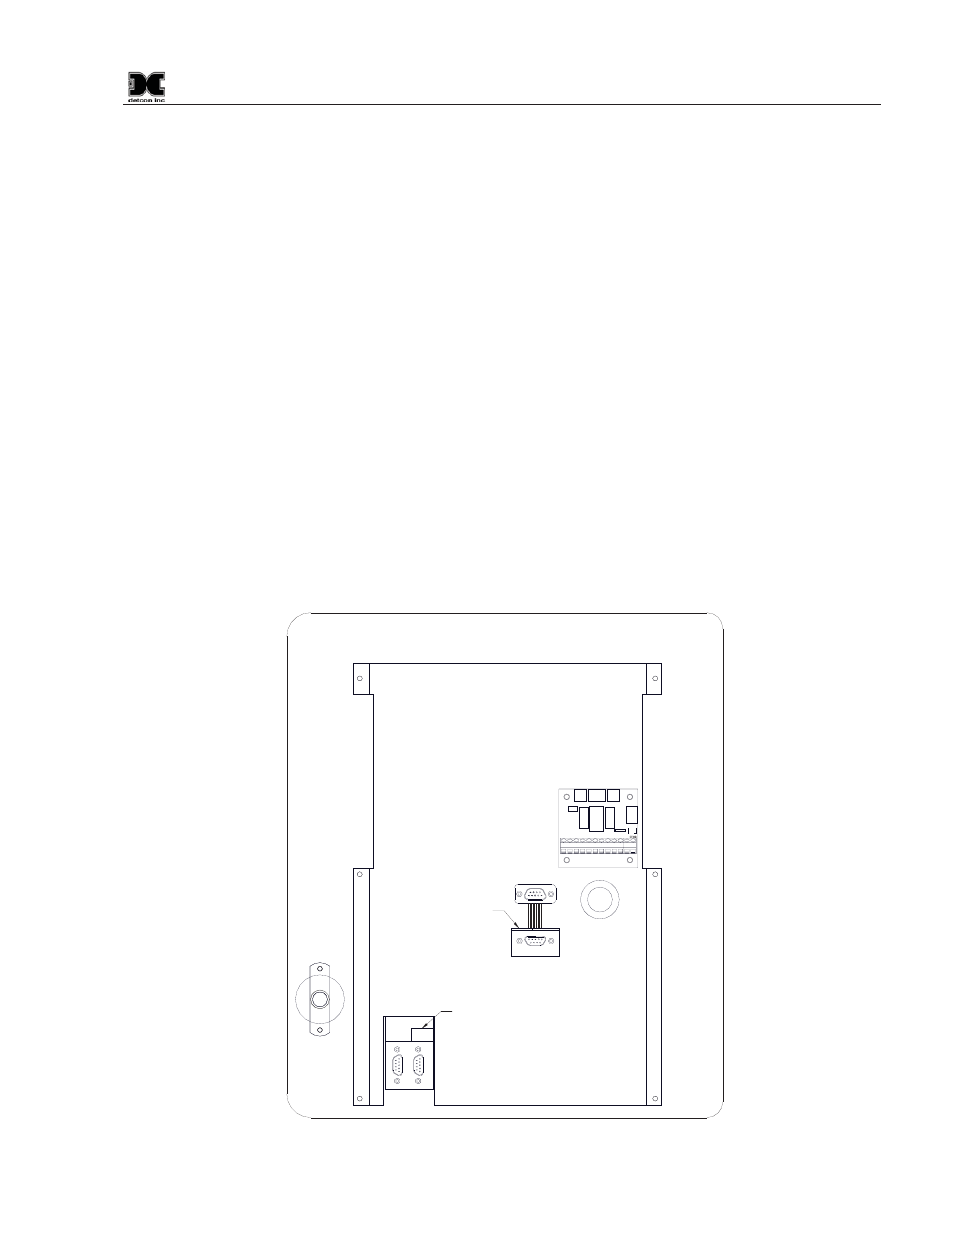
2 plc upgrade, Figure 34 display back panel – Detcon 1600A-N4X User Manual
Page 31
1600A-N4X
1600A-N4X Instruction Manual
Rev. 0.2
Page 27 of 38
12. “Downloading successful” will display on the ProSave software once firmware upgrade has
completed.
13. Remove USB/PPI cable from touch screen.
14. Cycle the power on the Model 1600A.
15. Verify the proper touch screen firmware version has been loaded.
Touch screen version can be found in the top right corner of the “Screen Utilizes” menu.
Program Menu Ź Screen Utilities: HMI v.XX
5.6.2 PLC Upgrade
1. Install memory cartridge with new firmware (refer to Figure 34 for memory cartridge location).
2. Cycle the power on the Model 1600A.
Firmware and CPU configuration are copied to the system once the system power cycles.
This operation takes approximately 15 seconds.
3. Once the 1600A power has been cycled and the unit has returned to normal operation, remove memory
cartridge.
NOTE: Powering on a PLC with a blank memory cartridge, or a memory cartridge that was
programmed in a different model of PLC will cause an error.
4. Verify the proper PLC firmware version has been loaded.
PLC version can be found in the top right corner of the “Screen Utilizes” menu.
Program
Menu
Ź Screen Utilities: PLC v.XX
Memory
cartridge
USB/PPI cable to
Touch Screen
9-Pin Male
connector
J1
J2
J3
J4
J5
U1
U2
1
3
4
5
6
7
8
9
10
12
11
2
K1
XPS
N
PW
R
XPS
N
GN
D
SC
R
N
PW
R
SC
R
N
GN
D
PL
C
PW
R
PL
C
GN
D
NO CO
M
FL
T
RS
T
A
B
+
-
NC
NO
C
+
-
A
B
SH
L
D
FLT
/C
OM
M
RES
ET
PO
WE
R
RS
-485
Figure 34 Display Back Panel