Operations of the mx100 standard software, Connecting to or disconnecting from the mx100 – Yokogawa PC-Based MX100 User Manual
Page 26
6
IM MX100-0E
Operations of the MX100 Standard Software
Connecting to or Disconnecting from the MX100
Before carrying out the following procedure, check that the power switch on
the MX100 is ON and that the PC is connected to the MX100 locally in a one-to-
one relationship as shown under “Connection to the PC” in “Connection to the
Network.”
When Connecting for the First Time
1.
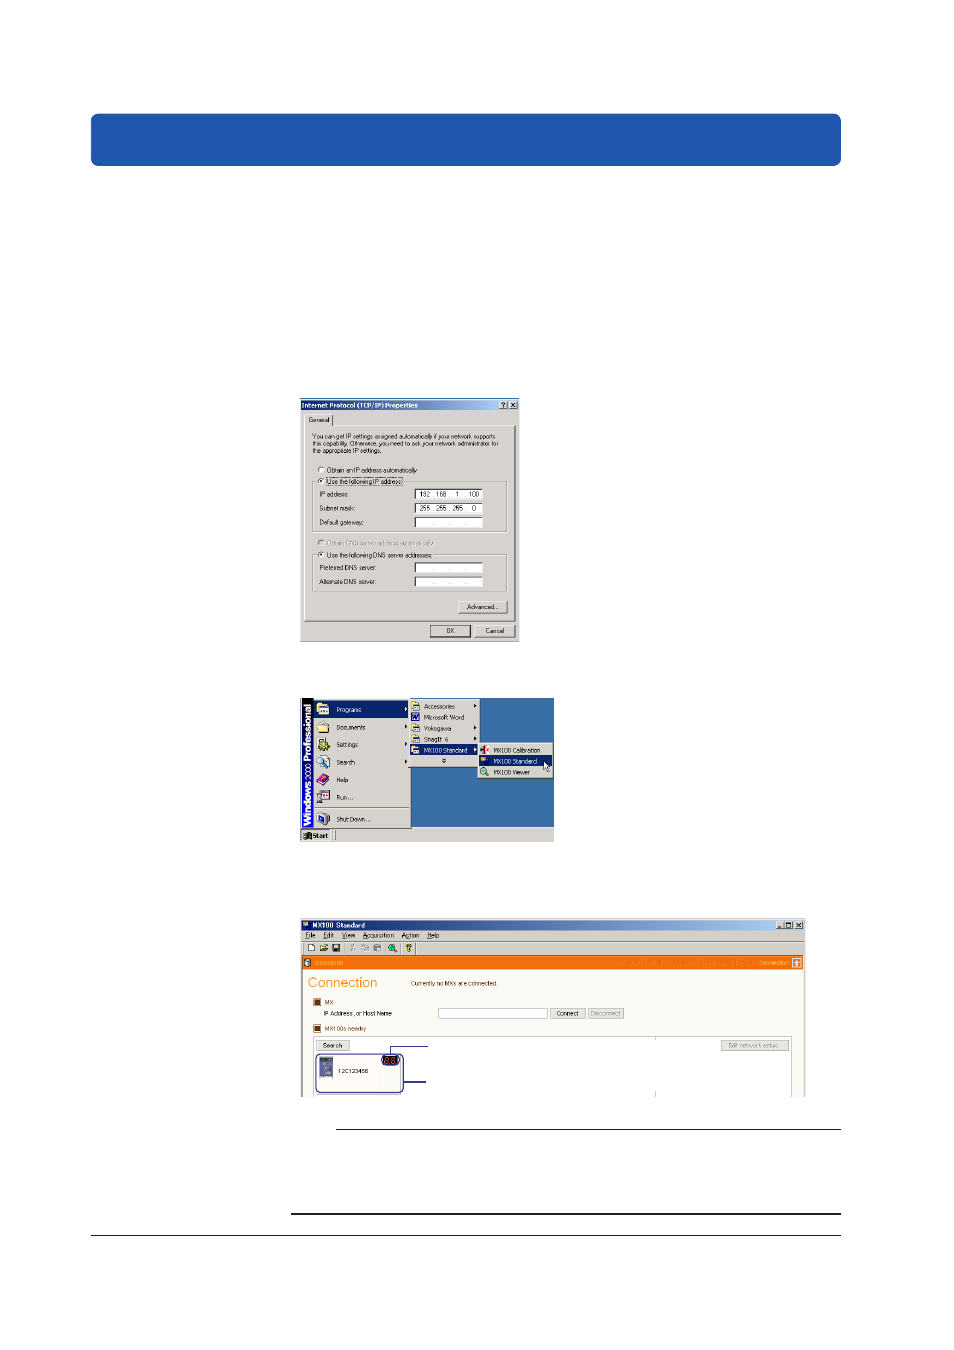
Enter the IP address and subnet mask of the PC as shown in the figure below.
Set the IP address of the PC to a fixed address (192.168.1.100, for example), not dynamically.
Set the subnet mask to 255.255.255.0. Leave the default gateway blank or set it to 0.0.0.0.
The dialog box in the left figure appears
on Windows 2000. To open this dialog
box, choose
Properties from the My
Network Places short-cut menu. Then,
choose
Local Area Connection >
Properties under the General tab >
Internet Protocol (TCP/IP) > Properties.
On Windows XP, open
Control Panel,
choose
Network and Internet
Connections > Network Connections >
Local Area Connection Properties >
Internet Protocol (TCP/IP) under the
General tab > Properties.
2.
Click
Programs > MX100 Standard > MX100 Standard.
The Integration Monitor starts.
3.
Click
Search.
If an MX100 is found, icons appear in the frame containing the Search button for MX100s in the
same network segment.
Icon indicating the connected MX100
Clicking here causes the 7-segment LED of
the connected MX100 to display --CALL--.
Note
• If an icon for an MX100 does not appear, see “When Connection Cannot Be Made or When
Connecting to Another MX100.”
• If multiple MX100s are connected in the same network segment, all of those MX100s are
detected and their icons are displayed.