4 replacing the installation gasket, 4 replacing the installation gasket -6, Replacing the installation gasket – Proface APL3000B - Node Box PC User Manual
Page 75: 6 4.4 replacing the installation gasket
PS-3650A/PS-3651A Series Hardware Manual
4-6
4.4
Replacing the Installation Gasket
The installation gasket provides protection against dust and moisture.
Installation Gasket Attachment Procedure
(1)
Place the PS-A unit on a flat, level surface facing the display face downwards.
(2)
Remove the gasket from the PS-A unit.
(3)
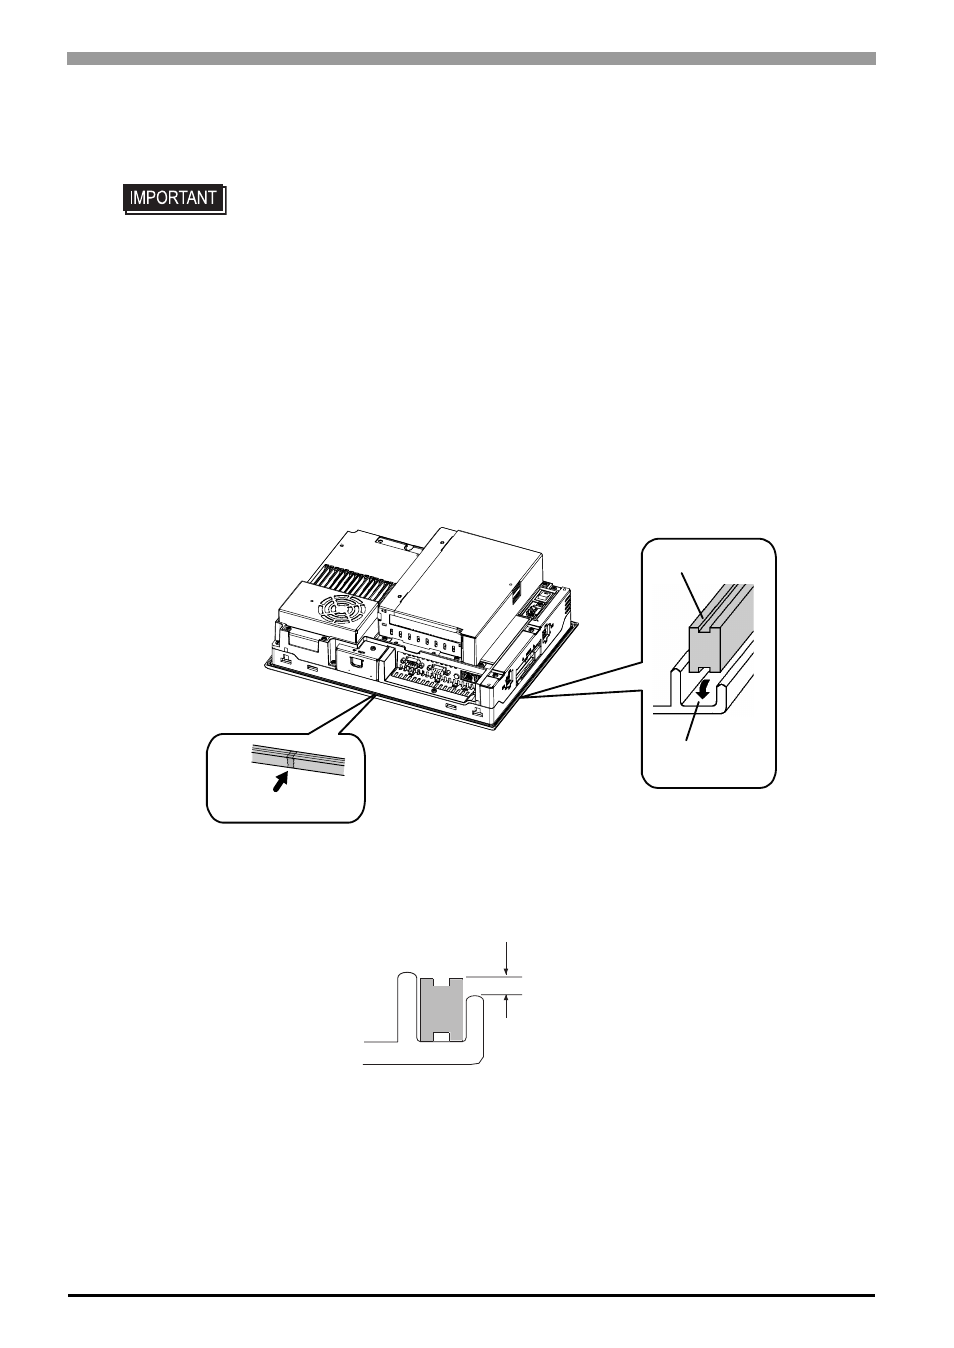
Attach the new gasket to the PS-A unit. Be sure to insert the gasket into the PS-A unit’s groove so that
the gasket’s groove sides are vertical.
(4)
Check that the gasket is attached correctly to the PS-A unit. The upper surface of the gasket should
protrude approximately 2 mm [0.08 in.] out of the groove evenly.
• A gasket which has been used for a long period of time may have scratches or dirt
on it, and could have lost much of its water resistance. Be sure to change the gasket
at least once a year, or when scratches or dirt become visible.
• The PS-A unit installation gasket’s model number is CA3-WPG12-01.
PS-A Rear Face
Gasket Seam
Gasket
Installation
Groove
2.0 [0.08]
Unit: mm [in.]