WEATHER GUARD 1225 User Manual
Page 7
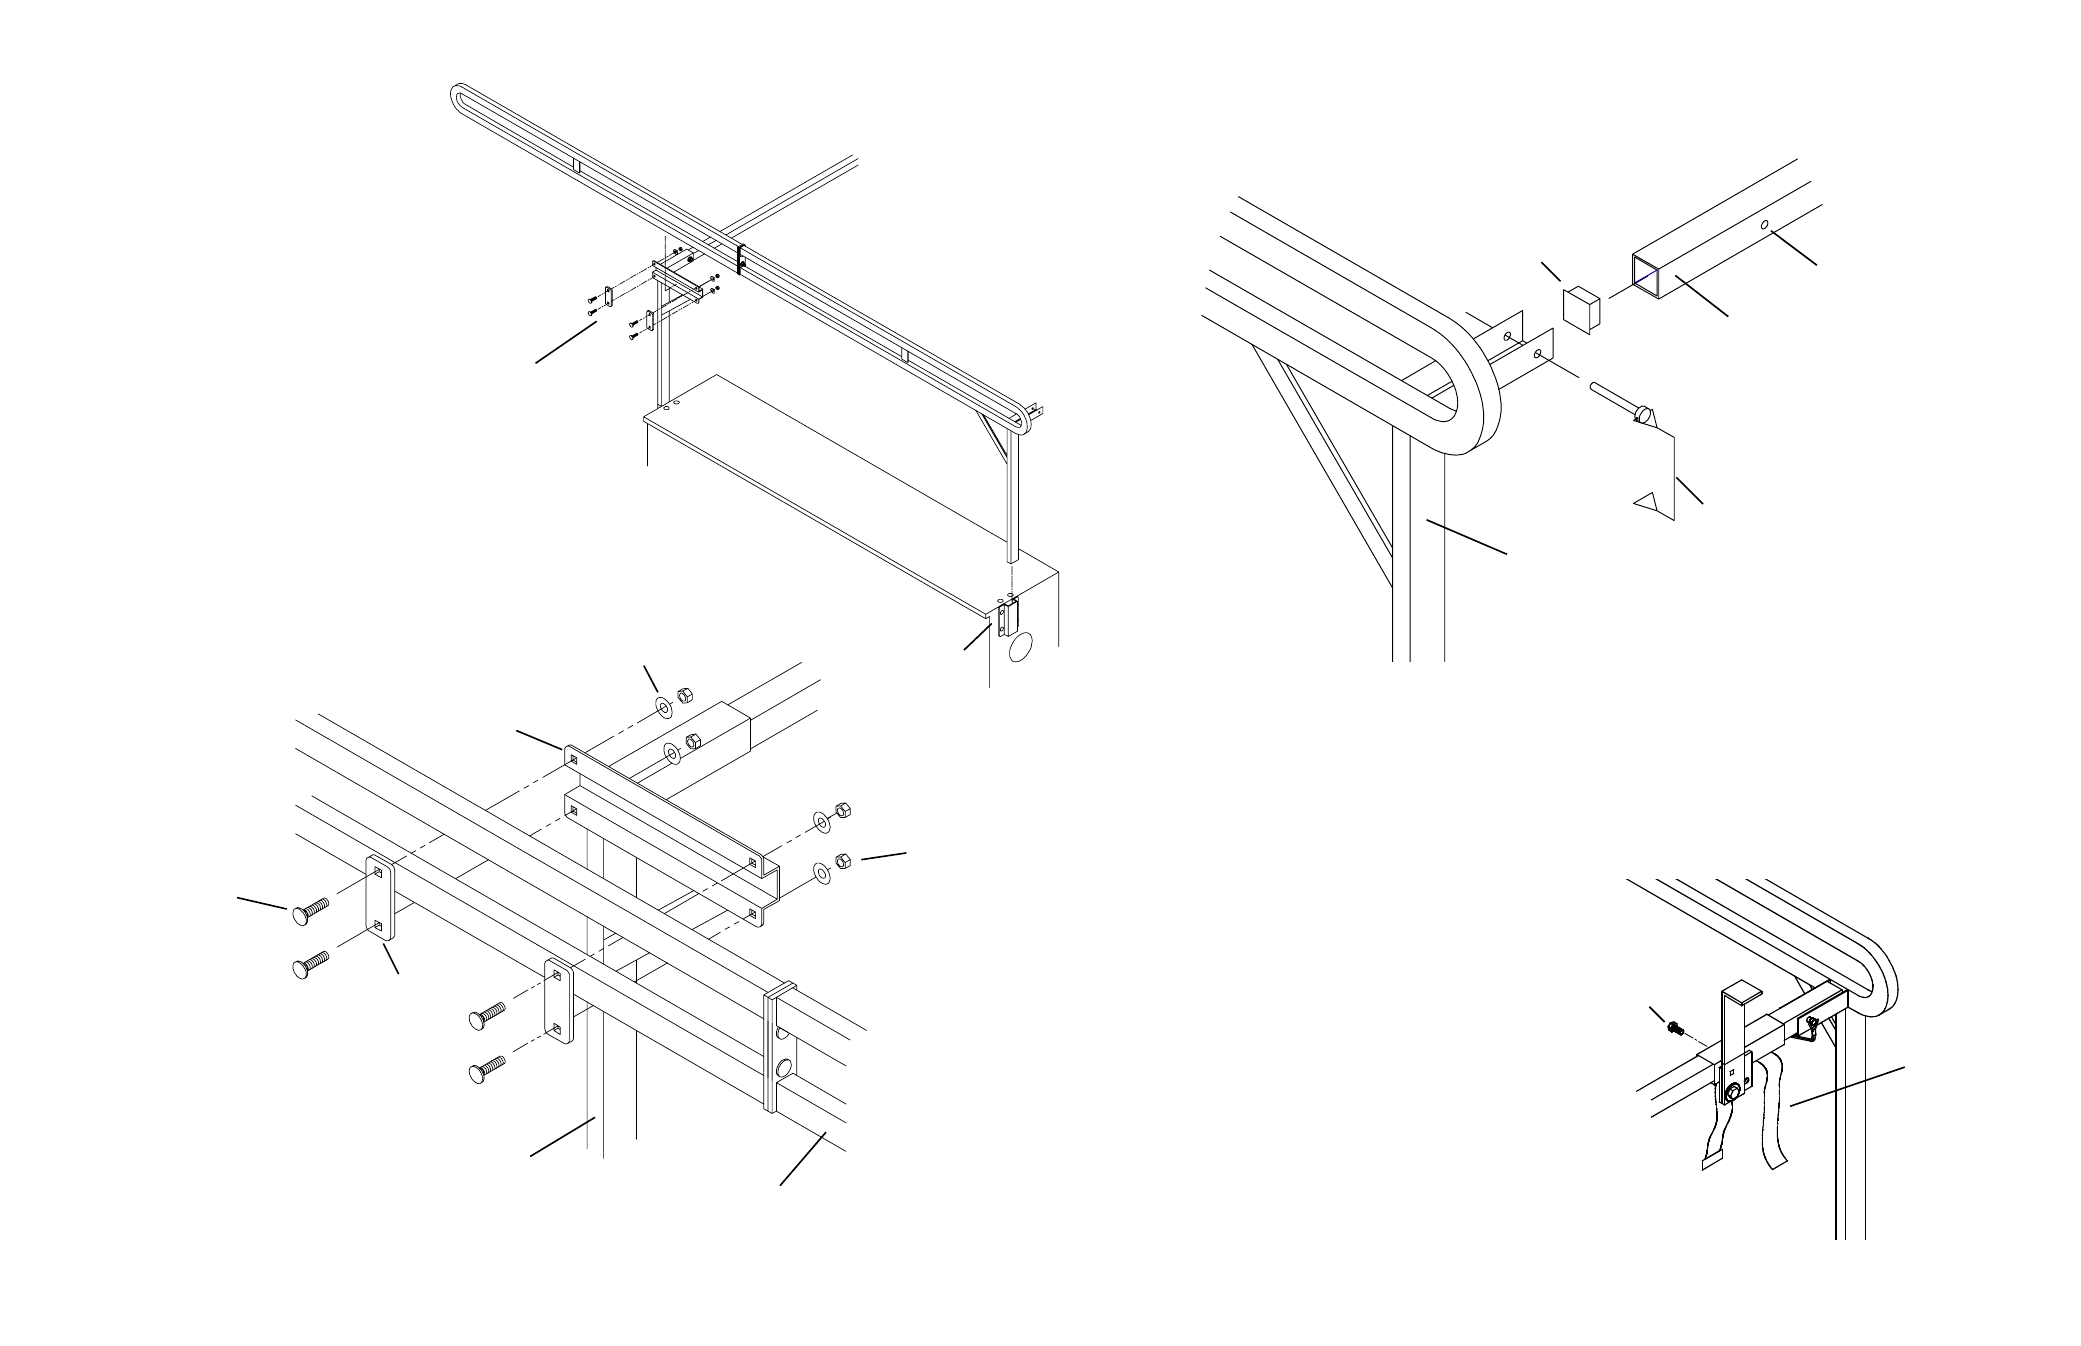
8. Rear Crossmember -
Place the Crossmember in the sockets, center it,
then mark the socket holes. Remove the Crossmember and drill the marks with a
3/8" drill bit. Install the Black Plugs in the Crossmember, replace the Crossmem-
ber in the sockets and install the Snapper Pins (see Figure 18.).
Snapper
Pin
Square
Cap Plug
3/8
Hole
Figure 18. Rear Crossmember Detail - Driver Side only shown -
procedure is the same for Passenger Side
7
Rear Leg/Rail
(Driver Side)
Crossmember
(open both ends)
5/16-18 Nylon
Lock Nut
(4 places)
5/16 Flat
Washer
(4 places)
5/16-18 x 1
Carriage Bolt
(4 places)
Clamp
Plate
(2 places)
Rail
Socket
7. Rear Leg / Rail Mounting -
With
the help of another person, install the
Driver Side Rear Leg/Rail into the Leg
Support at the rear, and loosely assemble
the Rail assembly in the Front Leg rail
sockets (see Figure 16. and detail Figure
17.). Repeat this with the Passenger Side
Rear Leg/Rail. Tighten both of the Rear
Leg/Rails in the Leg Supports, making
sure the Legs are at 90 degrees to the ser-
vice body. Tighten the Clamp Plates on the
front Rails.
Figure 17. Rear Leg/Rail Mounting Detail - Driver Side only shown -
procedure is the same for Passenger Side
Front Leg
(Driver Side)
Rail Assembly
See Figure 17.
for detail
Leg Support
Figure 16. Rear Leg/Rail Mounting
9. Ladder Stop -
Remove rear Crossmember and slide Ladder Stop onto it.
Install Crossmember on rack. With a Ladder on the rack, locate the Ladder Stop
inside of the ladder and then secure. Insert a strap through the loop on the Ladder
Stop and on the front Crossmember Socket. Refer to the warning decal on the
Ladder Stop.
3/8-16 x 3/4"
Thread Cutting
Bolt
Strap
Figure 19. Ladder Stop Detail - Passenger Side only shown -
procedure is the same if deciding to install on the Driver Side