Arc installation procedure – Warner Electric ARC 2000 User Manual
Page 2
2 Warner Electric • 800-825-9050
P-2016 • ARC
ARC Installation Procedure
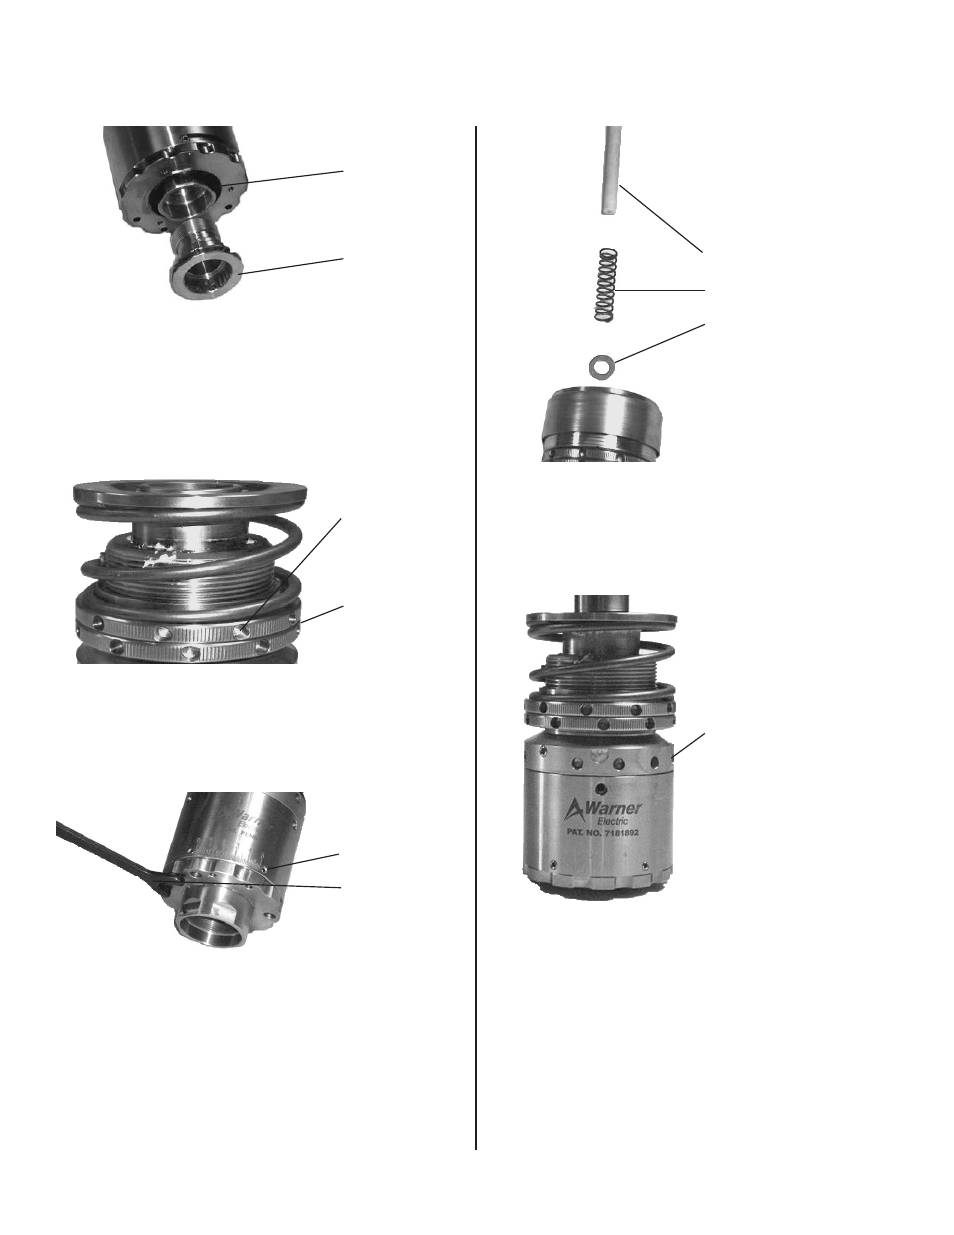
Install chuck (not supplied). Use appropriate open-
end wrench
(YTL4-0009 or YTL4-0007) depending
on headset model to hold headset output.
See Figure 1.
Set the top-load assembly using provided spring
setting chart. Lock the jam nuts using O.D. spanner
wrench
(YTL3-0009). See Figure 2.
Set the preliminary static torque using provided
torque setting chart. Loosen set screws with hex
key wrench, turn end cap with face spanner wrench
(YTL2-0002), tighten set screws to 8-10 lb-in. Over
tightening is not necessary and will strip the screws
or possibly damage the housing body. See Figure 3.
Apply anti-seize compound to spindle shaft.
Install spring seat and spring (not supplied) if
required. See Figure 4.
Wrench flats
Customer
Supplied
Chuck
Spanner
Holes
Jam Nuts
Face
Spanner
Wrench
Set Screws
Spring
Knock-out Rod
Spring Seat
Figure 1
Figure 2
Figure 3
Figure 4
Figure 5
Install headset on spindle. Turn onto threaded
spindle until headset is fully seated on spindle.
Tighten headset securely using O.D. Spanner
wrench (YTL3-0009). See Figure 5.
Spring Seat