Removing the cpu heat sink, Removing the processor – Acer 230 User Manual
Page 88
80
TravelMate 230/ 280
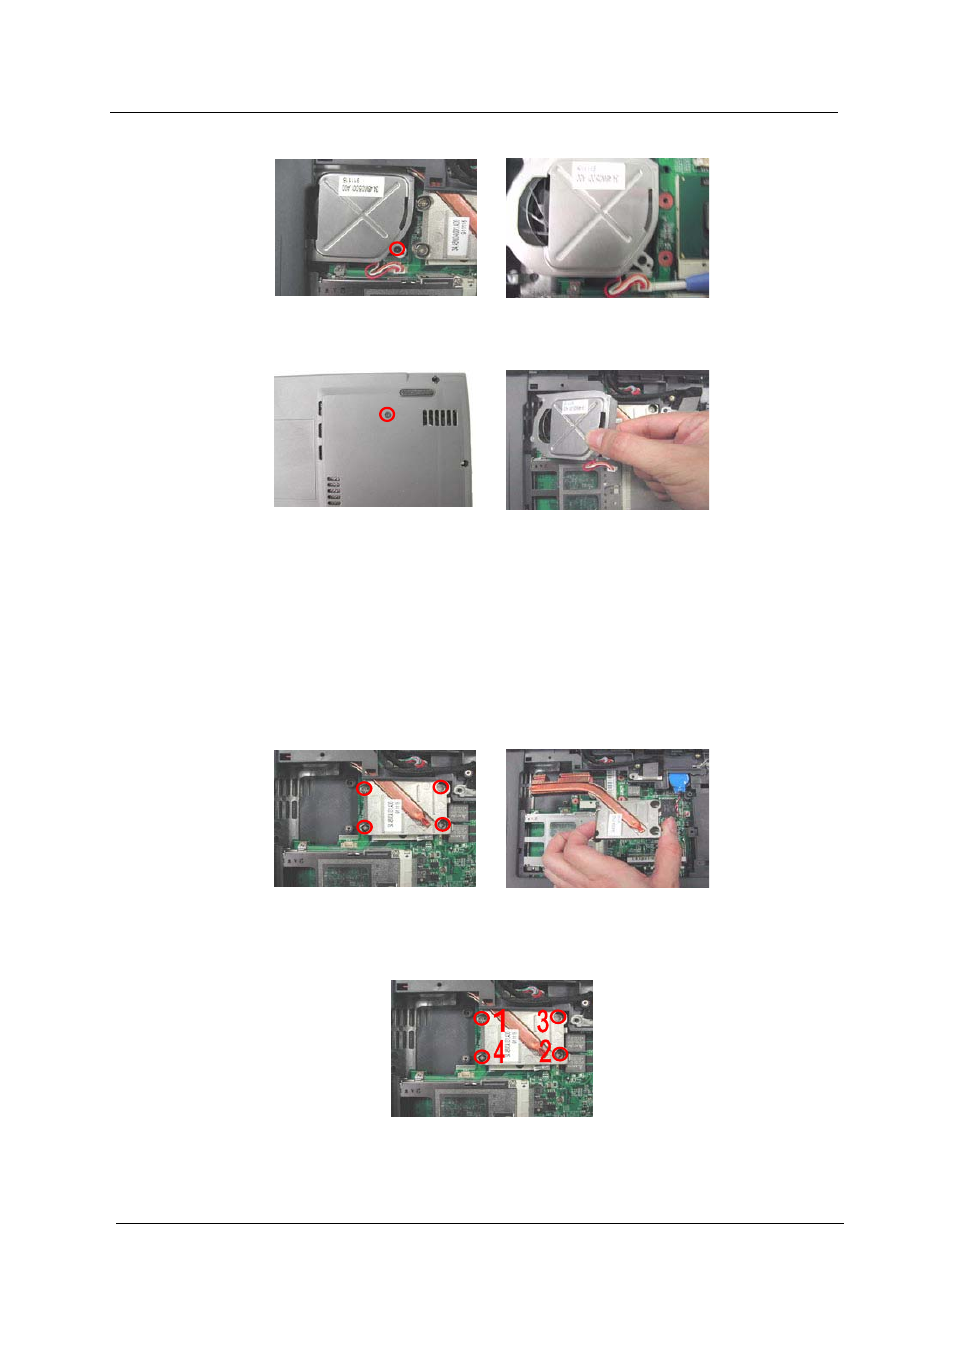
5.
Remove the other screw from the base of the unit, then remove the fan from the lower case.
Removing the CPU Heat Sink
1.
See “Removing the Battery” on page 62
2.
See “Removing the Middle Cover” on page 68
3.
See “Removing the Keyboard” on page 69
4.
See “Removing the Heat Plate” on page 70
5.
See “Removing the Audio Board” on page 85
6.
Remove four screws and then detach the CPU heat sink from the main unit.
NOTE: Please follow the numeric orders such as 1, 2, 3, and 4 to screw the CPU heat sink to the main board.
It is suggested that you reverse the sequence when you remove the screws.
Removing the Processor
1.
This manual is related to the following products: