Assembly instructions, Important – Foredom Series S User Manual
Page 5
Assembly Instructions
Always make sure your power tool is unplugged during assembly!
After identifying all the components of your power tool, it should be assembled in the
following manner:
Assembly and Adjustment of Flexible Shaft, Sheath, and Handpiece
Proper assembly and adjustment of the flexible shaft and
sheath are critical for the correct operation of your Foredom
power tool.
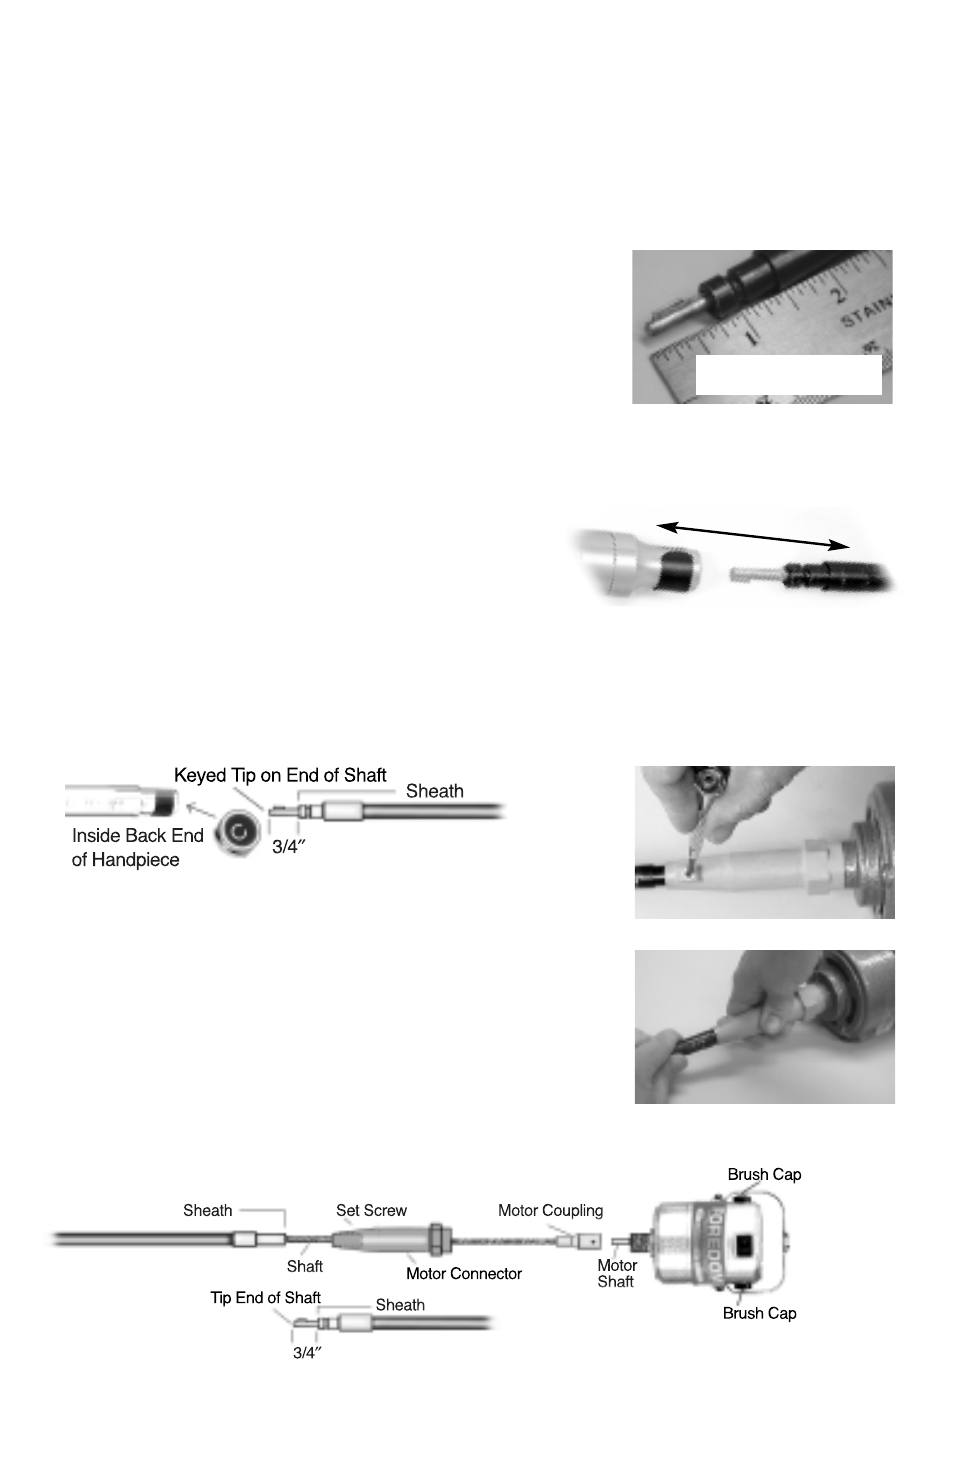
The exposed tip (handpiece end) of the flexible shaft
(with handpiece removed) must extend 3/4″ beyond the sheath.
Important Note: The shaft and sheath should be checked and
adjusted (if necessary) even if you received them assembled
and attached to the motor!
Please follow the directions below to assemble and adjust the shaft and sheath.
To check the shaft and sheath you must first remove
the handpiece.
1.The handpiece is easy to remove from the flexible shaft.
To
remove, simply pull the handpiece off the shaft and sheath with a firm grip. To re-attach, be
sure that the keyed tip of the flexible shaft is properly lined up with the slot in the back end of
the handpiece by looking into the rear of the handpiece before pushing it on. If it is not in line,
turn the shaft tip or the handpiece to the correct position (see illustration below).
2. Place the entire unit on a flat surface with the shaft and sheath
extended straight. Loosen the set screw on the motor connector.
Adjust the exposed tip (handpiece end) of the flexible shaft so
that it extends 3/4″ beyond the sheath, as shown in illustrations
at right. This is done by moving the sheath in or out of the
motor connector.
3. When the correct adjustment is made, re-tighten the set screw in
the motor connector and re-attach handpiece onto the
flexible shaft.
.
Figure 1
5
IMPORTANT!