Securitron PBA User Manual
Page 2
PN# 500-11200
Page 2
Rev. E, 02/12
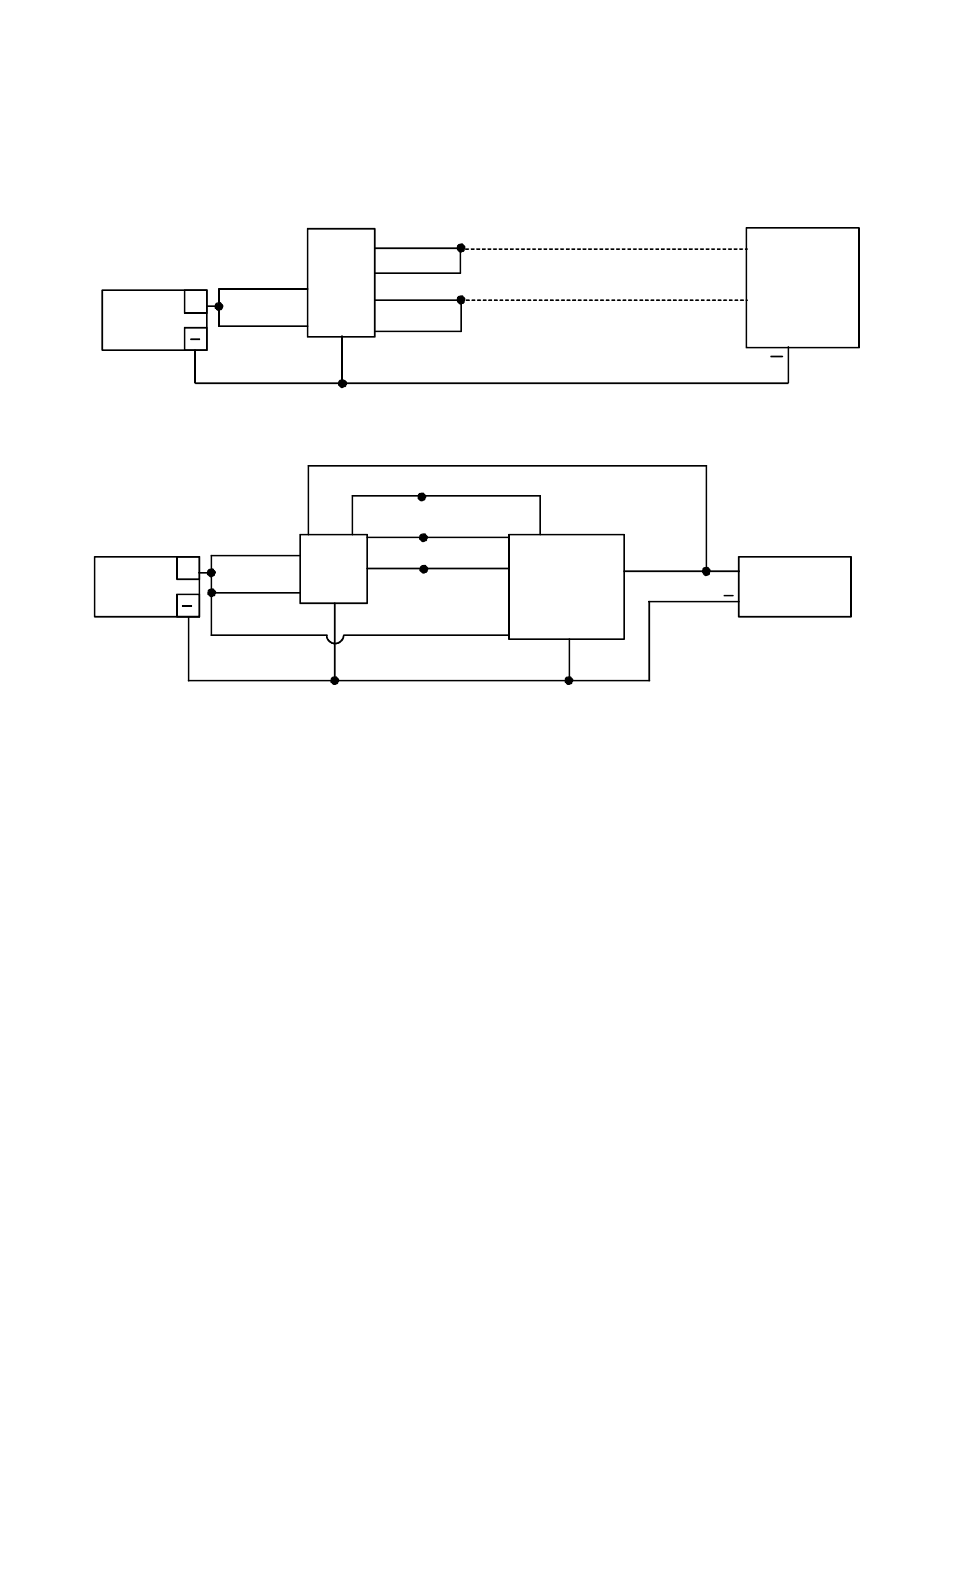
TimeMate. Momentarily pressing the button will release the lock for the amount of time set on
the TimeMate. The LEDs will switch colors during the lock release period. The wiring is also
done in double break fashion so that even if the timer fails, the button will still be able to
momentarily release the lock. This is for added safety.
POWER
SUPPLY
TIMEMATE
+
YELLOW
RED
WHITE
BLACK
D.C. LOCK
FAIL SAFE
GREEN
PB
+
NC
NO
BLACK
BLUE
YEL
L
O
W
GR
E
E
N
POWER
SUPPLY
+
D.C. LOCK
ELECTRIC
PB
+
BLACK
+
GREEN
YELLOW
IF FAIL SAFE
IF FAIL SECURE
MOMENTARY RELEASE OF FAIL SAFE OR FAIL SECURE ELECTRIC LOCK
TIMED DOUBLE BREAK RELEASE OF FAIL SAFE LOCK
NO
NC
NO
NO
NC
NC
5. ALTERNATE LENS/LED CHANGING
The pushbutton is factory shipped with a green lens and a green LED installed and an optional
Red lens and red LED. Changing to the Red LED/lens set is simple.
1) Grasp keyplate and unscrew the mushroom lens counter-clockwise. Remove mushroom
lens and insert, save the white insert.
2) Turn the keyplate over and locate the pink and blue locking tabs at the bottom of the
switch. With a flat bladed screw driver lift both tabs simultaneously until the contact
blocks are loose from switch body. Pull the contact block away from the switch.
3) Grasp top of LED and push down slightly and rotate counter-clockwise, then pull LED
straight out to remove.
4) Insert the Red LED into the socket and reverse the steps to lock the LED into the socket.
5) Snap the contact block back onto the switch body. The blue contact should be on the
right side.
6) Replace the white insert back on the lip of the switch – careful to match the tabs on the
insert with the notches on the switch lip. The word EXIT should be correct reading
orientation to the keyplate.
7) Place the Red lens over the insert on the switch and tighten lens clockwise - careful not to
dislodge the insert sitting in the notches. Tighten hand tight until tight, do not over
tighten.