Robot waterbase applicator - maintenance, Piston removal/replacement, Head rebuild – Ransburg Evolver Water Applicator 78863-90, 78863-60 User Manual
Page 26
22
Robot Waterbase Applicator - Maintenance
4. Remove end caps [3] by turning CCW by hand.
Remove backup piston [14] and spring return [15].
5. Remove retaining ring [22] by turning CCW. Remove
air cap [19], air cap locator [20], and air cap clip [21].
Remove fluid nozzle [12] using appropriate wrench
by turning CCW.
6. Remove electrode [2] by turning CCW. A drift pin
may be inserted into the provided hole in needle
shaft [1].
7. Pull needle shaft [1] straight out of the housing.
Remove fluid nozzle [11] by turning CCW. Remove
o-ring [18], packing [8], and washer seal [9], from
inside house bore [10].
Piston Removal/Replacement
8. Remove piston nut [4] from shaft [1]. Unscrew CCW
from the shaft piston [5]. Carefully pry the piston seal
[6] off the piston. Replace the seal as required.
9. To install the seal, push the piston seal [6] onto
the piston [5] with the spring side of the seal facing
towards the smaller diameter of the piston [5].
Head Rebuild
10. To rebuild, follow steps 1 to 8 in reverse order.
>
A drop of purple loctite may be required
on the needle shaft [1] end threads where
electrode is assembled.
NOTE
Valve Body Removal / Repair
1. Remove the gun from the robot by turning the
retaining ring counter clockwise from the robot
mount plate. (See Figure 7.)
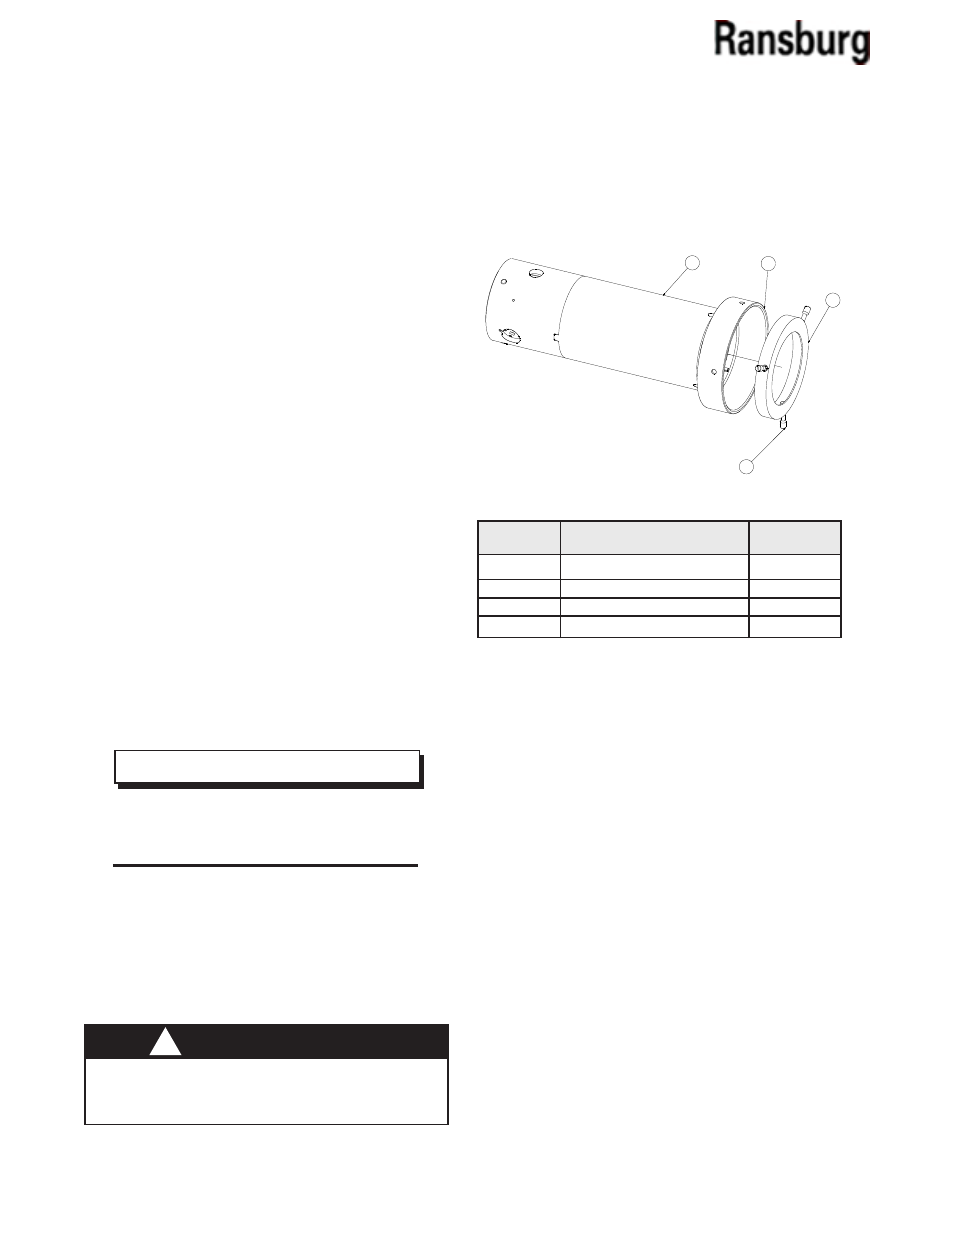
Figure 10: Flange Removal
4. Referring to Figure 10, remove (3) locating pins
[2]. Remove flange [1] from end of gun. Remove the
retaining ring [4] and shroud [3].
1
Flange, RWA-EFM
1
2
Locating Pin
3
3
Shroud
1
4
Retaining Ring
1
Item #
Description
Qty.
>
Be sure voltage is OFF, all lines de-pressur-
ized, clean, and dry.
W A R N I N G
!
2. Take applicator to a clean area outside the spray
area, preferably to a designated maintenance area.
3. Remove the head of the gun. (See Figure 8.)
3
2
4
1
AA-03-01.1