Reassembling the meter, Installing the meter, Assembling the meter – Liquid Controls MS Meters User Manual
Page 27
27
Reassembling the Meter
(See Pages 31 & 32 for the Torque and Wrench & Socket Size Charts)
NOTE: The principles of meter disassembly and
reassembly are the same for all Liquid Controls meters.
Although your meter may look slightly different than those
pictured, the steps are the same, except as noted.
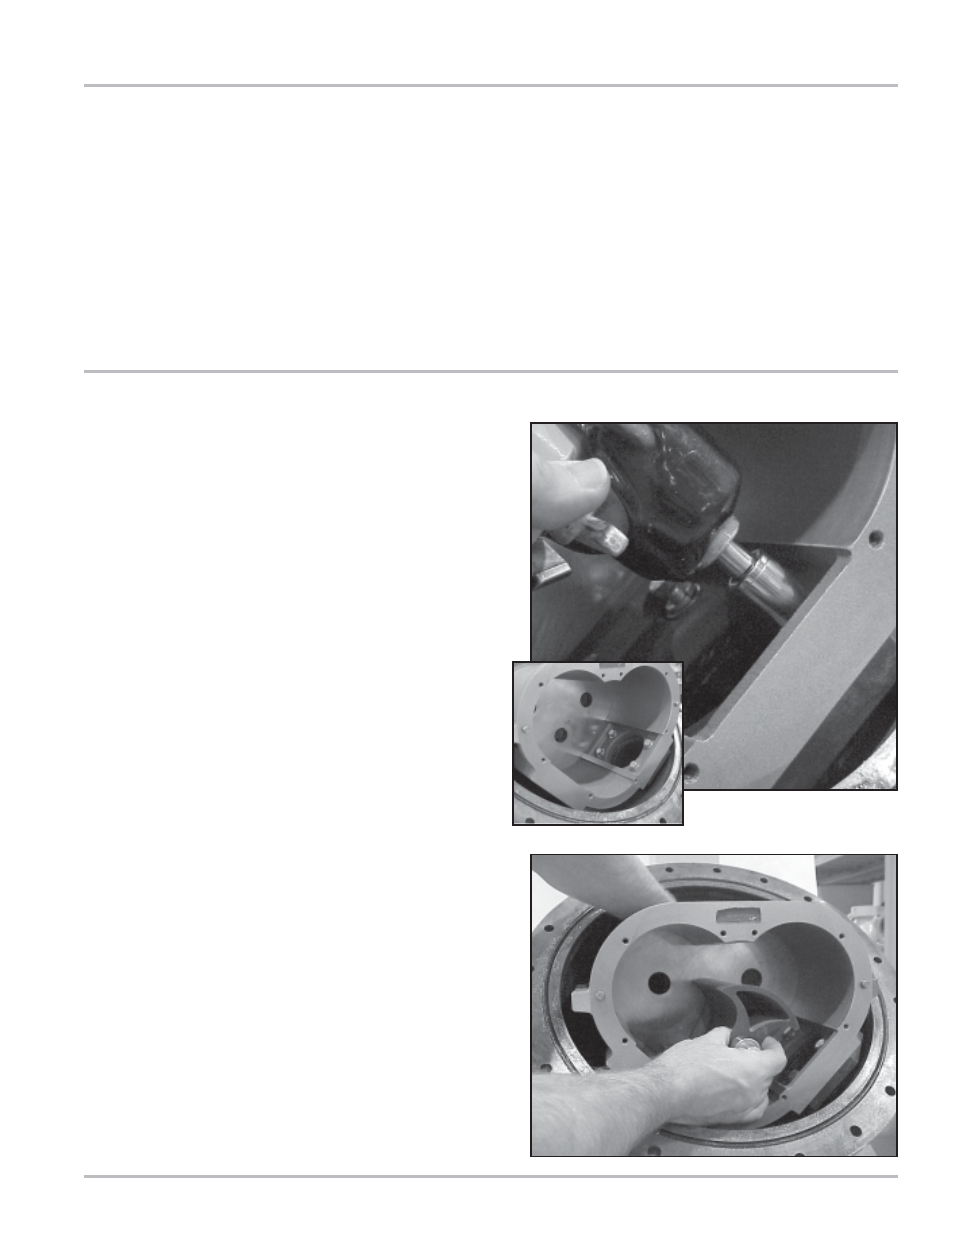
Installing the Meter
1.
Place the flat gasket in the lower weldment and line
up the bolt holes. Position the meter housing in the
weldment lower hemisphere and secure using the
four bolts. Use care not to damage the flat gasket.
Use an impact driver or socket to tighten bolts.
2.
Install the blocking rotor. It will be necessary to guide
the universal joint assembly into the drive coupling
bearing and packing gland by reaching behind the
meter element.
Assembling the Meter
Tools:
Cover socket or open end/box end wrench
Spare displacement rotor gear or shop rag
Rotor gear wrench or socket
Bearing plate wrench or socket
- Gear Plate Selection Guide (24 pages)
- MA4 Meter (32 pages)
- M-MA Meters (28 pages)
- HMS3700 & HMS3770 Insertion Sensors LC Mag Insertion (8 pages)
- HMS501, HMS600, HMS1000, HMS2400, HMS2500, and HMS5000 LC Mag IOM (8 pages)
- CIM100 (16 pages)
- Rate of Flow (4 pages)
- HML4-F1 - LCMag (40 pages)
- LCRII Install E3650-E3651 Series (40 pages)
- LCR-II Setup & Operation (60 pages)
- LCRII Menu Map (2 pages)
- LCR-II - Quick Reference (2 pages)
- LCR Install (24 pages)
- LCR Setup & Operation (60 pages)
- LCR 600 Install (36 pages)
- LCR600 Wiring Schematic (1 page)
- LCR 600 Setup & Op (68 pages)
- LCR 600 - Quick Reference (2 pages)
- FlightConnect 600 (52 pages)
- FlightConnect 600 QR (2 pages)
- LCR-II Installation E3655-E3656 (36 pages)
- LCRII E3651-E3656 Wiring Schematic (1 page)
- DMS Installation (20 pages)
- DMS Setup (84 pages)
- DMS Delivery (52 pages)
- DMS i1000 Quick Reference - DMS Delivery (2 pages)
- DMS Office (52 pages)
- DMS i1000 EZConnect Operators (36 pages)
- DMS i1000 Quick Reference - EZConnect (2 pages)
- EZConnect Office (44 pages)
- FlightConnect Office (36 pages)
- FlightConnect Setup Guide (8 pages)
- DB Manager (20 pages)
- POD (16 pages)
- Dual Meter Multiplexer (8 pages)
- Differential Pressure Transducer (12 pages)
- XL LED Display E1615_E1616_E1617_E1618 (20 pages)
- SCAMP (20 pages)
- WinHost Operation (44 pages)
- SP714-S2i (12 pages)
- HML110 IOM (31 pages)
- HML210 IOM - LCMag (44 pages)
- Sponsler T675 - Cryogenic System Register (54 pages)
- Sponsler IT400 Electronic Register (40 pages)