Draw-Tite 59789 ROOF RACK User Manual
Fitting instructions, Parts list, Crossbar kit
59789
PART No:
59789N Rev: 10/31/13
Fitting Instructions
2014–ON SOUL WITH ANCHOR POINTS
Crossbar Kit
CARRYING CAPACITY:
Pg 1 of 2
75Kgs/
165 Lbs
Printed in China
Note: Prior to Assembly
Prior to assembling your cross bar kit check that the kit
contains all the parts you will need to fit the cross bars.
Refer to parts lists for guidance. L-Wrench is stored in the
End Support.
Please read these instructions before assembly.
Step 1: Removing the vehicles anchor point covers.
A. On the vehicles roof or ditch molding you will find fore and aft
anchor point covers. (fig 1)
B. Carefully remove these covers by sliding them in the direction
shown on the cover. This will reveal the anchor points. It is
advisable to screw the bolts into the anchor point threads at
this time to clean the threads.
Note: Take care when removing the covers to avoid damaging or
losing clips. Covers will not be replaced while the cross bars are
on the vehicle.
Store the covers and any plugs while cross bars are in use for
later replacement.
Step 2: Installing Rubber Gaskets and Adaptor
A. Position the rubber gaskets over the anchor points as
shown in figure. (fig 2)
B. Ensure that the gasket is properly aligned.
C. If your gasket and/or adaptor has a directional arrow
ensure this is correctly positioned.
D. Ensure that the gasket slots are centered over the anchor
point threads in the roof.
E. Place the plastic adaptors into the gasket’s recessed top
surface. (fig 3) Repeat for all four anchor points. (fig 4)
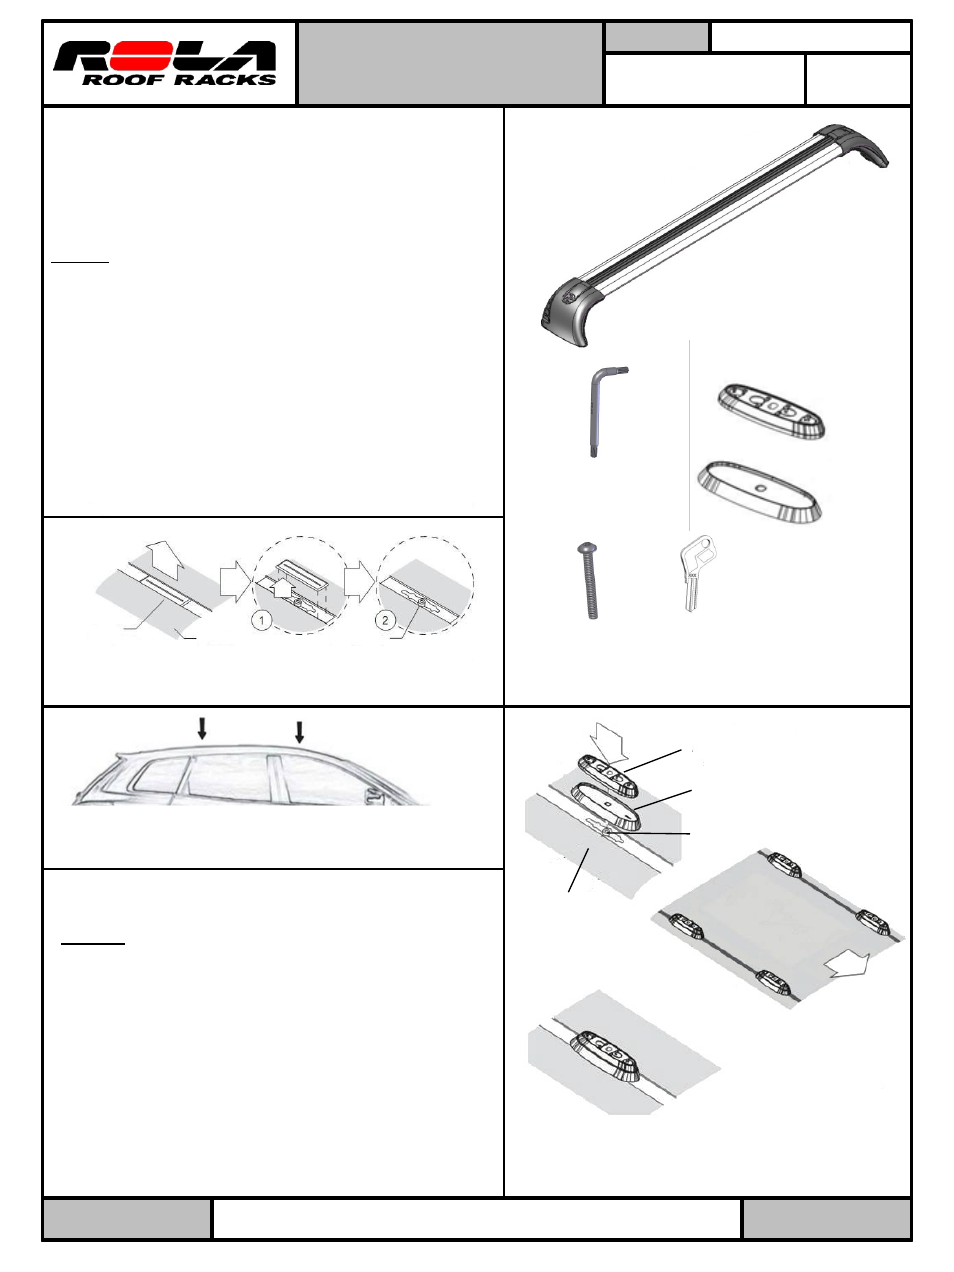
Cross Bar / End Support
Assembly (2)
Plastic adaptor (4)
Rubber Gasket (4)
L-Wrench – Security
Key(2) (Stored in End
Support)
Anchor point
cover
Vehicle’s roof
Anchor point
Plastic adaptor
Vehicle’s roof
Anchor point
Rubber Gasket
Front of vehicle
Vehicle’s
roof
Location of anchor points on vehicle
Fig 1
Fig 2
Fig 3
Parts list
Key (4)
Bolt (4)
Fig 4