Installation instructions, Mitsubishi lancer, Picture 1 – Draw-Tite 24885 SPORTFRAME HITCH User Manual
Page 2: Passenger’s side forward attachment, Part numbers
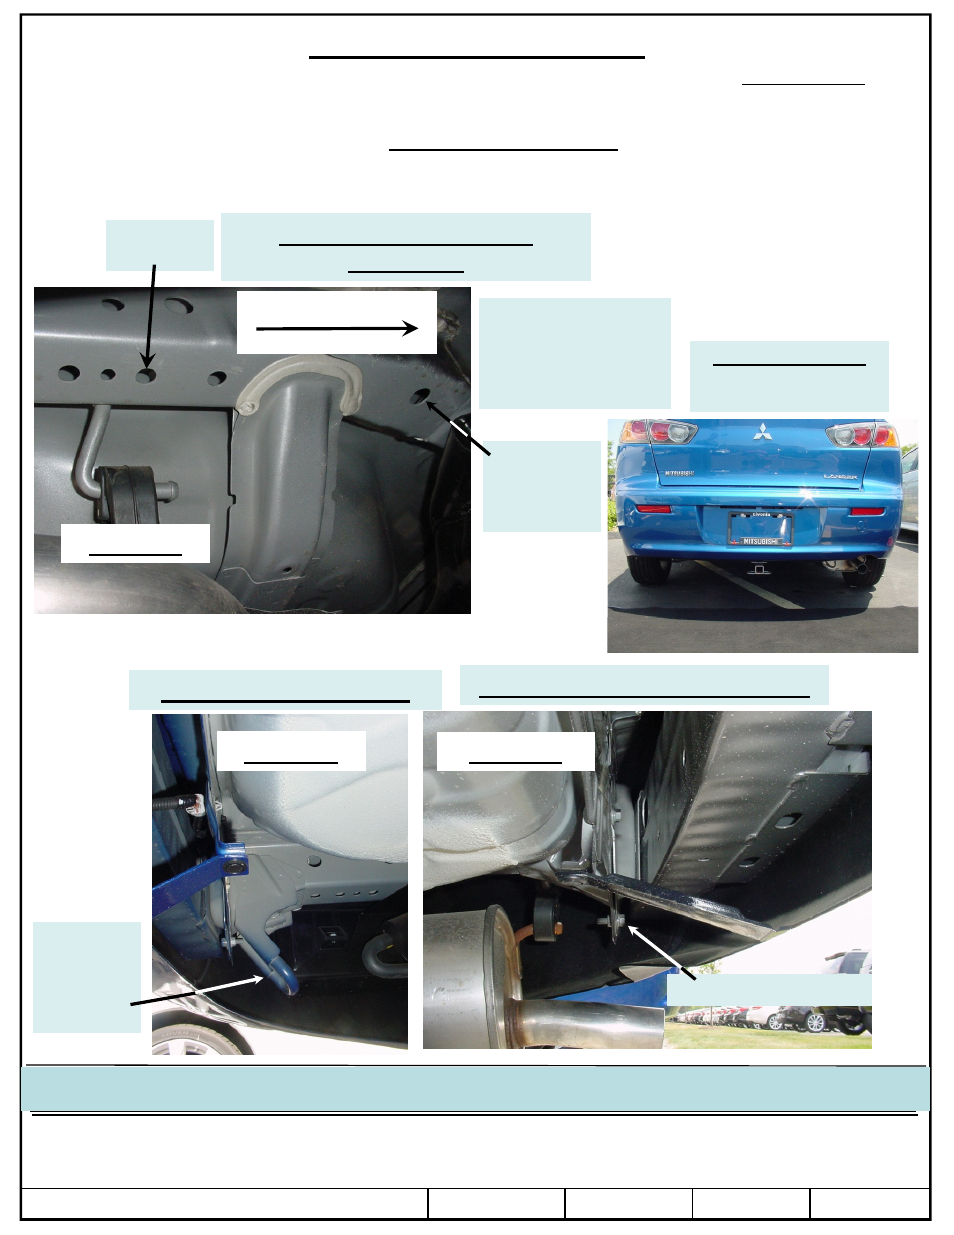
Installation Instructions
Access Hole,
enlarge to
allow block
to fit through
Mitsubishi Lancer
All single exhaust models inc. GT
Part Numbers:
60302, 24885, 77273
Insert Bolt Leader up
through attachment
hole and back down
through enlarged access
hole
Picture 1.
Vehicle Forward
Attachment
Hole
Passenger’s Side Forward
Attachment
INSTALLED HITCH
All you see is the
receiver tube!
Another Fine Cequent Performance Products hitch
© 2012 Cequent Performance Products
Sheet 2 of 6
60302N
5-29-12
Rev. A
Note: check hitch frequently, making sure all fasteners and ball are properly tightened. If hitch is removed, plug all holes in trunk pan or other body panels to
prevent entry of water and exhaust fumes. A hitch or ball which has been damaged should be removed and replaced. Observe safety precautions when working
beneath a vehicle and wear eye protection. Do not cut access or attachment holes with a torch.
This product complies with safety specifications and requirements for connecting devices and towing systems of the state of New York, V.E.S.C. Regulation V-5
and SAE J684.
Mount
hitch
bracket to
rear face of
Tow Hook
Tighten 7/16”-Gr.5 Carriage Bolt with torque wrench to 50 Lb.-Ft. (68 N*M), Tighten 5/8”-Gr.5 Carriage Bolt with torque wrench to 150 Lb.-Ft. (203 N*M)
Tighten 8mm bolt to 25 Lb.-Ft. (37 N*M)
Picture 2.
Picture 3.
Driver’s Side Attachment
Passenger’s Side RearAttachment
Remove this 8mm bolt