Analog Way OPS200 User Manual
Page 35
The four user presets of the
OPS200
can be called back at any
stage during your show or event.
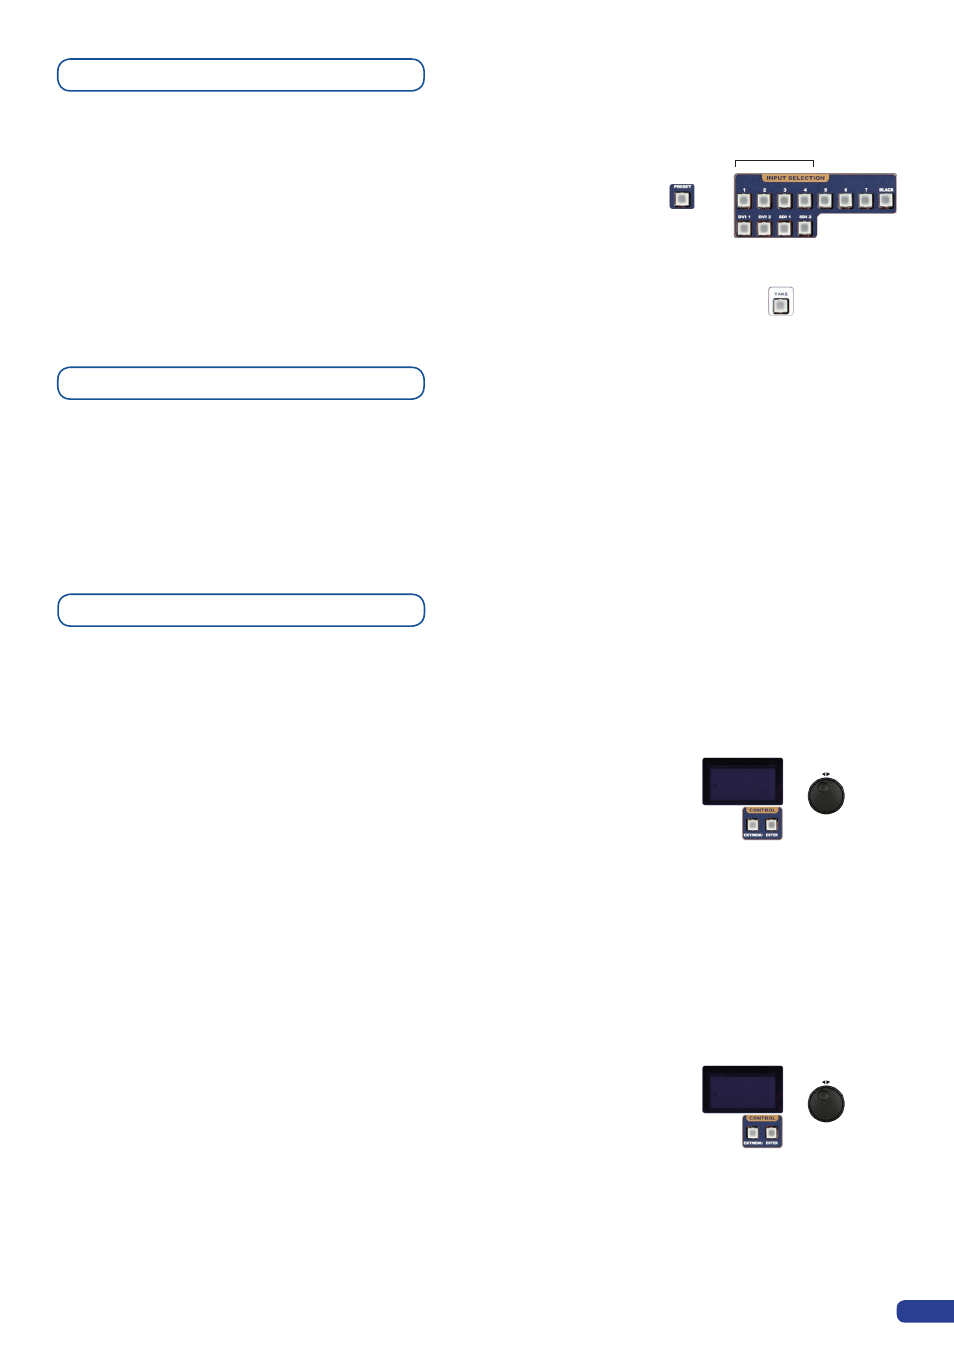
1/ Press the
[PRESET]
button, then press one of the four first Input
Selection section buttons to choose which memory (#1 to #4) you
wish to use. The preset will be displayed on your preview screen.
2/ Once you have selected your preset, simply press the
[TAKE]
button to view the result on your main screen.
+
Preset Memory 1-4
The
OPS200
allows to work with up to 9 stereo inputs, 1 auxilary input,
and 2 embedded SDI audio inputs (via the SDI BNC connectors), all
accessible via the Audio menu of the
OPS200
, and which can be
affected to one or both of the 2 independant symetrical/asymetrical
outputs of the device.
To configure audio settings of the
OPS200
, plug all audio inputs into
the device, and navigate to the Audio menu.
1/ Choose the audio mode, Break Away or Top Layer Follow, which
you wish the audio to work in.
* NOTE * : the Break Away mode will air the selected audio source,
while the Top Layer Follow mode will air audio from the toptmost
active layer of the
OPS200.
2/ Select Source Settings from the Audio menu to select the audio
source you wish to work with, then set levels and left/right balance
for each input.
3/ Select Auxiliary Settings to determine level and balance of the
auxilary input.
4/ Select the Main Output menu to determine main audio output
level, balance and delay settings, or to mute main audio output.
5/ Select Audio Prelist, from the Audio menu, to determine pre-listen
audio output level, balance and delay settings, for each audio
input, or to mute Prelist audio output.
6/ Select Delay Mode, to determine how the
OPS200
handles audio
delay. Select Auto Adjust to let the
OPS200
determine audio
output delay. Select Manual Adjust to determine audio delay
manualy.
*NOTE* : selecting Manual Adjust will give access to audio delay
value (in milliseconds) of the main and Prelist audio output menus.
Working with Presets
Working with Audio
Audio configuration
33