2 outputs section, 3 screens – Analog Way NeXtage 16 User Manual
Page 30
30
7.3.2 Outputs section
Once the source is defined, a resume of your outputs settings will be displayed under the tab STATUS.
WARNING: Configuring the rate to follow a framelock input will lock the output frame rate to match the
selected source. This is useful to eliminate the “strobing effect” which may be visible as an artifact of the
framelocking process. However, be sure that your framelock reference input is a reliable source, as any
disruptions in the reference signal may cause visible glitches on your output, even if the selected framelock
reference input is not currently being displayed.
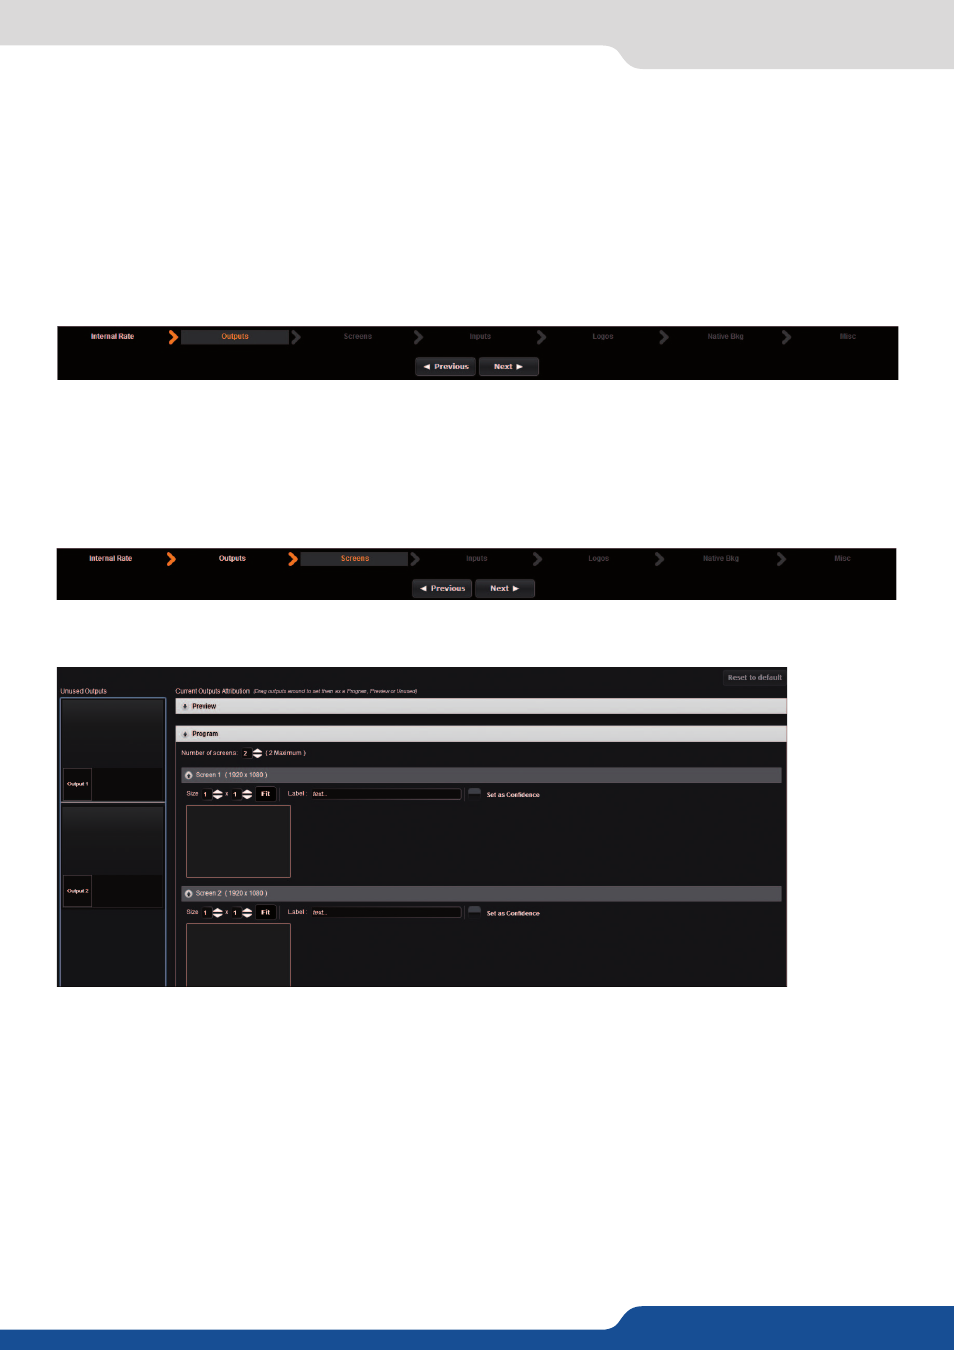
The screens page allows you to map a particular output to a particular screen or part of a screen.
On the left, you have the available outputs; on the right you have the available screens.
7.3.3 Screens
In this section, you can configure the outputs to operate as a Dual-Link output. Simply click on enable if you
want to activate the output #1 as Dual-Link.
Dual-Link resolutions (ie: 2560x1600) are only available on the DVI plug on output 1 as they use resources
from both outputs. You will lose the output #2 by activating the output #1 as a Dual-Link output.
7.3.2 Outputs section
Drag and drop the available outputs into the desired screen. By default your screens will be mapped as
Output #1 = Screen #1, and Output #2 = Screen #2. For example, to use your two outputs as Program and
Preview, drag the Output 1 box onto the Program Screen #1, and drag the Output #2 onto the Preview
Screen #1.
To set up the two outputs as an edge-blend, change the size of screen #1 match the number and arrangement
of outputs that you’d like to use, and drag each output into the box representing its position on the Edge
blend. (Further adjustments of the blend are done later,
see chapter: 7.3.15 Blending management
) Here
are some additional examples: