ATAS Permashake User Manual
Page 3
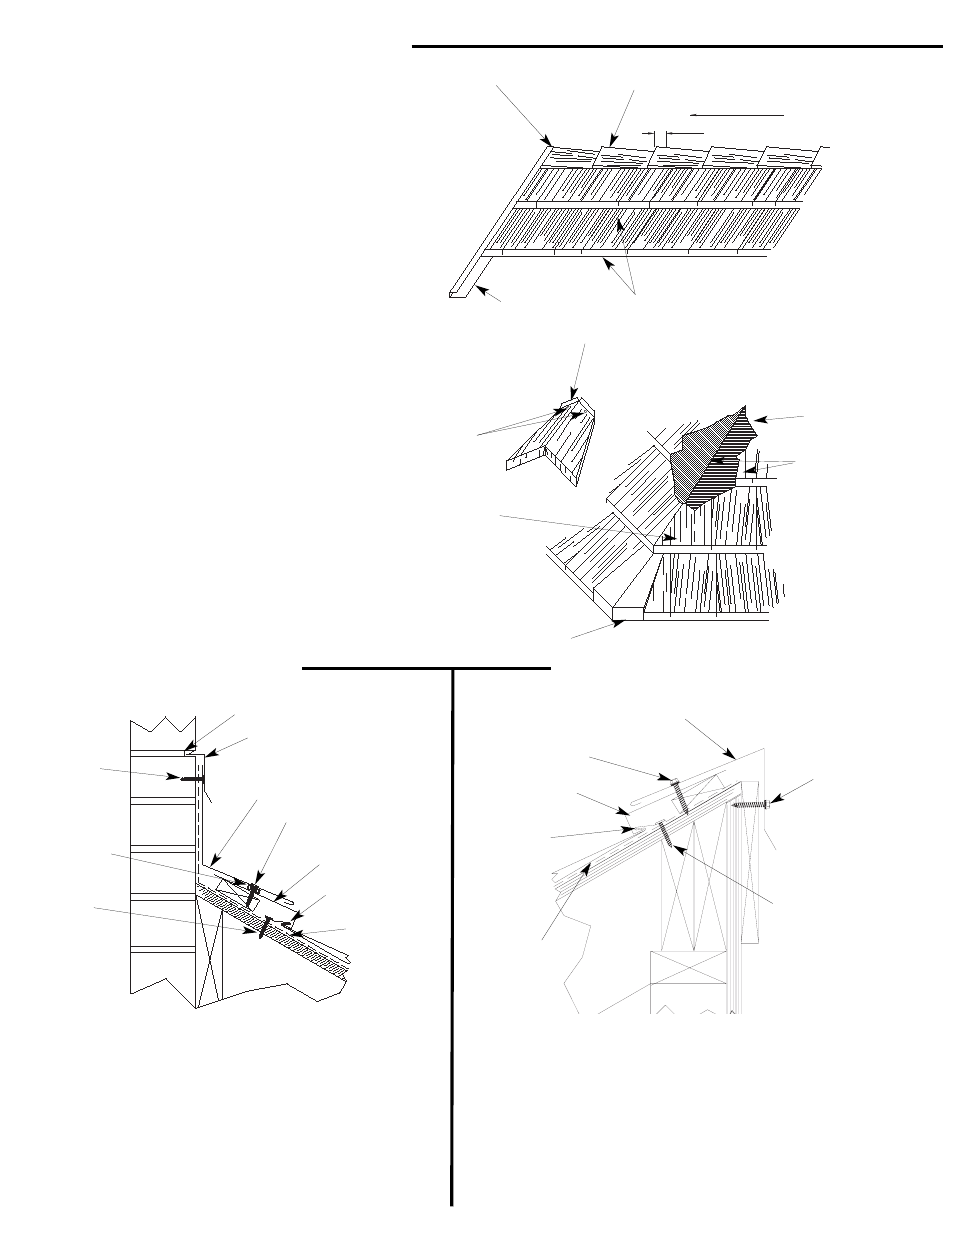
Hip & Ridge Detail
Headwall Detail Shed Ridge Detail
Hip and ridge applications are handled in the
same manner.
1. Install roof panels to meet at hip or ridge.
(Depending on roof geometry and run of roof,
the top panel may have to be cut along the
length of panel.
2. Lay a 6” strip of closure tape across hip/ridge
line.
3. Lay cap on roof and chalk a line to mark
placement of butyl sealant tape.
4. Secure the cap with a 2” x 5/16” painted/gas-
keted screw approx. 2’-0” o.c.
Ridge caps can accommodate standard ridge
venting products. Refer to venting manufactur-
er’s instructions and local building code require-
ments.
Note: For hip applications, fasten the caps to
the high point on the shingle in order to avoid
dimpling, and make sure the screw penetrates
the cap through the butyl sealant tape into the
solid substrate.
1. Install metal shingles up to the headwall. Shim the panel if
necessary as shown above..
2. Lay headwall trim over the shingles while insuring that the
perpendicular section is flush against the headwall. use double
faced caulk tape between the panel and trim assemblies.
3. Apply counterflashing over the headwall trim as required, or
install wall paneling.
Reglet
HSA980
Counterflashing
Appropriate
Anchor
Fastener
HSA510
Headwall Trim
2” Hex Head Screw
w/washer
Permashake Panel
#10 x 1”
Wafer
Head
Screw
Anchor Clip
2” Hex
Head Screw
w / washer
HSA342
Shed Ridge
2” Hex Head Screw
w / washer
Anchor Clip
ATA-Guard*
Butyl Tape
#10 x 1” Wafer
Head Screw
ATA-Guard*
Permashake Panel
HSA302
Short hip cap pieces
Panels cut to meet
at hip line
Locate
fasteners
here
Hip cap bent to hip angle and two interlocking
tabs bent up to allow fastening - bend these two
tabs down again after applying the fasteners.
Hip Line
ATA-Guard*
ATAS Permashake Panel
HSA200
Channel Trim
2” lap
Prevailing
Wind Direction
HSA301
Short ridge cap pieces
Start applying ridge cap shingles
at this end.
1. Install metal shingles up to the shed ridge peak. Shim panel
if necessary as shown above.
2. Place double faced caulk tape just inside hem of Shed Ridge
Trim. Fit trim to peak. Fasten through tape and shingle into
solid substrate. Use 2” x 5/16” painted / gasketed screws.
3. Front face fasten Shed Ridge Peak Trim to facade.