ATAS ScanRoof User Manual
Page 3
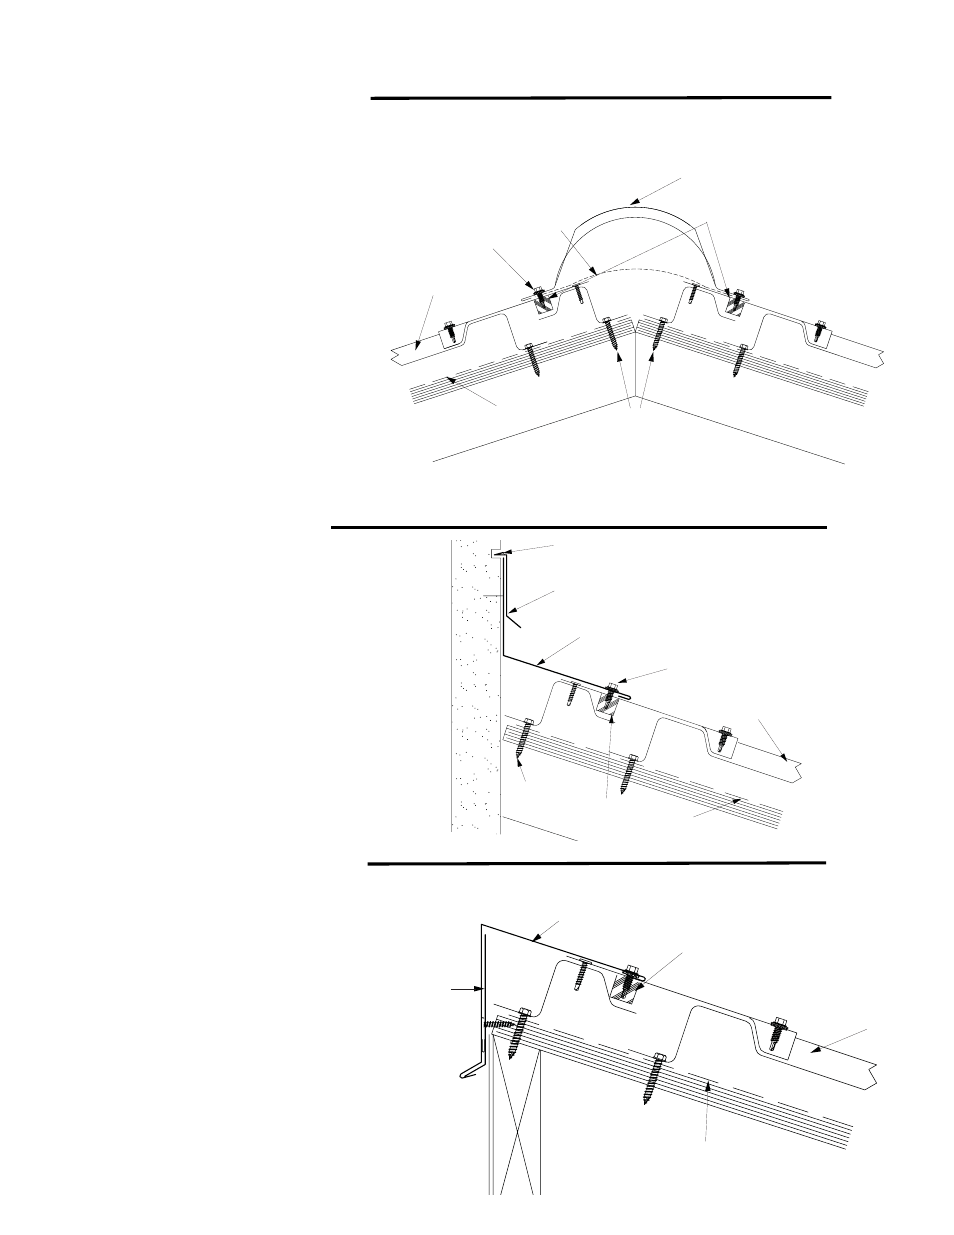
Hip & Ridge Detail
Headwall Detail
Shed Ridge Detail
Hip and ridge applications are handled in the same
manner.
1. Install panel to hip/ridge line. Cut panel to size.
Install “Z” purlin at ridge of roof. Overlap and
fasten cut panel section to “Z”.
2. Seal panels at hip/ridge line using
Adhesive Closure Roll between panels.
3. Attach Ridge/Hip Cap to panels with Stitch
screws at 15 3/4” o.c. Fasten the side of ridge.
1. Install panels to headwall area. Cut panel to
size. Install “Z” purlin at wall. Overlap and fasten
cut panel section to “Z”. Lap is required to allow
proper fastening of “Z” purlin at top panel.
2. Seal top with neoprene closure to panel, set in
sealant. Be sure headwall trim will
cover neoprene.
3. Place headwall trim to wall. Stitch fasten to
top of panel at 15 3/4” o.c.
4. Install counter flashing into reglet over headwall
transition. Seal into reglet with appropriate
sealant or place wall treatment over
headwall trim.
1. Install panels to peak. Cut panel to size.
Install “Z” purlin at wall. Overlap and fasten cut
panel section to “Z”. Lap as required to allow
proper fastening of “Z” purlin at top panel.
2. Seal top neoprene closure to panel. Be sure
shed ridge cap will cover neoprene.
3. Fasten Starter Cleat at peak. Fastener spacing
to be 12” o.c.
4. Place shed ridge cap to wall. Stitch fasten to
top panel at 16” o.c.
Appropriate
Sealant
Appropriate
Anchor Screw
Top
Neoprene
Closure
ATA-Guard
Scan Roof Panel
SWR8XX
Stitch Screws
SCA500 Headwall Trim
SCA980 Counterflashing
Top Neoprene Closure
ATA-Guard
Scan Roof Panel
SCA342
Shed Ridge Cap
SCA348
Shed Ridge
Starter Cleat
Appropriate
Anchor Screw
Neoprene Closures
ATA-Shield
Scan Roof Panel
SWR8XX
Stitch Screws
SCA370
Ridge/Hip Cap
Adhesive
Closure Roll