Eave detail gable detail, Panel sidelap – ATAS Field-Lok Low Slope User Manual
Page 2
Eave Detail
Gable Detail
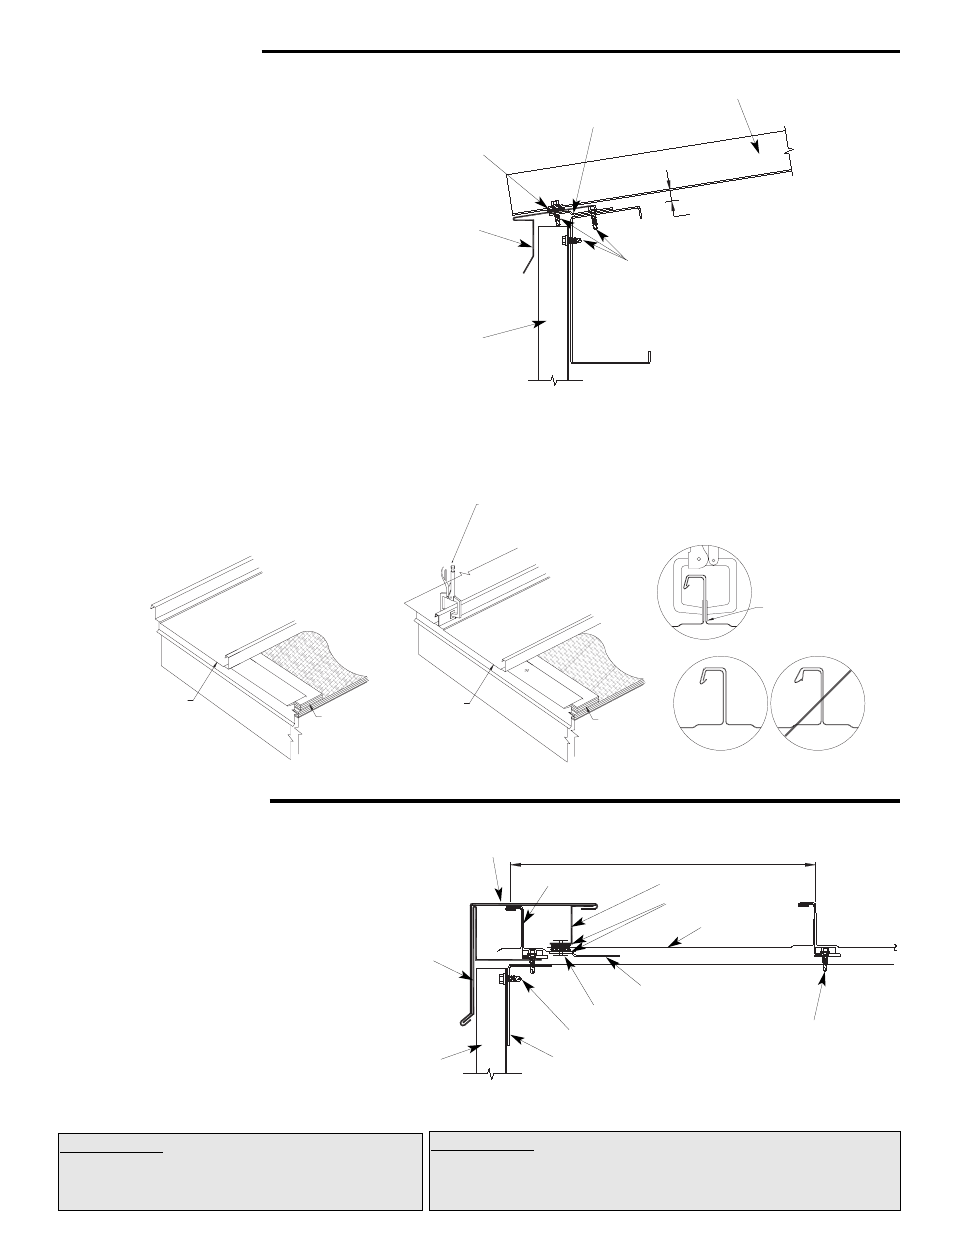
1. Apply ATA-Shield** along eave and up the roof to
a point at least 24” beyond outside face of exterior
wall.
2. Install 3/8” shim at eave.
3. Install drip edge against fascia trim. Lay ATA-
Guard* over eave trim.
4. Trim (cut) both seams back to allow for turn down.
Install panel by sliding lower flanged edge over drip
edge.
5. See below for proper panel sidelap installation.
General Note: Before any installation be sure to lay
ATA-Shield** in all areas where ice & water can
occur. ATA-Guard or appropriate underlayment
should be installed over the entire roof.
1. Install underlayment to gable edge. Place 3/8”
shim as shown.
2. At gable start detail, install gable trim starter cleat
with appropriate fasteners at 2’-0” into fascia board.
3. At end gable, cut panel to appropriate width to
allow room for clips at gable end. If panel cut off is
3” or wider install cut off portion of panel underneath
last panel w/ butyl tape applied in between the two
panels and install clips before installing gable assem-
bly.
4. Apply double-faced butyl sealant as circled in
sketch. Fasten “Z” closure to panel with pop-rivets.
5. Install starter cleat at end detail same as start
detail.
6. At both ends snap gable/rake trim over starter
cleat and “Z” closure to lock into place. Pop-rivet
these two pieces together with one pop-rivet per trim
length.
Underlayments: ATA-Shield** is the recommended self adhesive underlay-
ment for eaves, sidewall and any critical areas exposed to ice damming
and extensive water run off.
Available in 65’-8” x 39-3/8” rolls (200 sq. ft. per roll).
Underlayments: ATA-Guard* is a polyolefin based, 100%
asphalt free, high strength reinforced roofing underlay-
ment for use beneath metal roofing on steep slope appli-
cations. 1000 sq. ft. per roll at 48” wide.
PANEL SIDELAP
Install clamp on
lower portion of
vertical leg
Shim
Eave end
of panel
of panel
Eave end
Shim
SHOWN FOR PROPER SEAL.
CLAMP PANEL AS
3/8” or 1 3/8”
Appropriate anchor
screws sufficiently long
enough to fully penetrate
the solid substrate.
Field Lock Panel
Offset Angle
Butyl Tape
Sealant
Eave Trim
Wall
Panel
FULL PANEL WIDTH
Field Lock Panel
Butyl Tape Sealant
Standard “Z” Closure
Extended
Gable/Rake
Starter Cleat
Gable/
Rake
Closure
Trim
Rake Angle
Offset Angle
Appropriate Anchor Screw
Plain pop-rivets
Wall
Panel
Anchor Clips
#12 x 1-1/4” Hex
Head Screws