3 module insertion/removal, Module insertion/removal – Alpha Technologies Cordex 48-1.2kW User Manual
Page 22
030-834-J0 Rev A
Page
16 of 34
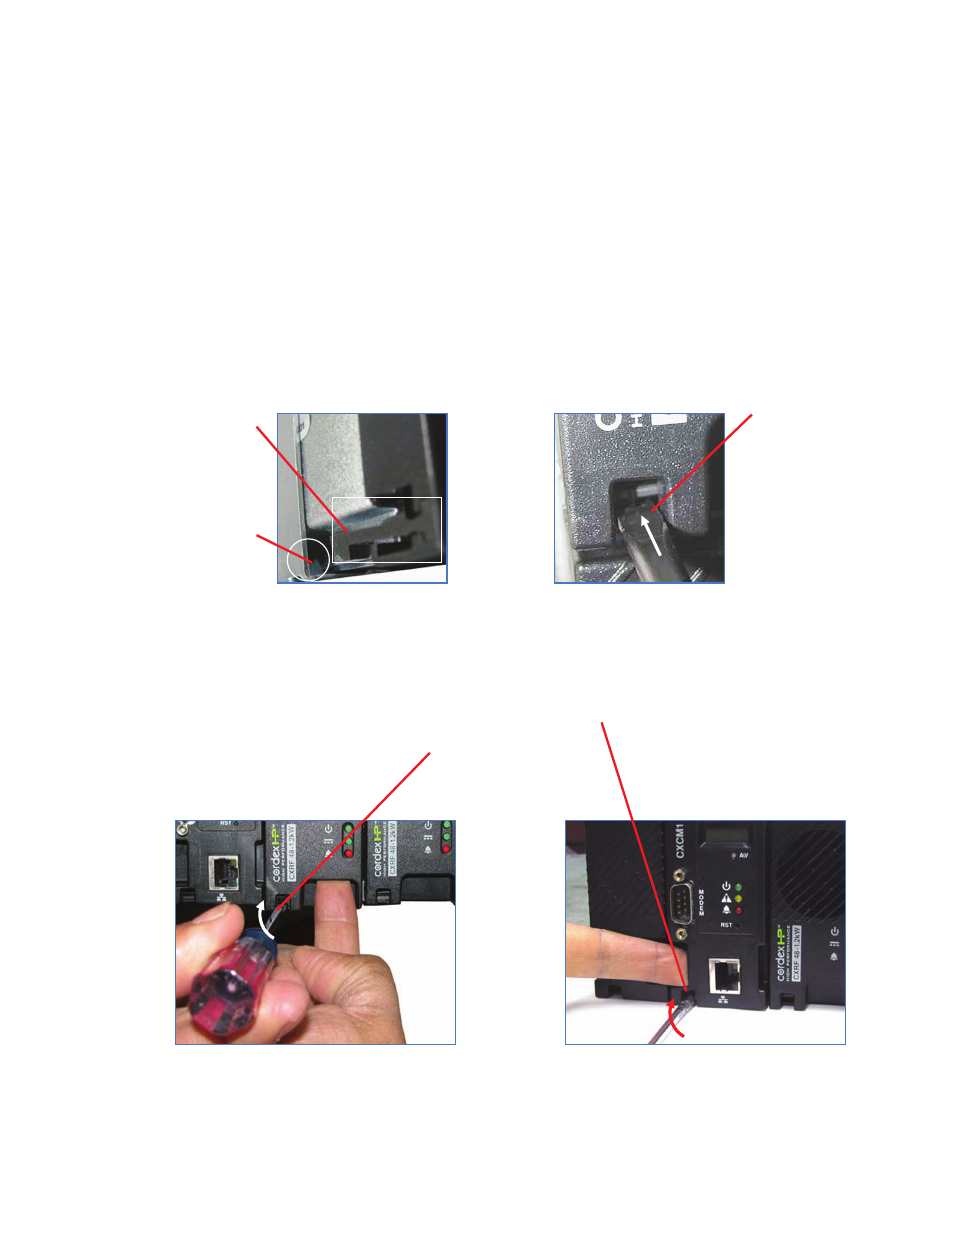
4.3
Module Insertion/Removal
Insert by placing the module on the shelf bottom and sliding the module into the rear connector (inside of
the shelf). Apply pressure on the front of the module to engage the rear connector in the shelf receptacle. A
locking clip is provided to secure the rectifier into the shelf.
NOTE: Do not force a module into position if it does not seat properly. All modules are keyed to ensure that the
correct module (polarity/voltage) type is used.
To remove a module, insert a ⅛" x 4 flat head screwdriver into the slot located on the bottom left corner of
the front plastic panel. With one hand, turn the screwdriver clockwise approximately 30 degrees to move
the clip from the resting state (locked position). With the other hand, grasp the ledge of the finger opening
on the front panel to pull the module away from the rear connector and out of the shelf. CXRF and CXCM1
removal shown below.
Shelf tab
Module
locking clip at
resting
position
Turn screwdriver
approx. 30 degrees
gently clockwise to
raise locking clip
Insert
1/8 x 4
flat head
screwdriver
under locking
clip