Assembly to the table with c-clamps (see, Figure 4, Computer input select audio – Extron Electronics HSA 822 User Guide User Manual
Page 9
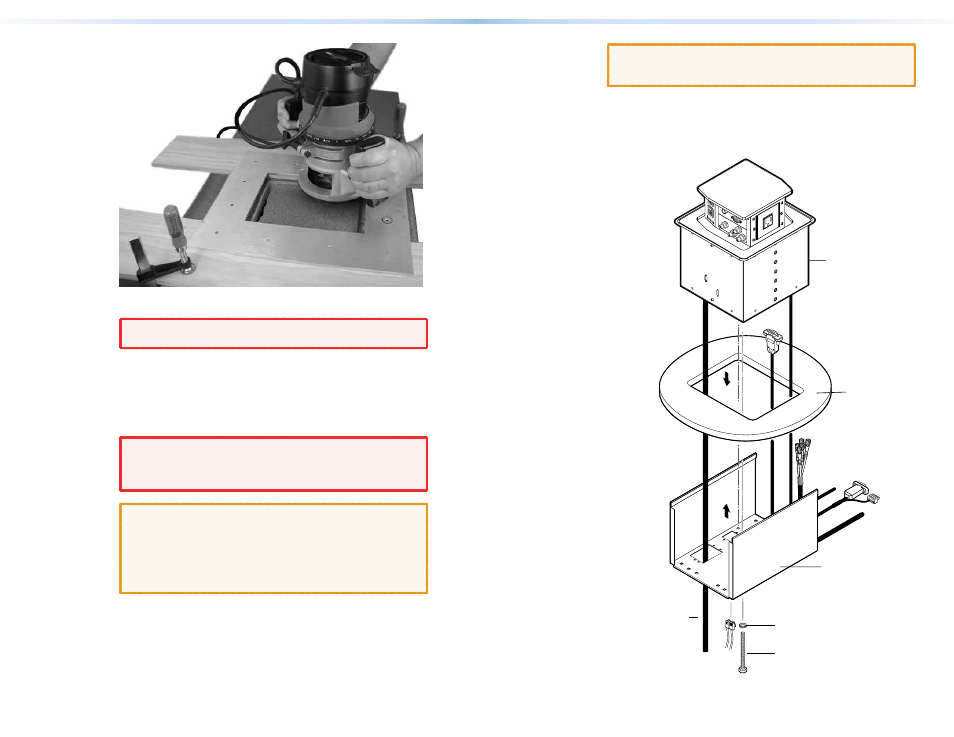
Figure 4.
Cutting the Opening with a Router
WARNING:
Wear safety glasses when operating the router.
Failure to comply can result in eye injury.
4.
Using a router with a 5/8-inch (or 16 mm) outside diameter guide
bushing and a 1/2-inch (or 12 mm or 12.7 mm) diameter straight
router bit, carefully cut the opening in the table surface (see
figure 4).
5.
Remove the C-clamps and the routing template.
WARNING:
The flanged edges of the top of the surface
enclosure are sharp when the HSA is removed
from the table. Exercise caution when handling
to prevent personal injury.
CAUTION:
The flanged edges of the top of the surface
enclosure are bevelled to an ultra-fine thickness
of less than 0.04 (4/100) inch (approximately
1 mm). These edges are soft and can be easily
nicked or bent. Exercise caution when handling
and mounting the enclosure. Mishandling can
damage the appearance of the enclosure.
6.
Carefully lower the HSA enclosure into the hole to test the fit. If
necessary, remove the enclosure and use a file or rasp to enlarge
or smooth the edges of the opening.
7.
Remove the rubber edge protectors that protect the flanged
edges of the top of the surface enclosure. If a sticky residue
remains, remove it with an appropriate metal cleaning product.
CAUTION: Do
not use isopropyl alcohol or other solvents
to clean the HSA. Strong solvents will ruin some
finishes.
8.
From the underside of the table, bolt the clamshell to the
enclosure with two bolts of optimum length (included) (see
figure 5).
9.
Peel any remaining protective coating from the enclosure.
Mounting
Surface
Full Thread
Mounting Bolts
AAP Cables
Flat Washer
Power Cord
RJ-45 Connectors
Clamshell
HSA 822
COMPUTER
INPUT
SELECT
AUDIO
Figure 5.
Mounting the HSA 822 Enclosure
8
HSA 822 Hideaway Enclosure • Installation
9
HSA 822 Hideaway Enclosure • Installation